Introduction
This article will show you how to configure a Cisco SF300-08 smart switch. This switch can be used to allow up to 6 controllers to connect to a single PC or internet source simultaneously without aggregating the controllers' data. Since we don't suggest that you network more that 4 readers (2 Pro controllers or 4 Minis), this is an important asset when working with large timing lines with lots of controllers.
In order for the controllers' data not to be aggregated, the switch has to be configured with specific settings. Please download the configuration file at the end of this article before proceeding with the configuration.
Prepare Your PC
- First, you'll need to configure your PC's LAN/Ethernet adapter settings to communicate with the switch. The switch's default IP is 192.168.1.254, so set your LAN adapter to an IP within this range.
If you're not sure how to change your LAN adapter's IP address, click HERE. - You should also disable your computer's WiFi.
Configure the Switch
- Supply power to the switch and connect it to your computer with an Ethernet cable. The ethernet cable should be in Port 1 on the switch.
- Open a web browser and type 192.168.1.254 into the address bar and press enter. You should see the login page for the switch.
- Enter cisco as the username AND password and log in.
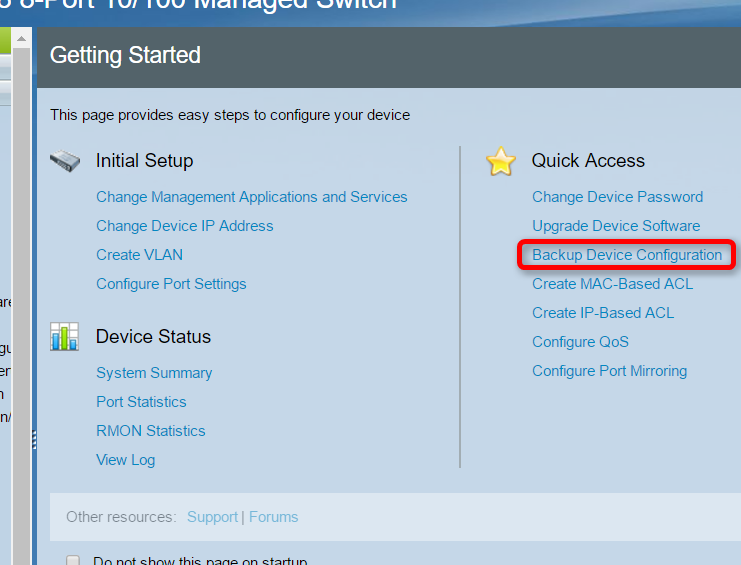
- On the main screen, click the Backup Device Configuration link under the Quick Access section.

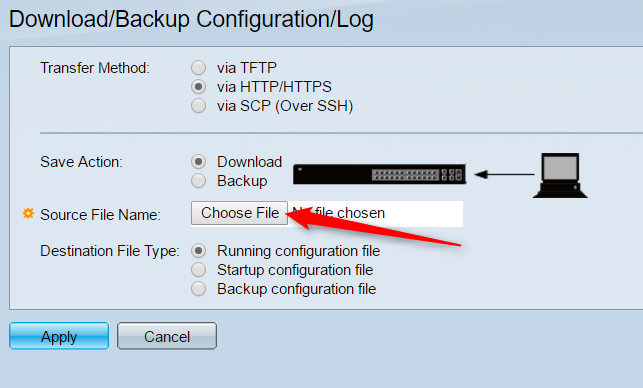
- On the next screen, make sure the Save Action selected is Download, then click Choose file and browse your PC for the configuration file you downloaded from this article.

- Click Apply.
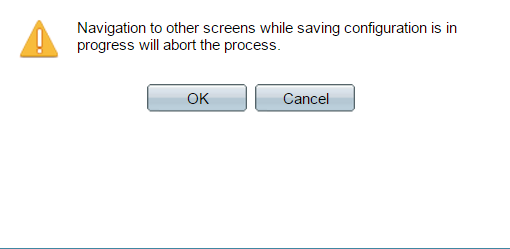
- Acknowledge the warning message by clicking OK.

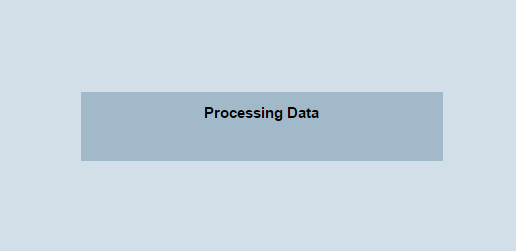
- As the switch is configured, you'll see the following message. Do not close the browser window or navigate away from it. After about 1 minute, the switch should be configured.

To verify that the switch was configured, move the Ethernet cable to Port 2 of the switch and then change your PC's LAN adapter IP to 172.20.23.X where x is a number higher than 2. Now open a web browser and type 172.20.23.2 into the address bar and press Enter. If you see the switch login screen, you know the switch has been configured.
Using the Switch
Using the switch is simple. Any controllers should be connected to ports 3-8. Your PC or hard line internet connection should be inserted into port 1. Port 2 should not be used.
No special configuration is necessary for the controllers to communicate with a PC.
If you're supplying internet to the controllers via a hard line connection via a router, you will need to configure the router with an IP of 172.20.23.1 and then set the Gateway IP on your controllers to that IP.