Introduction
Before you can set the time on your ChronoSync, you must download and install ChronoSync Time Manager from the Timer Portal's Downloads section. This can be found under Software > ChronoSync Time Manager.
Syncing
To sync your ChronoSync:
- Launch ChronoSync Time Manager and insert your ChronoSync into one of your computer's USB ports.
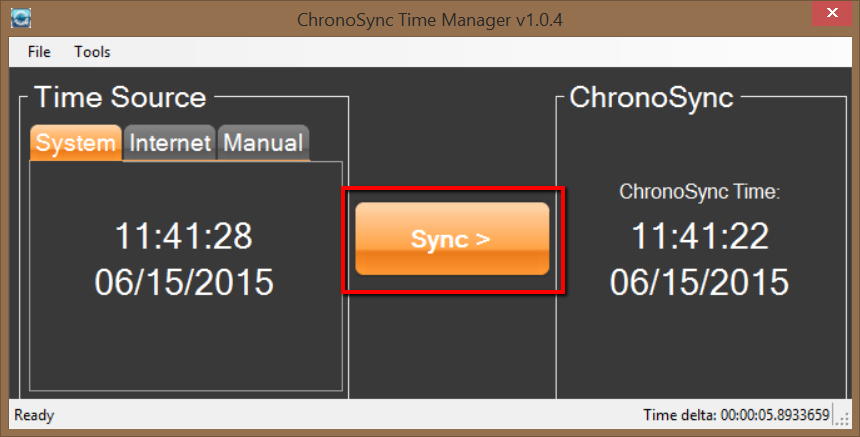
- Click Discover. After a few seconds, the Discover button should turn into a Sync button, and the ChronoSync's time will be displayed on the right side of the window under ChronoSync.
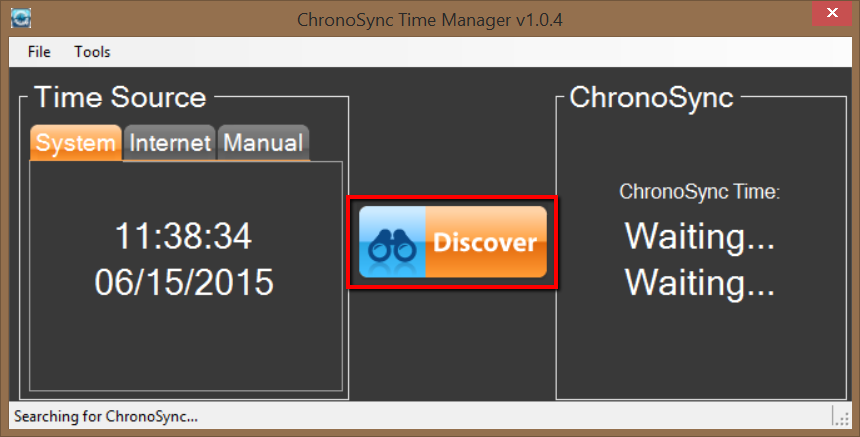
- Select the Time Source. Available sources are System, Internet, and Manual.
- System sets the time on the ChronoSync based on your computer's current time.
- Internet sets the time based on a predetermined website. This must be set under Tools > Options. Time Manager is programmed with pool.ntp.org and time.nist.gov, but you may add another time server by entering the address manually and clicking Save.
- Manual lets you specify a custom date and time. - Once you have selected the Time Source, click the Sync button.
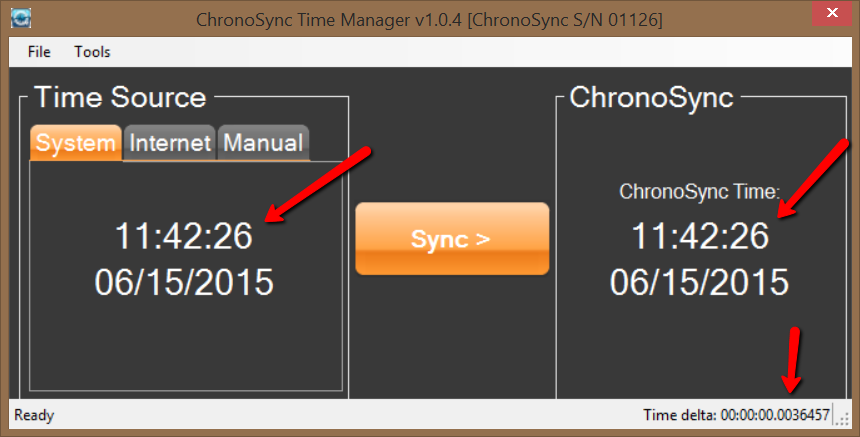
- Verify that the times match. If you selected the Time Delta display option, the current Time Delta will display at the bottom right corner of the window. After a sync, the Time delta is rarely more than a couple hundredths of a second.
Update Firmware
All ChronoSyncs purchased since 2014 should have the latest firmware, but if we release new firmware in the future, or if staff instructs you to re-load the firmware, this section will be useful.
To update a ChronoSync's firmware:
- Download the firmware file from the Downloads section at the bottom of this article.
- Open Time Manager, insert the CS, and make sure it's successfully discovered.
- Click Tools > Update Firmware
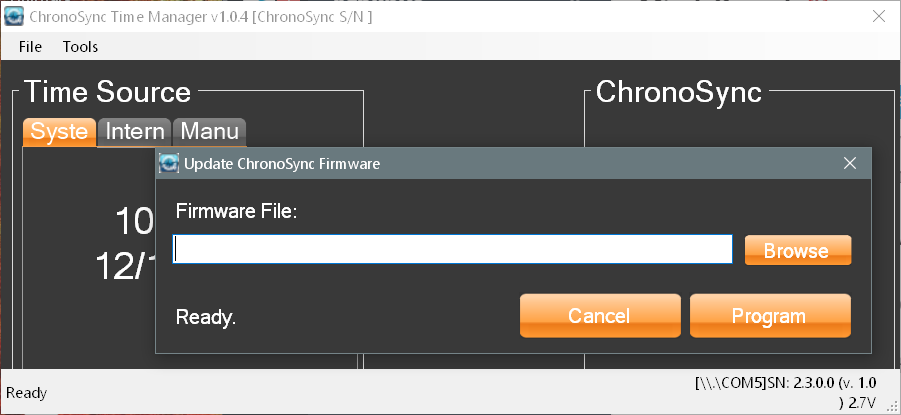
- In the window that appears, click Browse and select the file you downloaded. The window should now say Ready

- Click the Program button. After a few seconds, the status line at the bottom will start to count up through the lines of firmware code.

- When the process is complete, the status line should say Programming Complete. You can now close the update window and use the ChronoSync as normal.

Settings
There are several settings under Tools > Options that you can use the alter the appearance of times in Time Manager.
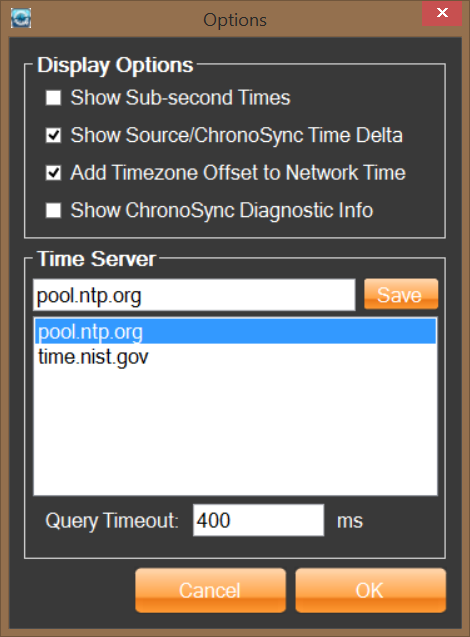
- Show Sub-Second Times displays tenth and hundredth seconds in the Time Source and ChronoSync fields.
- Show Source/ChronoSync Time Delta displays the difference in time between the Source time and ChronoSync time.
- Add Timezone Offset to Network Time adjusts the incoming time from a selected Internet source to accommodate your current Time Zone.
- Show ChronoSync Diagnostic Info shows firmware and other version information in the lower right section of the window. This relocates the Time Delta field to the bottom center of the window.
Troubleshooting
If ChronoSync Time Manager doesn't detect your ChronoSync, there are several troubleshooting steps you can take to figure out if there is a problem.
- Remove the CS and make sure there isn't any dust or dirt inside the USB connector. Re-insert the CS and click Discover.
- Try a different USB port.
- Leaving the CS inserted in the computer, close and re-open Time Manager.
- To make sure the computer is detecting the CS, ensure that the volume is turned on and then plug in the CS. The computer should make a sound to acknowledge that a new device was inserted into the USB port.
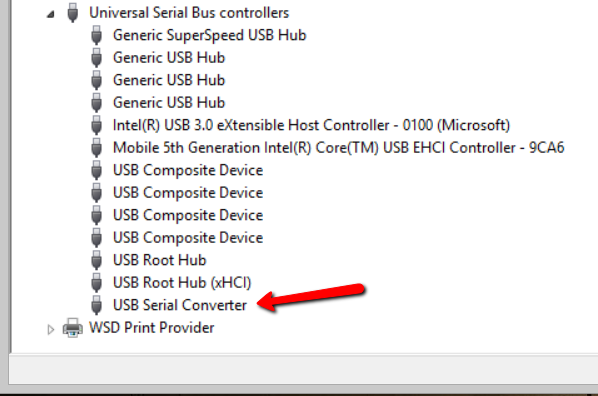
- You can also navigate to Control Panel > Hardware and Sound > Device Manager and scroll down to the Universal Serial Bus Controller section. Look for a listing that says USB Serial Converter. If you do not see this listing when your CS is plugged in, there may be a physical problem with the CS.
