Introduction
ChronoCast is an app available for Apple iPhone and iPad devices that allows you to run a wireless Announcer line from your tablet or phone. If you are using a Pro or Pro2 Series controller, you can use the built-in WiFi modem to connect the Controller to your iDevice. If you're using a MiniTrack controller, you can use a 3rd party mobile router such as a CradlePoint or TP-Link, but we recommend using a Pro/Pro2 for ease of use.
Preparing a Participant File
Before you can use ChronoCast, you have to prepare a Comma, Tab, or Semicolon-delimited file to upload to the cloud. The upload portal at announcer.chronotrack.com will advise you to use a UTF-8 encoded file, but this is no longer correct. You can save your file as a normal CSV, tab-separated TXT, or semicolon-delimited file.
Do not include rows in your Announcer file that do not have a bib assignment. This will cause the athlete database transfer to the ChronoCast App to fail completely.
Column headers MUST follow the proper naming convention. The BIB column should ALWAYS be the first column in the file, and should actually contain the athlete's timing Tag number. All other fields can be presented in any order. The supported fields are:
- BIB
- FIRSTNAME
- LASTNAME
- SEX
- CITY
- STATE
-COUNTRY
- AGE
- VIP*
- ROW_COLOR*
- TEXT_COLOR*
- Custom information*
The VIP field can be used to ensure that designated runners will be displayed and cannot be discarded when the number of runners exceeds the Runners per Second speed. VIP's are also highlighted in a different color in the display. You can enter 1 in the VIP column next to each VIP runner.
The Row and Text Color options allow you to use hex colors for each person in the file to determine the background color and text color.
You can also display any number of custom fields. Any field that isn't built into ChronoCast by default is a custom field. To view custom information for a person, tap their name in the announcer view and a pop-up window will appear.

Here's an example of a well-formatted announcer file:

Loading a Participant File
Before you can begin using ChronoCast for your announcer display, you must load a participant file onto the iPad. Make sure your iPad is powered on and has an active internet connection.
- Navigate to announcer.chronotrack.com from ANY internet-connected device (easiest with a computer)

- Log in using the Login ID found on the Status page of the ChronoCast app

- Now, upload your participant file, selecting the correct Delimiter.

- When you've uploaded the participant file, navigate to the Settings tab in ChronoCast and tap the Load Roster button. After a few seconds, you should see the correct number of "athletes loaded".

Now continue to the Pro Controller configuration below, or Skip to the MiniTrack section.
Connect a Pro/Pro2 Controller to Your Device
- Once you have the participant data loaded onto the iDevice, power on your Pro or Pro2 controller and ensure that its WiFi modem is powered on.
- For Pros, this is under Configure > Power.
- For Pro2s, this is under Settings > Network Adapters > highlight WiFi and tap edit. You should also ensure that the Pro2 is connected to the "ChronoTrack" ad-hoc network.
- Ensure that the controller is in Immediate Mode.
- For Pros this is under Controller > Operations

- For Pro2s, this is under Race Ops > Controller
- Now, on your iDevice, navigate to the Settings > WiFi system menu.

- Ensure that your iDevice's WiFi is enabled, then select the ChronoTrack ad-hoc network. This may appear under the Devices section. If prompted for a password, enter T****S******N (this password is partially hidden for security reasons. If you do not already know this password, please contact ChronoTrack Support)
- Now press the blue button to the right of the ChronoTrack network to enter the WiFi settings menu.

- In the following screen, select Static under IP Address
- Now enter 192.168.0.X (where x is any value between 2 and 49)
- Enter 255.255.255.0 as the Subnet Mask

- Now return to the Status tab of the ChronoCast app and ensure that it is Listening On the IP address you entered.

- On your controller, set the Server IP as the IP address you entered on your iDevice.
- For Pro controllers, this is on the Configure > Network screen.

- For Pro2 controllers, this is on the Race Ops > Server screen. You will likely need to Add a Connection. If you do, make sure the Type is set to WiFi.
- Finally, connect your controller to the iPad.
- For BoxScore 1.26, the Connect button is on the main screen
- For BoxScore 3, press the orange Data Stack icon in the upper right corner of the screen, then press Connect on the next screen.
- For Pro2 controllers, highlight the correct server entry, then tap Connect.
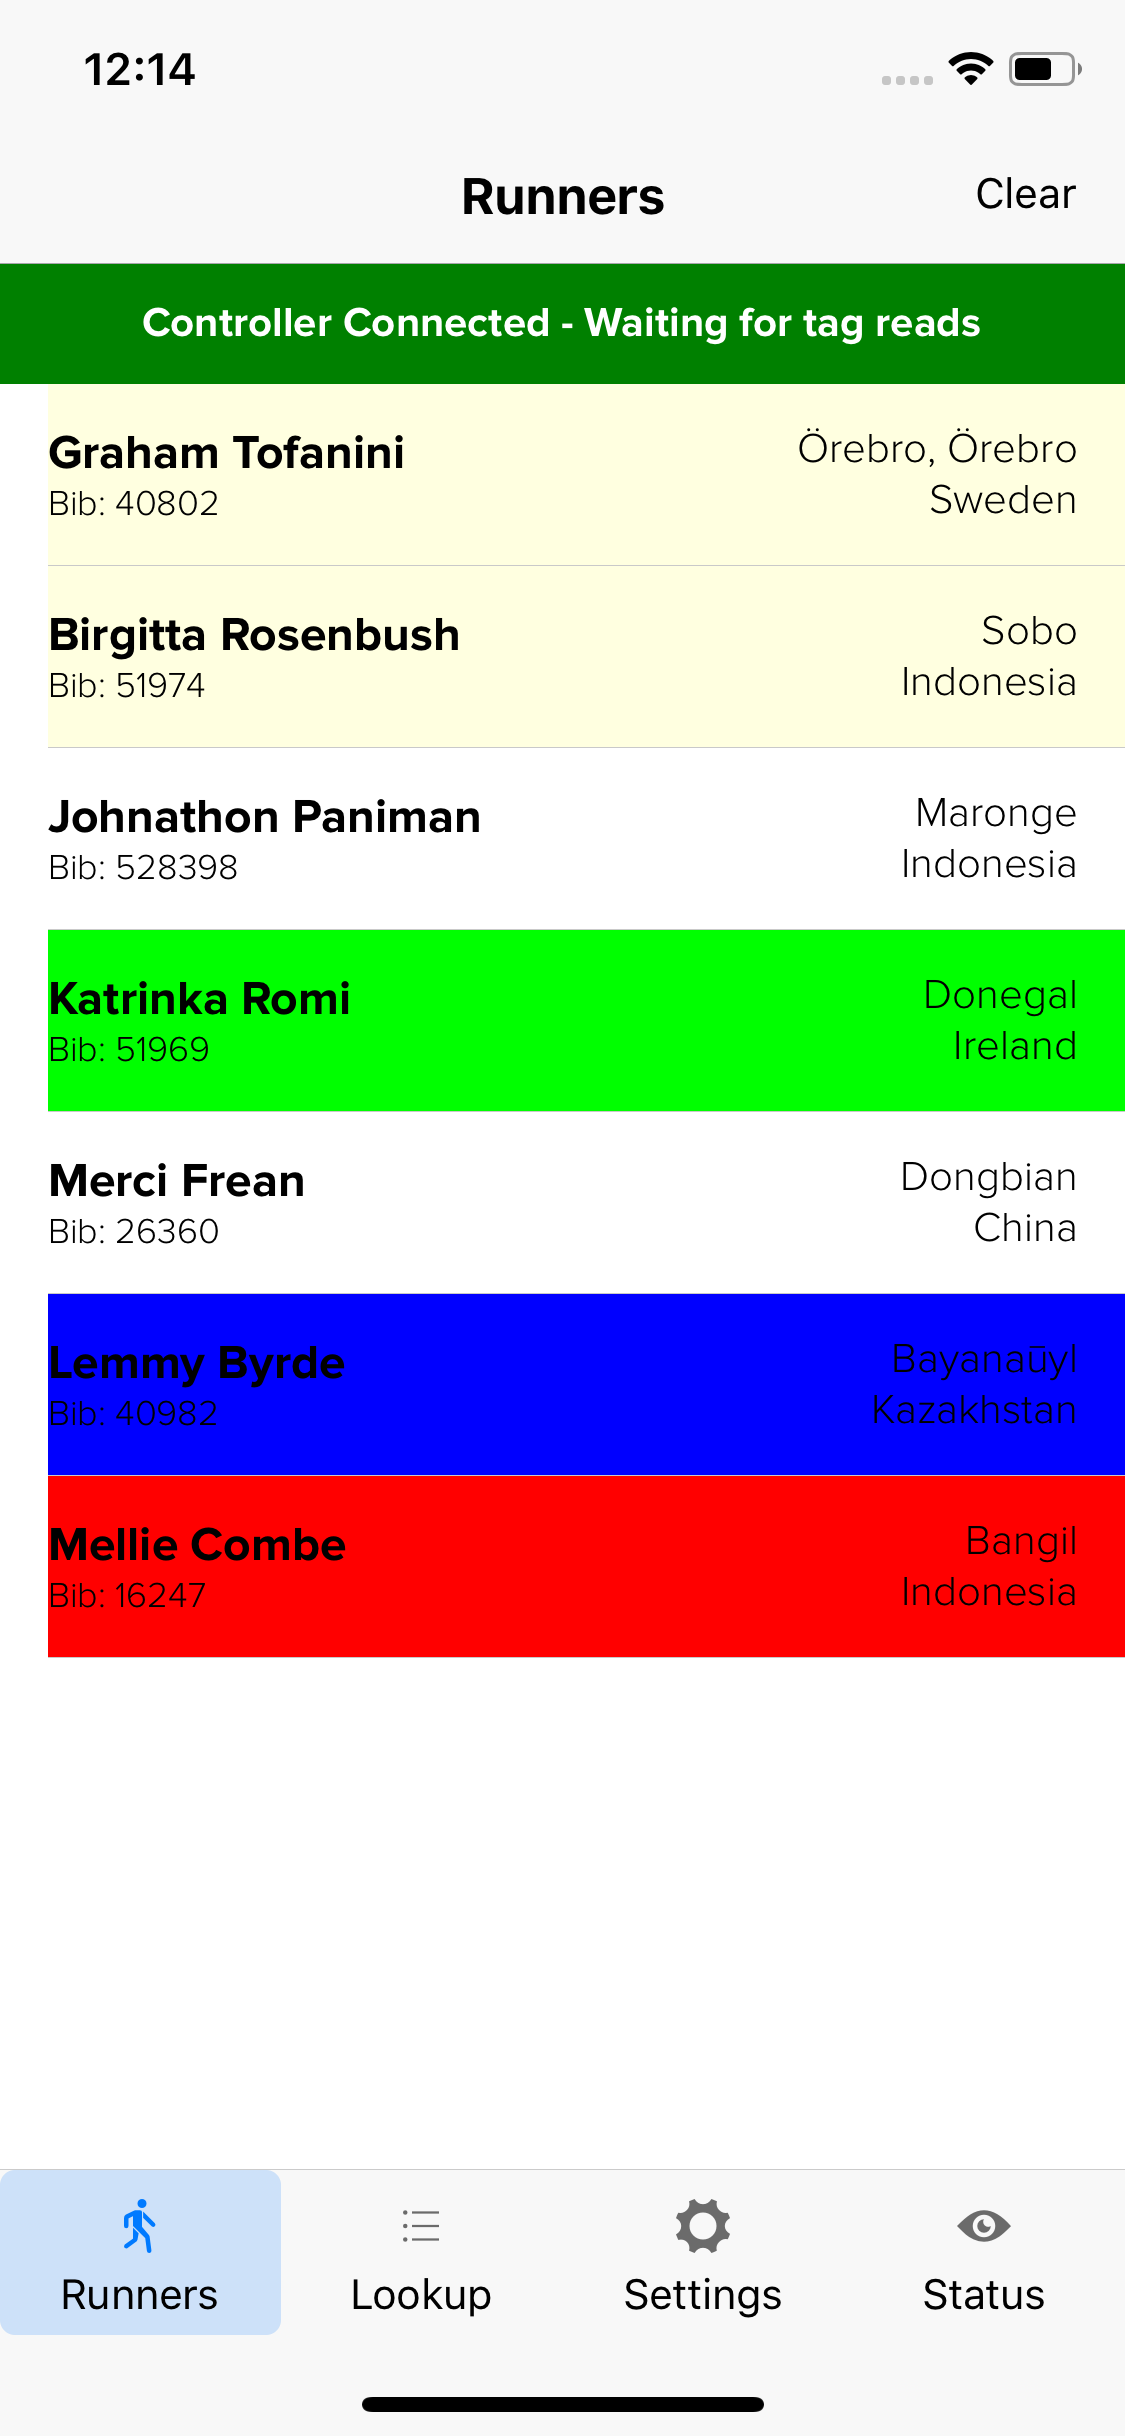
The ChronoCast app should now confirm that a Controller is connected on the Runners tab.
You are now ready to use ChronoCast with your Pro Controller.
If you are having issues connecting after following the above procedure, you may have entered the network key in Step 3 incorrectly. To fix this, return to your device's WiFi settings and press the blue arrow next to the ChronoTrack network. Press the Forget this Network button, then log into the network again, being very careful to enter the password correctly.
Below is a preview of how runners will be displayed within the app:

Ensure that the Mobile Router you intend to use has been configured with the configuration file for that Router model found HERE. When your Router is configured, proceed with the steps below.
- Once you have the participant data loaded onto the iDevice, power on your MiniTrack.
- Once the MiniTrack is powered on, press Menu > 3 > 3 > 2 to toggle Immediate Mode on.
- Connect your router's USB power cable to the MiniTrack to supply power to the router.
- Connect the Router to the MiniTrack with an ethernet cable.
- Now, on your iDevice, navigate to the Settings > WiFi system menu.
- Ensure that your iDevice's WiFi is enabled, then select your router's WiFi network. If there is a password set, enter it as well.
- Now press the blue button to the right of the ChronoTrack network to enter the WiFi settings menu.

- In the following screen, select Static under IP Address
- Now enter 172.20.23.X (where x is any value between 2 and 49)
- Enter 255.255.252.0 as the Subnet Mask

- Now return to the ChronoCast app and ensure that it is Listening On the IP address you entered.
- Press Menu > 2 > 2 and make sure that the Server IP is set the same as the IP you set on the iDevice.
- Now press Menu > 2 > 1 to establish the connection between your MiniTrack and the iDevice. The Connected light on the MiniTrack should turn solid green to indicate a successful connection. The ChronoCast app should also acknowledge that the controller is connected.
You are now ready to use the ChronoCast App with your MiniTrack.
If you are having issues connecting after following the above procedure, you may have entered the network key in Step 3 incorrectly. To fix this, return to your device's WiFi settings and press the blue arrow next to the ChronoTrack network. Press the Forget this Network button, then log into the network again, being very careful to enter the password correctly.
Below is a preview of how runners will be displayed within the app: