Introduction
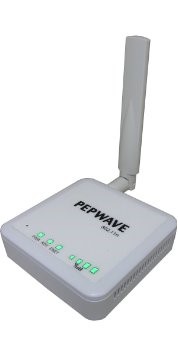
This guide will walk you through the process of configuring your Pepwave On-The-Go SUS-AGN1 router for use as a WiFi Client that will bridge an internet connection from a Host Router to a MiniTrack. This type of setup is useful for Gatorless splits. This configuration is best used with a Pepwave already configured as a Host.

Loading a Configuration File
- Download the configuration file from the Downloads section at the end of this article onto your computer.
- Provide power to the Pepwave and connect it to your PC using an Ethernet cable.
- After the unit has finished its boot-up sequence (~20 seconds), open a web browser and type 192.168.20.1:8000/ss/ into the search bar and press Enter.
- When prompted for a username and password, enter admin and MSurf000 These are case-sensitive.

- You should now be logged into the Pepwave admin panel. Scroll to the very bottom of the page and locate the Click here to upload the configuration file link at the bottom of the page. The Choose File and Upload buttons should appear.

- Select Choose File and select the Config file you downloaded in step 2.
- Click Upload and wait ~30 seconds after which you should see a message that says ‘Status: Uploaded configuration is applied’.
- Now enter 192.168.20.1 into your search bar and press enter.
- Click Settings, then select the Misc. tab.

- Click Switch to Bridge Mode.
- Click OK on the confirmation dialogue.
You are now ready to use your Pepwave Client Router to connect a MiniTrack to the internet.
To test configuration, insert a USB modem into the Host Router and power it on, plug the Client router into a MiniTrack using the USB cable, and then connect the Client router to the controller with the Ethernet cable. Wait for both the routers' and the modem’s boot sequences to complete. This can take a couple minutes, depending on the modem you are using.
Finally, attempt to establish a connection on your MiniTrack, first ensuring that the Server address is set to 50.17.233.218.