Introduction - What's a NanoStation?
This guide will walk you through the process of configuring a NanoStation2 and NanoStation5 as an Access Point (Host) or Station (Client) to enable a Pro Series or MiniTrack Controller to communicate with your computer wirelessly over long distances.
The NanoStation2 has an advertised range of 15km and the Nanostation5 has a range of 10km. With a NanoStation connected to your computer and another connected to your Controller, you can wirelessly connect to and pull data from the controller over these distances or less.
The NanoStation is a 'Line-of-Sight' device, which means that it is effective within the advertised range as long as there are no major obstacles in the way - e.g. trees, buildings, etc. We recommend that you test connectivity at each race location at which you will be using the NanoStations.
The AP Configuration is for the NanoStation that is to be connected to your computer. The Station Configuration is for any NanoStations that will be connected to Controllers. You may connect multiple Stations to a single AP, but some additional configuration is necessary. (See the Increment IPs for Multiple Stations section)
The below process works for either the AP or the Station configuration.
Configure the Computer
You will need to complete this process twice - once for the AP NanoStation and once for the Station one.
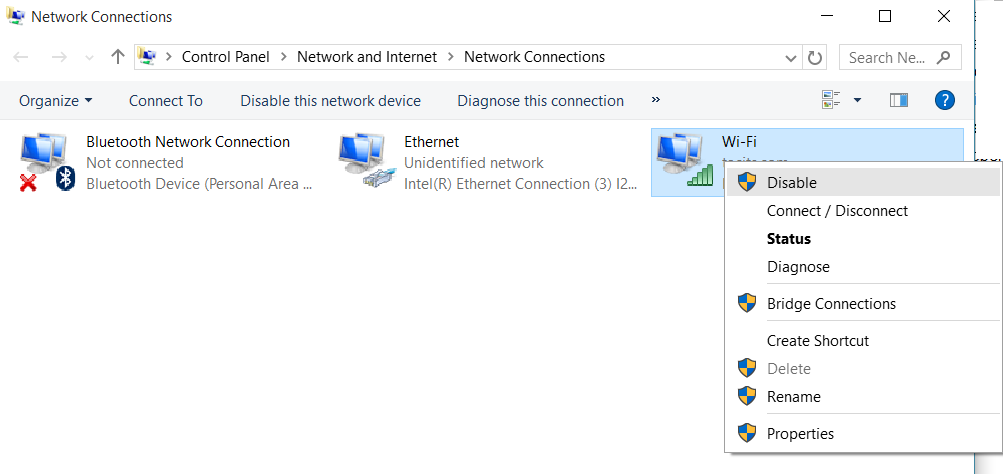
Before you can configure the NanoStation, you must disable your WiFi adapter. To do this:
- Navigate to Control Panel > Network and Internet > Network and Sharing Center and locate your WiFi adapter.
- Right-click on your WiFi adapter and click Disable.

Configure the NanoStation
- Download the correct AP and Station configuration file for your NanoStation model, located in the Downloads section at the end of this article.
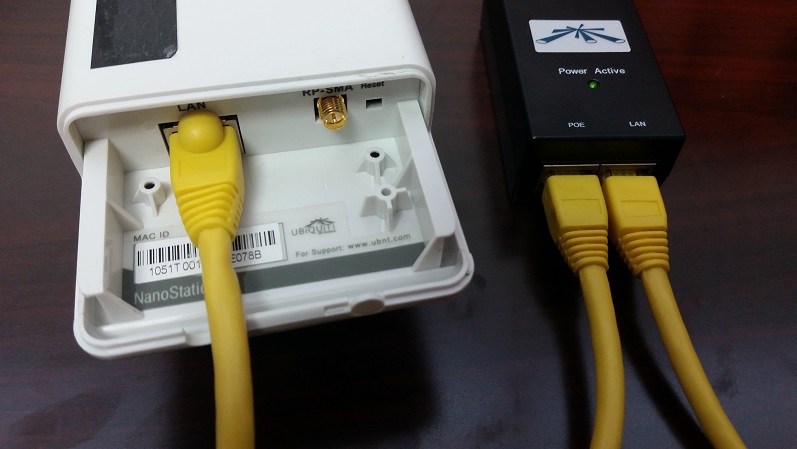
- Now connect the power cable to the POE power brick supplied with your NanoStation and plug it into an AC outlet.
- Connect the power brick's POE outlet to the LAN port on the NanoStation with an Ethernet cable.
- Now connect the LAN port of the power brick to your computer with an Ethernet cable.

- Open a web browser and enter 192.168.1.20 in the address bar.
- When prompted for a Username and Password, enter ubnt for both.
- In the NanoStation admin interface, click the System tab and scroll down to the Configuration Management section.


- Click Choose File next to Backup Configuration, and select the Configuration file you downloaded earlier.
- Click Upload.
- You may see a message like this appear at the top of the screen. Click Apply.

- You will see a status bar appear as shown below.

- Once the status bar is full, the configuration is complete.
Once the AP NanoStation is configured, repeat the above process for the Station.
Increment IPs for Multiple Stations
You will need to reference the Router Password Cheat Sheet found in the Downloads section of the Timer Portal under Networking Accessories. Please download it and have it ready.
If you are using more than one Station at once, you will need to increment the IP address of each subsequent Station to avoid network IP conflicts. You should load the Station configuration file first, then manually configure the IP.
To manually increment an IP:
- Supply power to your NanoStation and connect it to your computer (steps 2-4 in the preceding section), then open a web browser and enter 172.20.23.41 in the address bar and press Enter.
- When prompted for a username and password, enter the login information found on the Router Password Cheat Sheet.
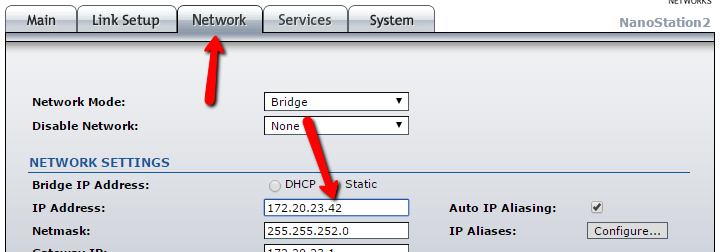
- In the admin interface, click the Network tab.

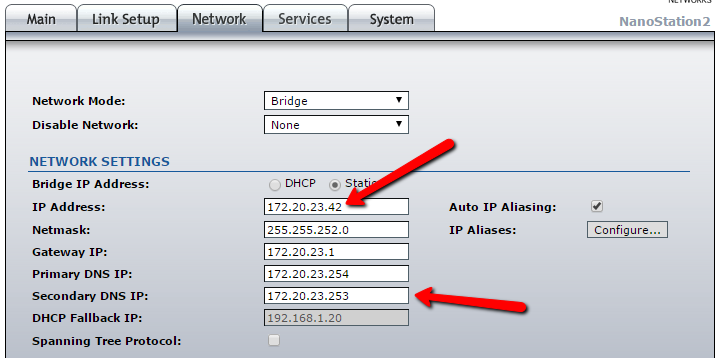
- Locate the IP Address field and increment the last number of the IP by 1 (or the necessary number, depending on the number of Stations you are using).
- Enter 172.20.23.253 in the Secondary DNS IP field.

- Click Change at the bottom of the page.

- You may see a message like the one below. Click Apply.

- You will see a status bar appear as shown below.

- Once the status bar is full, the configuration is complete.