Before You Begin
- Ensure that a standard Ethernet cable has been plugged in to connect your PC to your Controller.
- Turn on both the PC and the Controller.
- Ensure that Classic Data Suite OR Fusion is installed on your computer and it is allowed through the Windows Firewall.
- Turn off/allow an exception for CCS Lite in third-party antivirus software's firewall settings (McAffee, Norton, AVG, etc.)
Configure Your PC
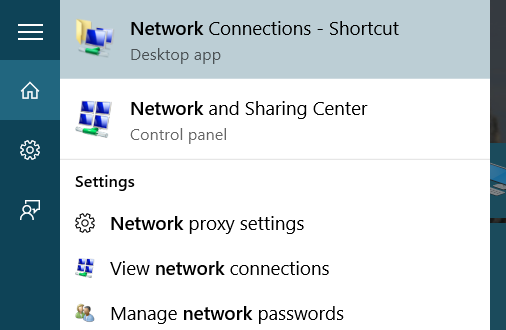
- Open the Start menu and begin typing "Network and Sharing Center". A pane should appear on the side of the screen.
- Click the Network and Sharing Center listing.


- In the window that opens, select Change adapter settings on the left side of the window.

- Locate the correct Ethernet adapter, right click on the entry, and select Properties.

- In the window that appears, select the Internet Protocol Version 4 (TCP/IPv4) entry and click Properties.
- Click the User Configured radio button.
- The information should be as follows:
IP: 172.20.23.x (x = any number between 2 and 49)
Subnet Mask: 255.255.252.0
You may leave all other fields blank.
It is important that you remember this number as it will be used later while configuring the controller. - Click OK.
Continue to Configure the Controller.
- Navigate to Control Panel > Network and Internet > Network and Sharing Center.

- Click Change Adapter Settings on the left-hand side of the window.
- Locate the correct Ethernet adapter. Right click on the entry and select Properties.
- In the window that appears, select the Internet Protocol Version 4 (TCP/IPv4) entry and click Properties

- Click the Alternate Configuration tab and click the User Configured radio button.

- The information should be as follows:
IP: 172.20.23.x (x = any number between 2 and 49)
Subnet Mask: 255.255.252.0
You may leave all other fields blank.
It is important that you remember this number as it will be used later while configuring the controller. - Click OK.
Continue to Configure the Controller.
- Navigate to Control Panel > Network and Internet > Network and Sharing Center.
- Click Change Adapter Settings on the left-hand side of the window.
- Locate the correct Ethernet adapter. Right click on the entry and select Properties.
- In the window that appears, select the Internet Protocol Version 4 (TCP/IPv4) entry and click Properties
- Choose Use the following IP address:
- The information should be as follows:
IP: 172.20.23.x (x = any number between 2 and 49)
Subnet Mask: 255.255.252.0
You may leave all other fields blank.
It is important that you remember this number as it will be used later while configuring the controller. - Click OK to close this window, and again on the Ethernet Properties window to finalize changes.
Configure the Controller (Firmware version 7.7.2.0+)
- From the MiniTrack Controller’s Main Screen press the Menu > 2 > 1 > 2
With the introduction of MiniTrack Firmware 7.7.2.0, you can now set two different server profiles - one on Menu 2 > 1 > 2, and the other on Menu 2 > 2 > 2. This means that you can configure one profile for the CCS server, and one for a local connection. - Enter the IP address you defined on your PC
- Press the Enter Key
- Click the Yes Key to Confirm the change.
- You should now be back at the 2 > 1 > 2: Server submenu
- Open CCSLite or Fusion on your computer.
- Press Menu > 2 > 1 > 1 to connect.
The Connection light should flash, indicating it is attempting to connect and then turn solid, indicating it has successfully connected. - In CCSLite or Fusion, confirm that the controller appears.
Now, you can stream data to your CT Live Event using Fusion, or SimpleClient