Introduction
Because ChronoTrack equipment and software use time of day for tag reads you must first sync the time on the controller as accurately as possible in order to collect accurate reads with your MiniTrack Controller.
To avoid disparity between individual controllers, we recommend you "daisy-chain" controllers together with ethernet cables before syncing times. When you sync the time on one controller, the time sync will be passed to all networked controllers. This not only speeds up the process of syncing, but ensures that all controllers are on exactly the same time.

When controllers are powered off, their internal time is kept by what is called a CMOS battery. The CMOS battery is not powerful, and controllers may experience 'drift' when powered off. Because of this, we recommend that Controllers be synced on race day immediately prior to being distributed to their respective points on the course without turning them off.
There are several ways to sync the time on your MiniTrack. These are listed below from most to least accurate.
NTP stands for Network Time Protocol, and is (generally-speaking) what most laptops draw their time from. Because the clock on a laptop connected to the internet is very accurate, syncing your Controller from your computer is the best way to ensure the time is set correctly. This can be done from the Fusion software or CCS Lite.
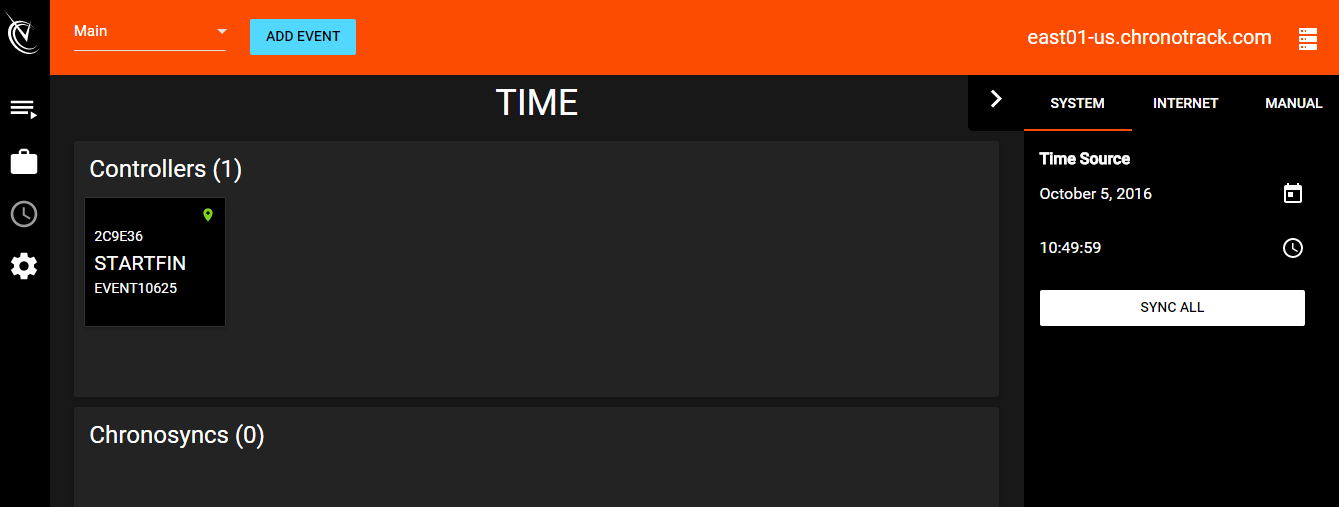
To Sync Your Controller from your Computer with Fusion:
- Power on your Pro and your computer.
- Connect the controller to the computer with an ethernet cable.
- On the computer, open the Fusion application.
- Establish a connection between your controller and your laptop.
- In Fusion, click the clock icon on the left side of the screen.
- Decide whether to use System, Internet, or Manual time and then click Sync All.

To Sync Your MiniTrack from your Computer:
- Power on your MiniTrack and your computer.
- Connect the controller to the computer with an ethernet cable.
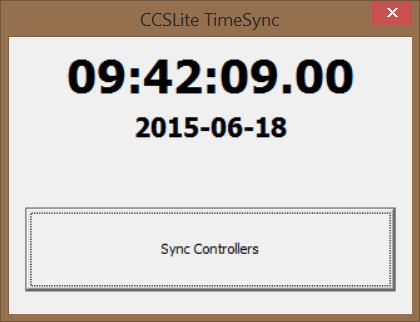
- On the computer, open the CCS Lite application. (No special configuration is necessary to sync times)
- Click Manage Controllers > Time Sync. You will see a running clock that shows your computer's current system time.

- Click Sync Controllers and click Yes on the confirmation dialogue.
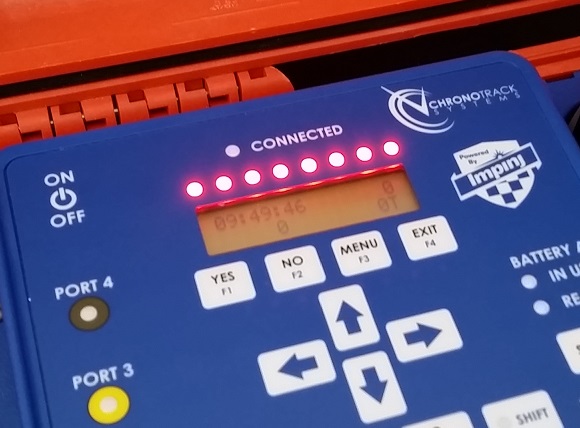
- You should see the red LEDs above the display on the controller light for 30 seconds. This indicates a successful sync.

ChronoTrack has created a device with an ultra-accurate internal clock that is accurate to a tenth of a second for 3 days after syncing.
Please note that a ChronoSync is only compatible with BoxScore 3 and MiniTracks running firmware version 5.3.8 or higher.
To Sync Your MiniTrack with ChronoSync
- Ensure that your ChronoSync has been synced through ChronoSync Time Manager.
- Insert the ChronoSync into one of the controller's USB ports. You should hear a beep to acknowledge the presence of the ChronoSync. Wait several seconds after the beep to ensure the controller has fully powered the ChronoSync.
- For all current MiniTrack firmware versions, press Menu > 4 > 3 > 1 to set the Controller's time from the ChronoSync. You may also press Menu > 4 > 3 > 2 to set the ChronoSync's time based on the Controller's time.
- The red LED lights above the display will light and the screen will display 'Time Pulled form ChronoSync' to confirm a successful time sync.
This process requires MiniTrack firmware 7.7.1.1 or higher.
If your Mini is connected to the Internet via a mobile router, you can sync the controller from an NTP server.
To Sync from NTP:
- Go to Menu > 4 > 4 > 2 to set the UTC Time Zone using the up or down arrow keys. (If the controller was in the Central Standard Time Zone, the UTC time zone would be -6:00)
If you reboot the Mini, the Time Zone offset will revert to 00:00 - Once you've set the Time Zone, press Enter, then confirm with Yes
- Now press 1 to access the Use menu. Use the down arrow to select Internet and press Enter, then Yes to confirm.
Press Menu to return to the home screen and observe that the letter "n" is flashing next to the current time. After a short while, the controller will beep, the LEDs above the display will light, and the "n" on the screen will appear consistently. Your controller's time is now synced.
This method requires your MiniTrack to have Reader Firmware version 7.6.0.68 or higher and that you purchase This GPS Antenna.
Syncing your controller from GPS is very accurate, but not always available due to environmental interference from weather or buildings.
To Sync via GPS
- Plug your GPS Antenna into one of your MiniTrack's four USB ports
- Press Menu > 4 > 6 > 1 and use the arrow keys to set your current Time Zone. The time zone is based on Greenwich Mean Time (GMT). If you're on Central US time, you would set the Time Zone to +05:00
- The controller display will show a "g" next to the time on the main screen. The "g" will flash at different speeds to indicate status:
- Slow flashing = no satellites detected
- Fast flashing = acquiring satellite Lock
- Solid = Lock acquired, time synced

- Once the "g" on the main display is solid, your controller will automatically set its time from the satellites. Please note that it may take up to 13 minutes to acquire a lock and sync the time.
In the absence of a laptop, ChronoSync, or GPS Antenna from which to sync, you can perform a manual time sync on the controller.
To Perform a Manual Time Sync
- Press Menu > 4 > 1
- Enter the date in YYYY/MM/DD format, then press Enter. Slashes will be automatically added.
- Enter the correct time in 24 hour format (military time).
- Press Enter and then Yes to confirm the sync.
- You should see the red LEDs above the display on the controller light for 30 seconds. This indicates a successful sync.