Before You Get Started...
To connect your Pro2 controller to the ChronoTrack server, you'll need to add a cellular profile for the carrier you intend to use. Before you can do this, you must install a SIM card that has been activated for a data only plan from a GSM carrier.
GSM carriers in the USA include AT&T and T-Mobile. Wherever you live in the world, you can just Google "*your country* GSM carriers" to find out which carriers use GSM. Also make sure you know you know the correct data APN for the carrier and any necessary login information before you complete this process.
If you visit your local cellular provider's store and tell a representative that you need a data only plan, they should be able to get you what you need. A 4GB/month plan should be plenty for streaming controller data, even for heavy use on multiple units. SIM cards must be full size, not Mini, Micro, or Nano size unless a full size adapter is used.
During the course of unit testing, ChronoTrack staff will add a cellular profile for AT&T, so if you'll be using AT&T, you can skip steps 3-5 in the "Add a Profile" section below.
Install the SIM
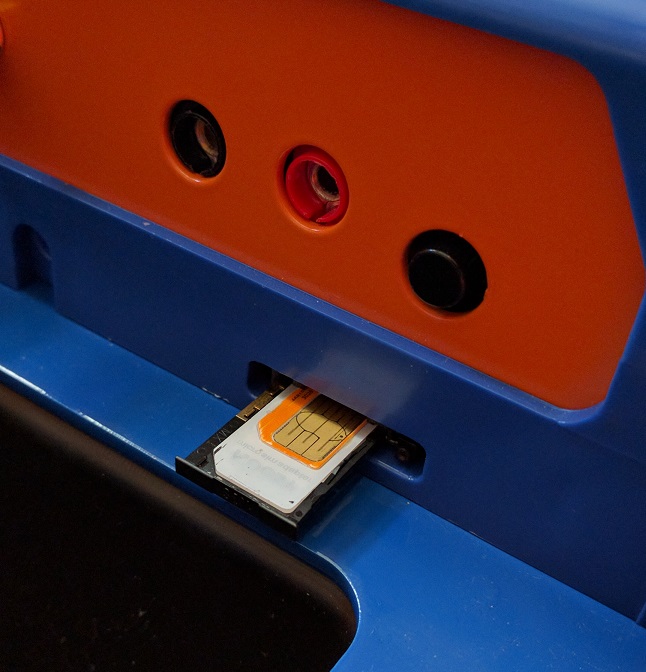
The SIM card slot is located on the left side of the head unit directly below the Gun Start button. You will need a pen or pencil to push the small button to the right of the SIM tray in order to eject the tray. The SIM should be inserted into the tray with the metal contact facing upward. Once the SIM is in the tray, push the tray back in until it won't go further.

Add a Profile
- Now that the SIM is installed, in ChronOS, tap Settings, then tap Network Adapters.

- Tap the Cellular entry to highlight it, then click Edit.

- On the next screen, tap the toggle to turn the Cellular modem on, if it isn't already on. Once it powers up, press the + icon in the small pane on the left side of the screen to add a new Profile.

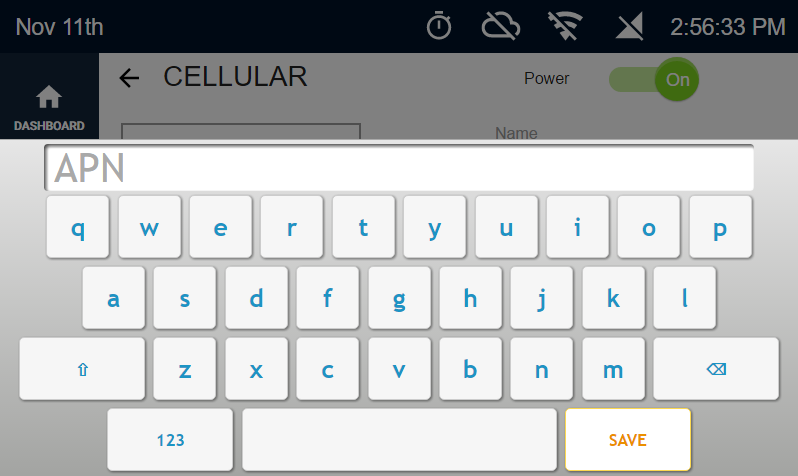
- In the text fields that appear to the right, supply the Name and APN for the carrier you're using. Tap the text field to bring up the on-screen keyboard. You can also supply a username and password if your carrier requires it.


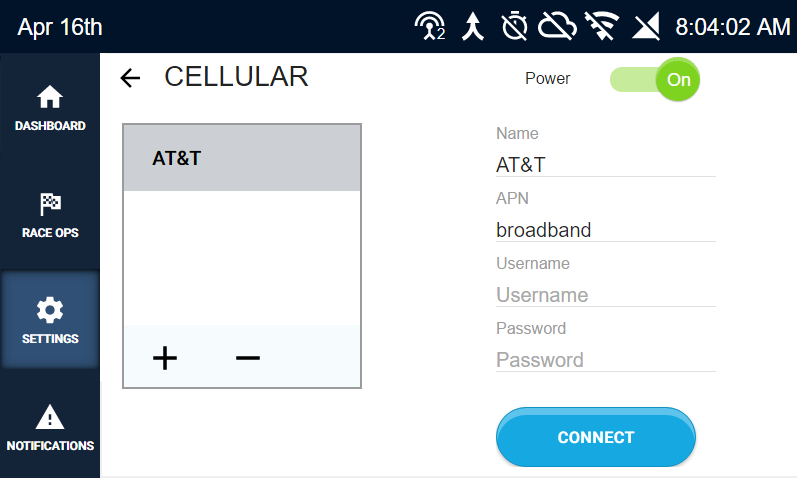
- Once you're done entering the information, the profile may automatically be added to the panel on the right. If not, click Create. Your screen should now look similar to the one below.

- Now, test the connection by pressing the Connect button. Make sure the profile is highlighted. The button will say "Connecting..." until it establishes a connection.

- Once the connection is established, the button will say Disconnect, a green circle will appear next to the profile, and the network strength and mode will appear on the status bar at the top of the screen.

What's Next?