Introduction
This guide will show you the simple steps to connect your Pro2 to the ChronoTrack Server via the built-in cellular modem. This guide assumes you've already installed a SIM card and set up a cellular profile. If you haven't done these things yet, click the link below to find out how.
Setting Up a Cellular Profile on a Pro2
Power the Modem and Connect the Network
If you did not power the cellular modem off prior to shutting down the controller the last time, the cellular connection should have automatically established. Verify this by checking if the signal strength and network mode appear on the status bar at the top of the screen. If this is the case, skip to step 5.

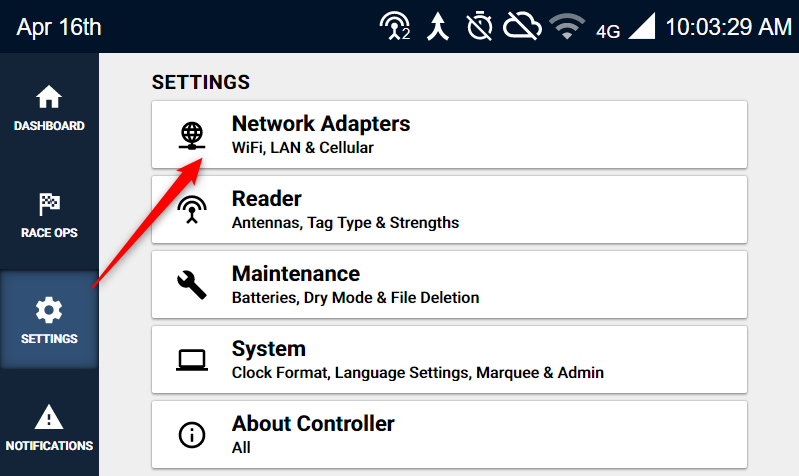
- From any screen of ChronOS, tap the Settings button, then tap Network Adapters.
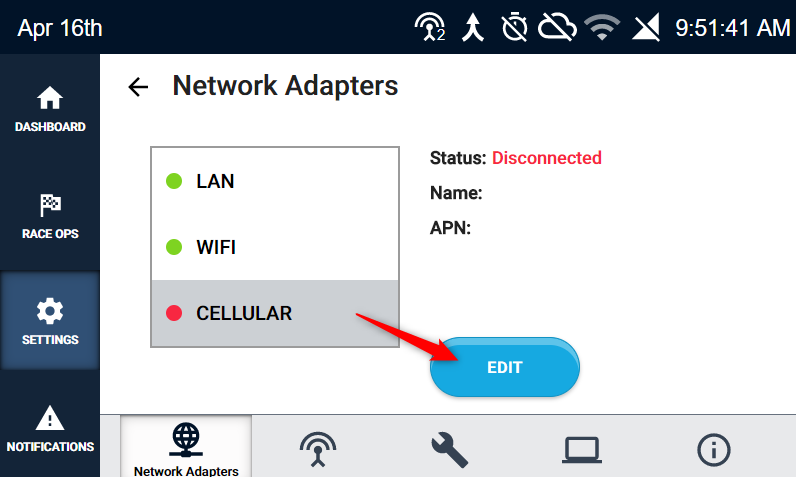
- On the Adapters screen, tap the Cellular entry to highlight it, then tap Edit.
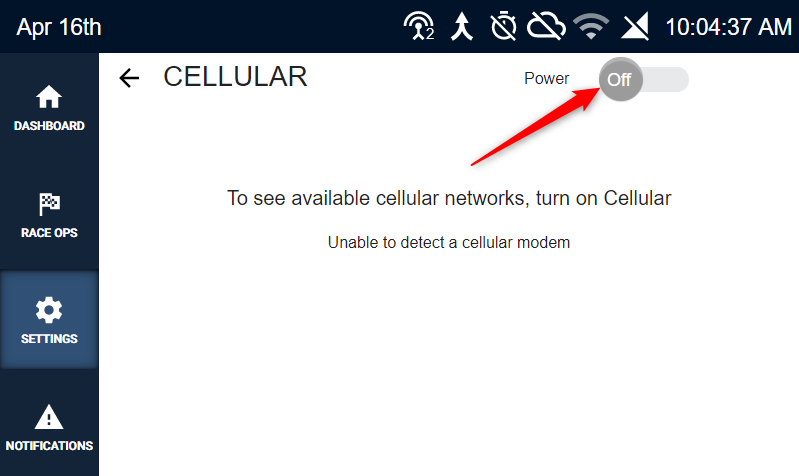
- In the next screen, tap the Power toggle to turn the cellular modem on.
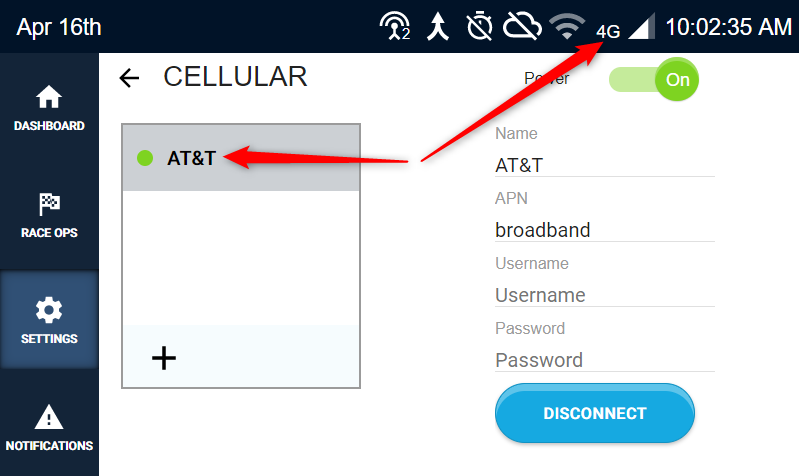
- After the modem powers up, tap the Profile you'd like to use to highlight it, then press Connect. After 10-20 seconds, the modem should connect to the network, a green circle will appear next to the Profile, and the signal strength and network mode will appear on the status bar at the top of the screen.
- Now, press the Race Ops button and select Server Connection.
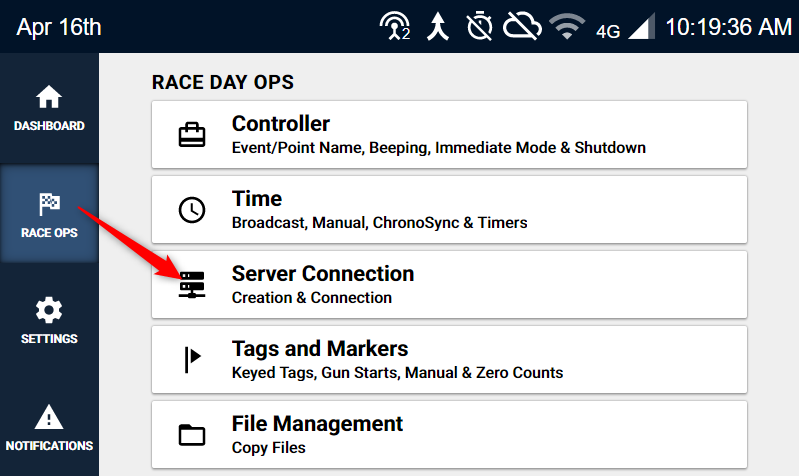
- On the Server Connection screen, tap the connection entry for the ChronoTrack server and tap Connect. If you don't have an entry for the primary CT Server yet, click HERE to find out how to add one.
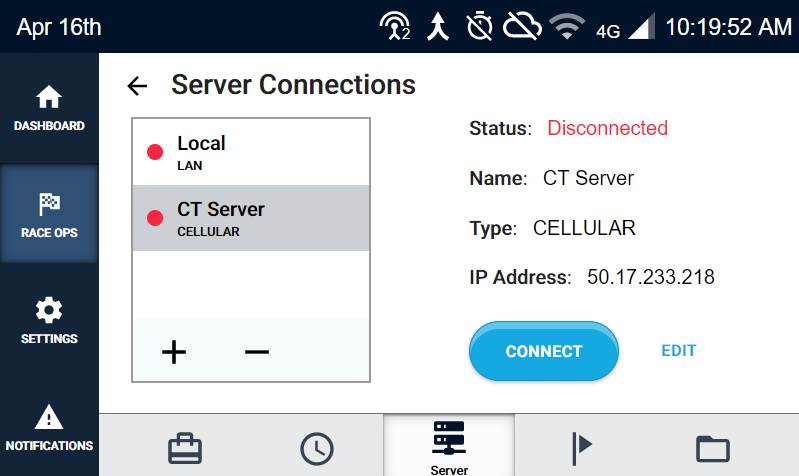
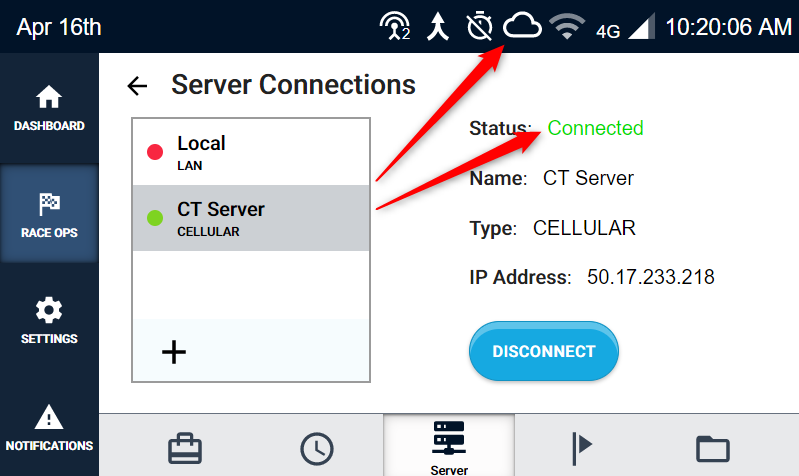
- After a second or two, the connection should be established. The Status field will say "Connected" and the cloud icon in the status bar at the top of the screen will no longer have a slash through it. You should also see the green "Connected" LED on the keypad is lit.
Any collected data will now be streamed to the ChronoTrack server and can be pulled down and streamed through Fusion, StreamManager, or SimpleClient.