Introduction
This process should only be done for Pro2s needing repair AND only after speaking to a ChronoTrack Support technician. Never attempt repairs on any of the Head Unit's components yourself. Repairs performed without the express permission of ChronoTrack staff will void your controller's warranty.
This guide will walk you through removing the Head Unit from your Pro2 controller in order to ship it to ChronoTrack for repair. Simply reverse this process to re-install the Head Unit after it's been repaired.
When you re-install a head unit, make sure you go to the Settings > System > Admin > Readers > Reader Config menu and run the Reader Config process.
You will need:
- A small philips screwdriver
- A small flat head screwdriver
Please remove all batteries from the controller and disconnect all external cables and antennas before attempting this process.
Removing the Head Unit
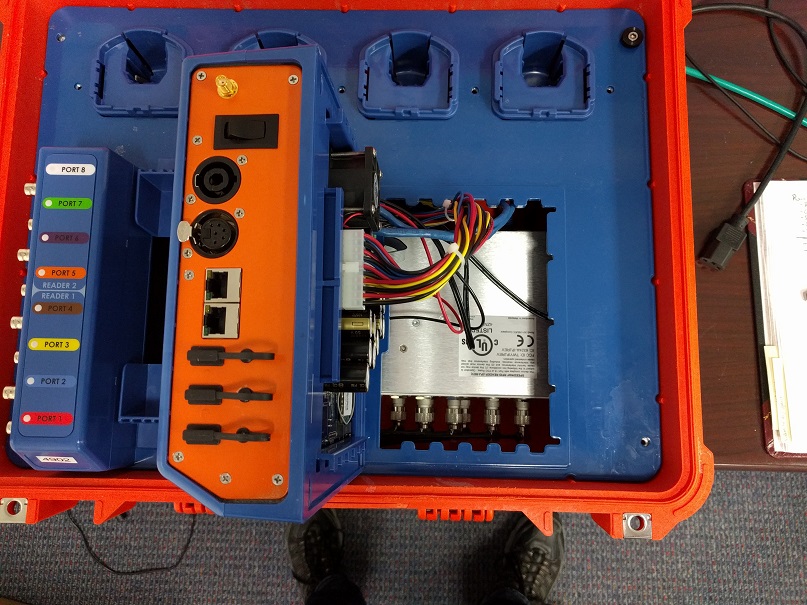
- Use a small Philips head screwdriver to remove the retention screw located on the left side of the Head Unit.

- Push the Head Unit to the left as you're facing the controller - this may require some force. The head unit should shift noticeably.

- Slowly and gently lift up about 3-4 inches on the Head Unit's right side and make sure that the internal cables are clear of the blue plate's fastening grooves.

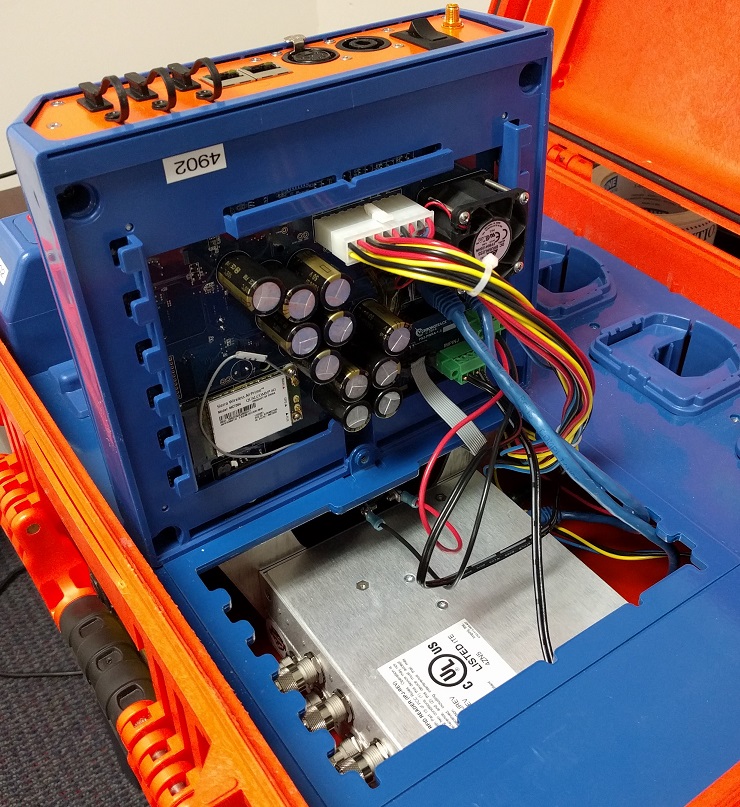
- Lift the Head Unit so that it is "standing" on its left side. It should rest upright on its own.

- All cables leading to the Head Unit will now be exposed. These will need to be removed in order to completely remove the Head Unit.

- Locate the gray ribbon cable and press outward away from the cable on one of the black tabs. The cable should come loose from the connector, and may fall away on its own. If the cable doesn't come away extremely easily, make sure the black tabs are both pushed far enough away from the connector.


- Now remove the two Ethernet cables from their ports. Each cable has a retention clip that will need to be pinched toward the connector before the cables can be removed.

- Now, locate the two green connectors and use a small flat head screwdriver to loosen the retention screws. Once the screws are loosened, pull the green connectors gently away from the board. Not much effort should be needed. If the connectors do not come out easily, make sure the screws are fully-loosened. Do NOT pull on the cables, but pull on the green connector.

- Finally, locate the large white connector with the multi-colored cables. Hold down on the plastic retention clip and pull the connector away from the board. This will require a little effort, and you may find it useful to rock the connector to help pull it away.

- The Head Unit should now be fully free of the rest of the controller. Package it well with bubble wrap or other padding for shipping for repair.
