Introduction
Custom Questions are now divided into two types of question: Product and Survey.
This guide will walk you through the possible applications of Survey type questions and how to set up each type.
Remember to keep similar questions sorted into specific Slides.
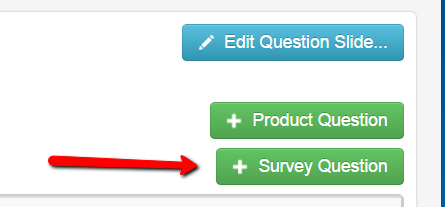
Survey Properties
- Once you have selected the + Survey Question button on the Registration > Custom Questions tab, you must enter the Question Text that the Athletes will see as they register. The question text is limited to 250 characters.
Example: Would you like to participate as a Clydesdale or Athena?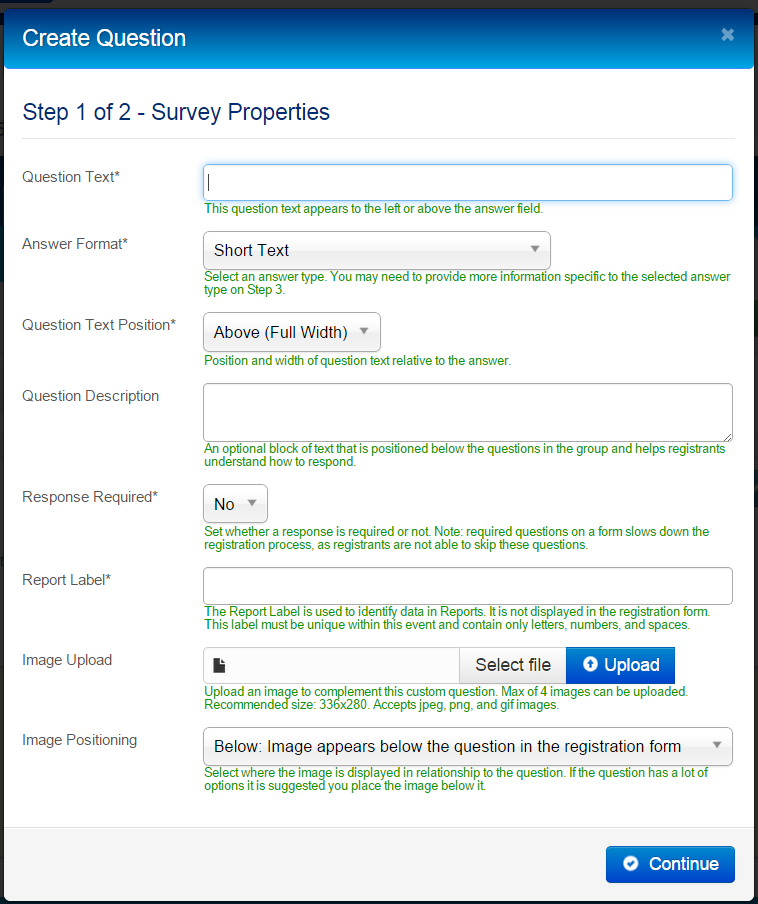
- Next, select the Answer Format you would like to use for your Question.
Note: Only Questions with pre-defined answers may be used to Map Athletes to Custom Brackets or Waves. Question types that may be used include Single Checkbox, Select Menu, Yes/No, and Radio Group.
The Answer Formats and their functions are listed below:
- Short Text – a short answer of 50 characters or less.
- Long Text – a long answer between 51 and 10000 characters. You may specify a custom length on the next page of the New Question window.
- Number – a numeric value between a minimum and maximum you may specify on the next page of the New Question window.
- Decimal – usually used for monetary answers. You may specify Min and Max Values and Precision (how many decimal places are allowed in the answer) on the next page of the New Question window.
- Date – the registrant will answer the question with a date. You may specify the Date Format and Min and Max Values on the next page of the New Question window.
- Time – the registrant will answer the question with a time of day in a 12-hour, AM/PM format. You may specify whether or not to allow the athletes to enter milliseconds on the next page of the New Question window.
- Duration – the registrant will specify a time frame in the answer. You may choose whether to allow milliseconds and the Min and Max Value for the question on the next page of the New Question window.
- Single Check Box – the registrant will be given the option to check a box or leave it blank (unless you have specified that an answer is required). You will specify the Checked Value for the answer on the next page of the New Question window.
- Select Menu – the registrant will be presented with a menu of items from which they may only select one. You may enter an additional menu prompt, and you must provide Labels and with a corresponding numerical Value for each.
- Yes/No – The athlete is presented with a simple Yes or No radio button choice. You may choose the layout of the Yes/No Buttons. You must also provide a Yes Label and a No Label to be applied to the Yes/No values on the next page of the New Question window.
- Radio Group – the registrant is presented with a series of choices from which they may only select one. You may choose the layout of the Radio Buttons, and you must provide Labels and with a corresponding numerical Value for each.
- Checkbox Group – the registrant is presented with a series of choices from which they may select more than one. You may choose the layout of the Checkboxes, and you must provide Labels and with a corresponding numerical Value for each.
- Email Address – the registrant will enter their email address.
- Phone Number – the registrant will enter their phone number.
- Hidden Value – the registrant will not see a choice, but by continuing through this question will trigger a value.
- Next, select the Question Text Position that determines where the question text will appear in relation to the answers.
- You may enter a Question Description to provide more information about the question. There is a 1000 character limit.
- You may choose to Require a Response to the question. Do not turn this option on unless you are requiring an opt-in or unless you are providing a No/None/Neither option to select from.
- Next, define a Report Label. The Report Label is used to identify data in Reports. It is not displayed in the registration form. This label must be unique within this event and contain only letters, numbers, and spaces.
- If you are uploading an image to display with the Question (such as a T-Shirt image), you can click Select File, locate and select the file on your computer, then click Upload to finalize the image.
- If you uploaded an Image, select the Image Positioning in relationship to the question and answer text.
- Finally, click Save & Next
Survey Details
The Survey Details section will look different depending on the Answer Format you selected. Email Address and Phone Number do not require additional configuration.
The various Answer Formats' Survey Details pages are shown below along with any necessary actions.
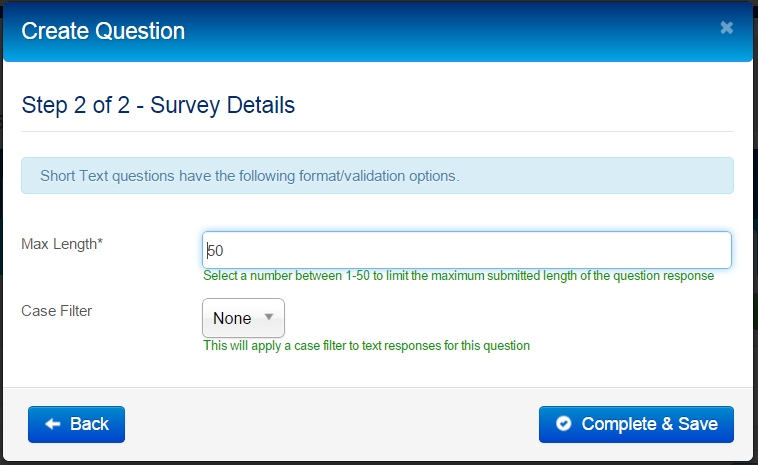
- Set the maximum number of Characters that may be used in the answer.
- You can set a Case Filter. Choose between Title Case, UPPER CASE, or lowercase.
- Click Complete & Save
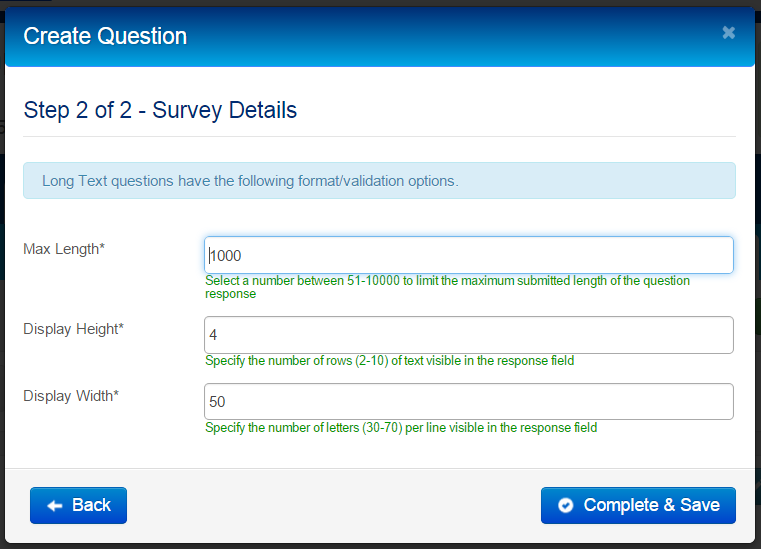
- Define the maximum number of characters that may be used in the answer.
- Define the response's Display Height in number of rows of visible text.
- Define the response's Display Width in number of visible letters
- Click Complete & Save
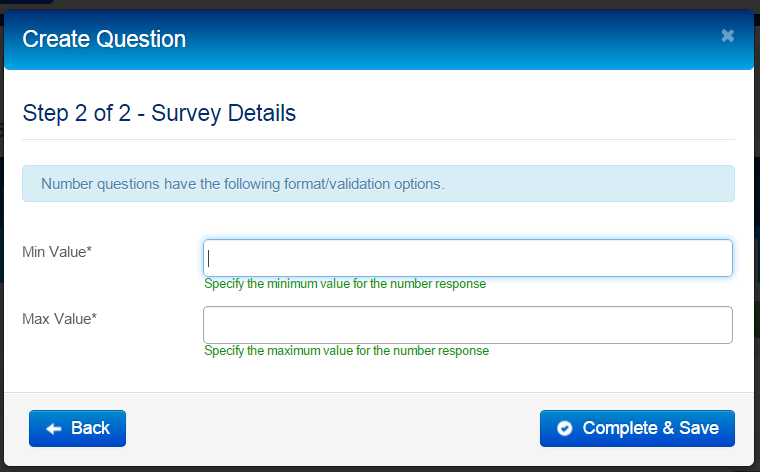
- Define the Min Value and Max Value that maybe entered as a response.
- Click Complete & Save
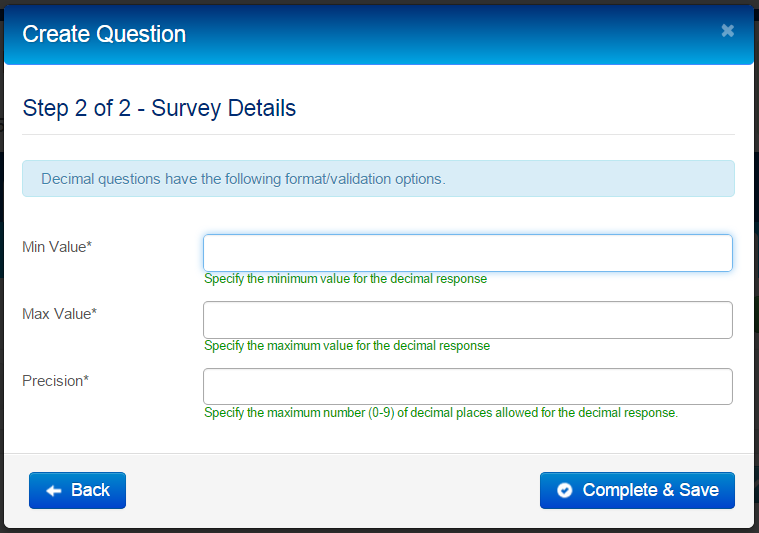
- Define the Min Value and Max Value that may be entered as a response.
- Determine the Precision of the answer - e.g. the number of decimal places allowed. Enter 0 to only allow whole numbers or up to 9 to allow decimal places.
- Click Complete & Save
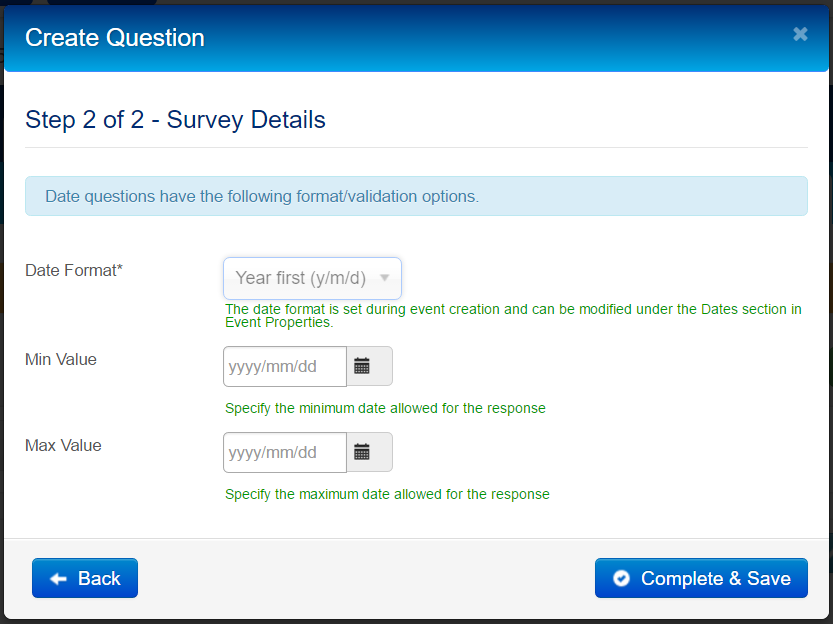
- the Date Format will always be grayed our in the Custom Question since it follows the format of the Event. If you want to change the Date Format, close the Custom Question form and go to Overview > Event Properties > Dates and select it there.
If you change the Event's Date Format after creating a Date type custom question, you will need to separately change the date format of the Custom Question you made. - Use the text field to manually enter the Min Value and Max Value that will be allowed for a response or use the calendar button to the right of the text field to 'browse' for the dates.
- Click Complete & Save

- Determine whether or not to Use Milliseconds.
- Click Complete & Save
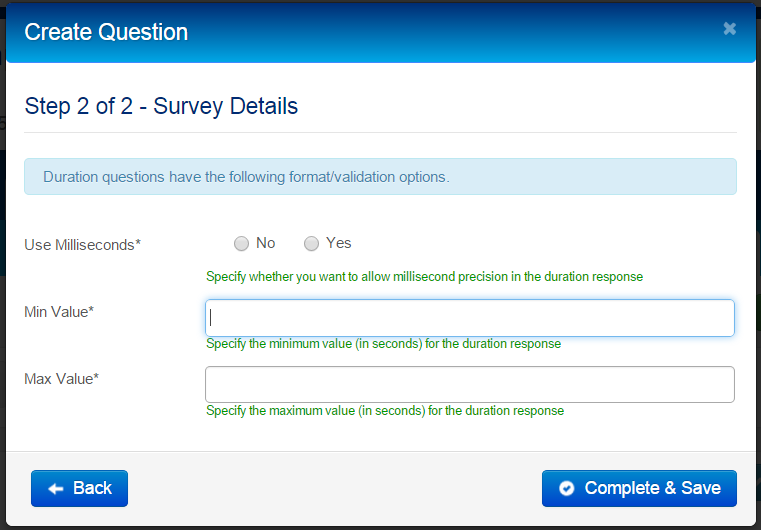
- Determine whether or not to Use Milliseconds.
- Specify a Min Value and Max Value that may be entered for a response.
- Click Complete & Save
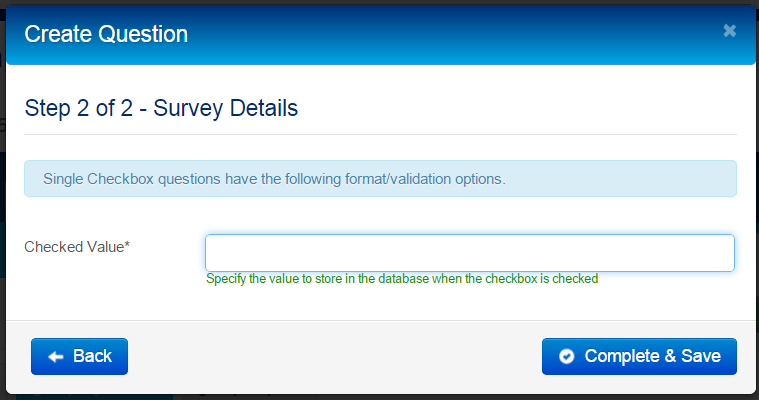
- Specify the value to be stored in the database for use in reports and Custom mapping when the checkbox is checked.
- Click Complete & Save
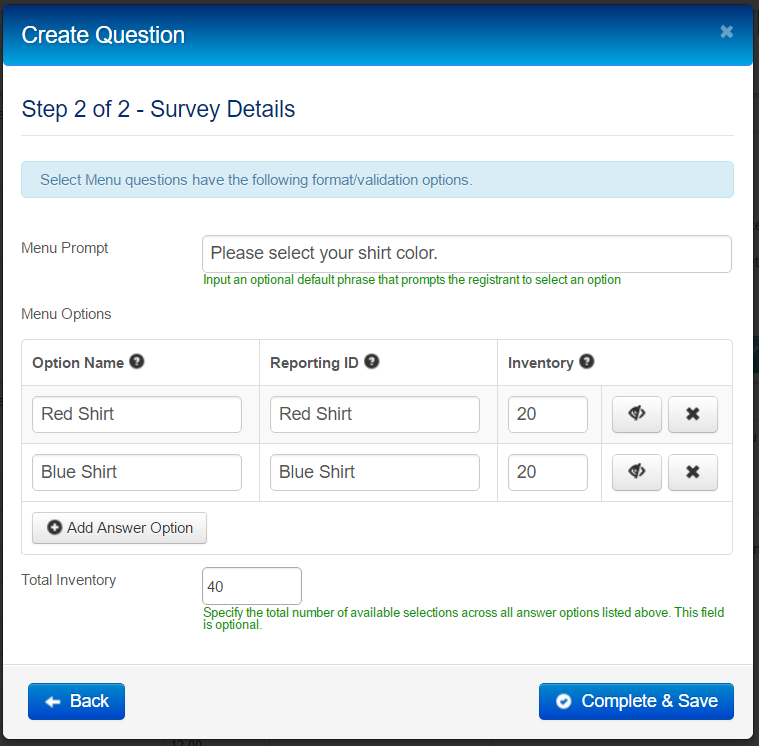
- You can specify a Menu Prompt that will appear above the Menu that offers Athletes specific instructions or additional information.
- Click Add Answer Option to add new options.
- Specify an Option Name and Reporting ID for each Menu Option that will be displayed in the registration form. The Label is the text that will display next to the option in the form, and the Value is what will be stored in the database. Values must be numbers.
- If you would like to specify inventory levels for each option, enter a numeric value next to each. Once the inventory level is reached, the option will become unavailable.
- If you would like to hide a given answer from the form without deleting it completely, click the button with a crossed-out eye.
- Specify a Total inventory amount. This is not required if you have individual levels entered.
- Click Complete & Save
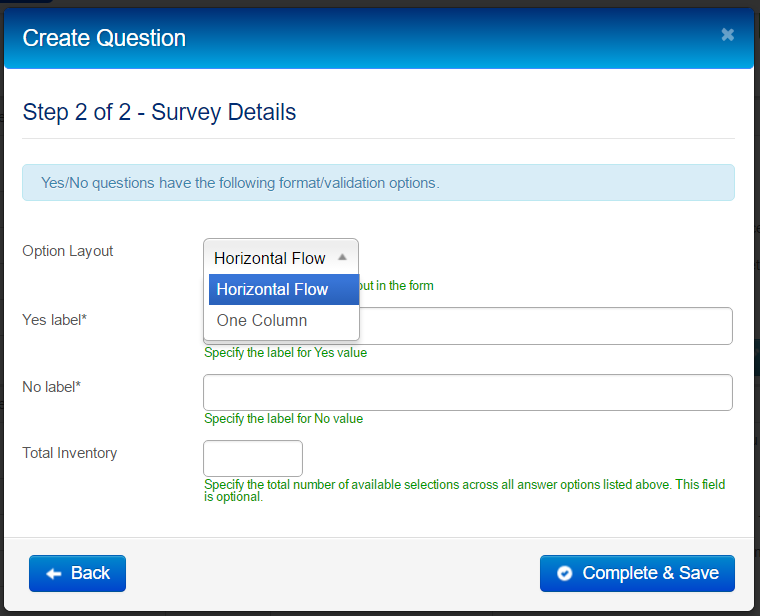
- Select an Option Layout pattern for the Yes and No options.
- Specify a Yes Label and No Label to display on the Registration Form and in Reports and Custom mapping.
- If necessary, enter a value for Total Inventory. Once total inventory has been met, the option will become unavailable.
- Click Complete & Save
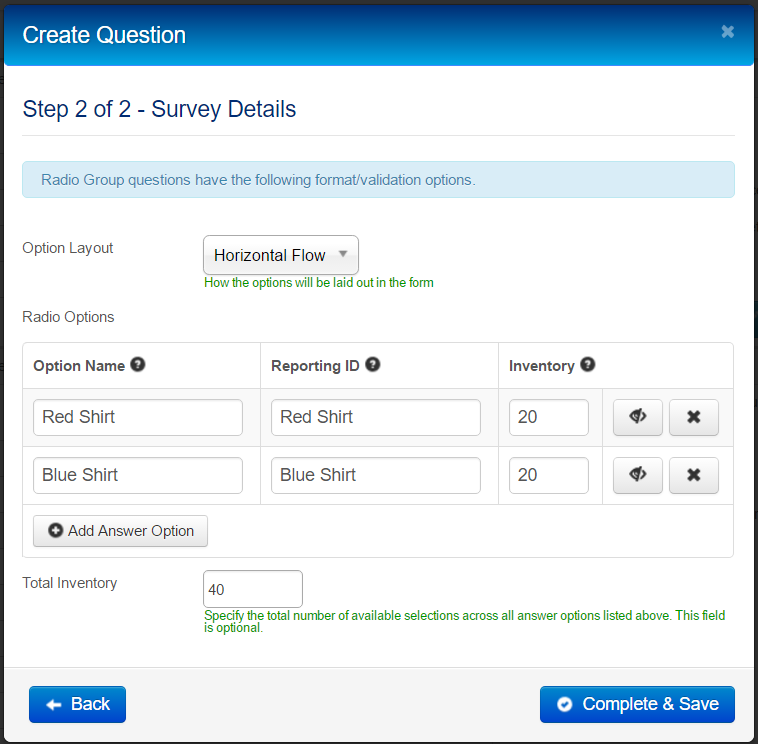
- Select an Option Layout pattern for the radio options.
- Click Add Answer Option to add new options.
- Specify am Option Name and Reporting ID for each Radio Option that will be displayed in the registration form. The Label is the text that will display next to the option in the form, and the Value is what will be stored in the database. Values must be numbers.
- If you would like to specify inventory levels for each option, enter a numeric value next to each. Once the inventory level is reached, the option will become unavailable.
- If you would like to hide a given answer from the form without deleting it completely, click the button with a crossed-out eye.
- Specify a Total inventory amount. This is not required if you have individual levels entered.
- Click Complete & Save
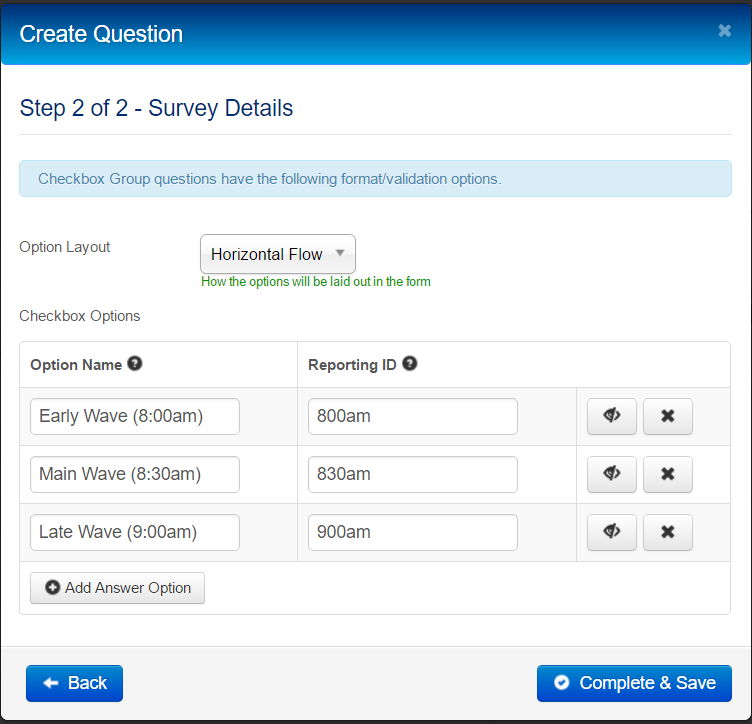
- Select an Option Layout pattern for the checkbox options.
- Specify an Option Name and a Reporting ID for each Checkbox Option that will be displayed in the registration form. The Label is the text that will display next to the option in the form, and the Value is what will be stored in the database. Values must be numbers.
- If you would like to hide a given answer from the form without deleting it completely, click the button with a crossed-out eye.
- Use the Add Answer Option button to add as many options as you need.
- Click Complete & Save
Hidden Value
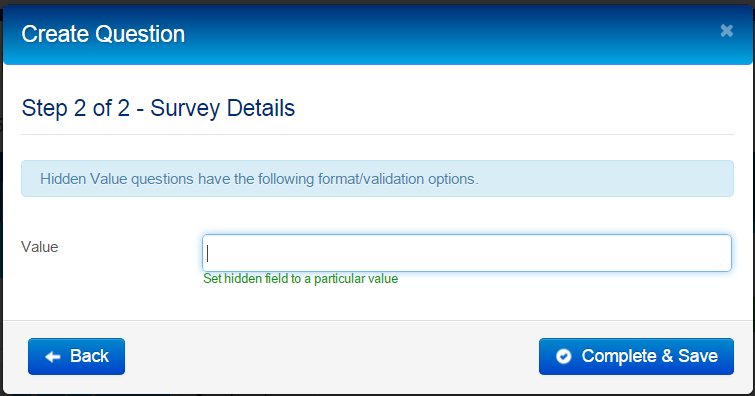
- Enter the desired Hidden Value. Values must be numbers.
- Click Complete & Save