Introduction
This guide will walk you through the process of configuring your TP-Link MR3020 router to supply internet to a MiniTrack or Pro Controller with a USB cellular modem. This configuration will also work to supply a Client Router with internet connectivity by connecting it to the Main router's WiFi network. This type of setup is useful for Gatorless splits.
Before you commit to using this router model, make sure you purchase a USB modem model that is compatible with this router, and also make sure that the Modem has an active SIM card inserted. Click HERE for TP-Link's compatibility list for the MR3020.
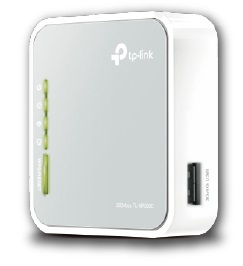
When you get your router, it may be one of two versions - V1 or V3. The V3 model is slightly newer, and its interface is different. This guide contains instructions for both the V1 and V3 models. The V3 router will say "V3" next to the model number on the bottom and will have TP-Link's updated logo on the front.
Load the Configuration File (V1)

- Download the TPLINK-Main-V1 configuration file from the Downloads section at the end of this article.
- Set the switch on the side of the router to 3G/4G
- Supply power to the TP Link using the included USB cable.
- Connect the TP Link to your computer with the included Ethernet cable.
- Open a web browser and enter 192.168.0.254 in the address bar.
Please note that you may need to set your Ethernet adapter's IP address to the router's IP scheme in order to access the admin interface. Example: 192.168.0.7 - You will be prompted to enter a username and password. Both are admin.
- You should see the TP Link configuration page. If not, ensure the Ethernet cable is firmly inserted into both the router and the computer. Also, ensure that your computer’s Ethernet adapter does not have a static IP that's outside the range the TP-Link uses.
- Click System Tools > Backup & Restore.
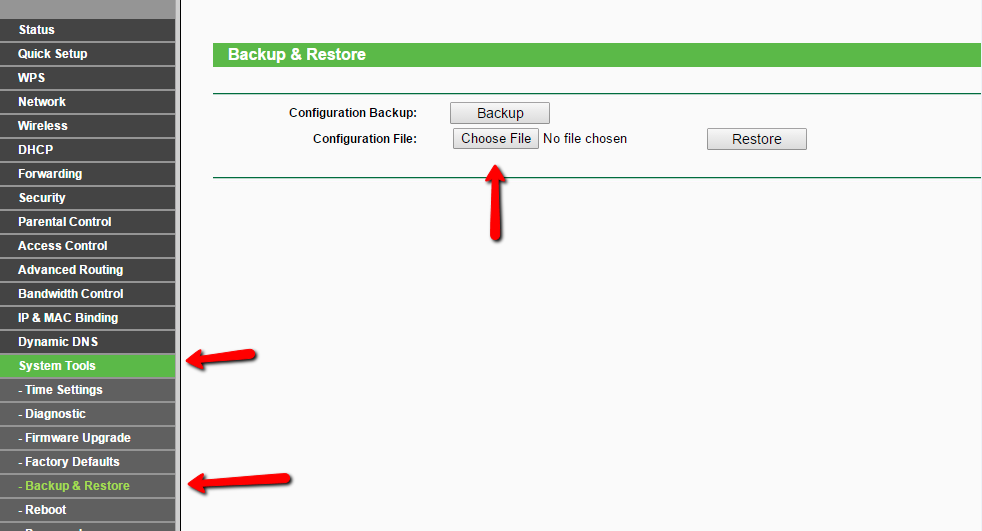
- Click the Choose File button and locate the TPLINK-Main.bin file you downloaded earlier. Select it, and then click Restore.
- You will see a progress bar that will fill very quickly, followed by a success message. The Router will then reboot.

- When the Reboot process finishes, your TP-Link should ready to use.
In most cases, when you plug in your USB modem, the TP-Link should automatically update with the correct Country and Carrier information. If you are having trouble connecting, you should log back into the router and verify that the Country and Carrier were correctly set by the modem. This can be done under the 'Network' menu.
To test configuration, insert a USB modem into the router, plug the router into a controller using the USB cable, and then connect the router to the controller with the Ethernet cable. Wait for both the router’s and the modem’s boot sequences to complete. This can take a couple minutes, depending on the modem you are using.
Finally, attempt to establish a connection on your controller, first ensuring that the Server address is set to 50.17.233.218.
If you need to log into the Router at a later time, the login Username and Password can be found on the Router Password Cheat Sheet in the Downloads section of the Timer Portal under Networking Accessories.
The SSID name and password are also found on the Cheat Sheet.
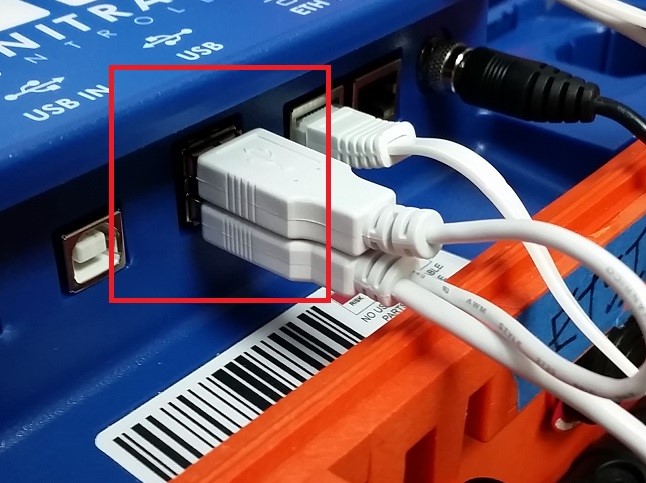
In order for the Router to receive enough power from the controller, both plugs of the USB cable must be inserted into the USB ports on the controller.
Load the Configuration File (V3)
- Download the TPLINK-Main-V3 configuration file from the Downloads section at the end of this article.
- Set the switch on the side of the router to 3G/4G
- Supply power to the TP Link using the included USB cable.
- Connect the TP Link to your computer with the included Ethernet cable.
- Open a web browser and enter 192.168.1.1 in the address bar.
Please note that you may need to set your Ethernet adapter's IP address to the router's IP scheme in order to access the admin interface. Example: 192.168.1.7 - You will be prompted to enter a new password. Choose one you'll remember short-term. The configuration file will set a different one.

- You should see the TP Link configuration page. If not, ensure the Ethernet cable is firmly inserted into both the router and the computer. Also, ensure that your computer’s Ethernet adapter does not have a static IP that's outside the range the TP-Link uses.
- Click the Advanced tab.

- System Tools > Backup & Restore
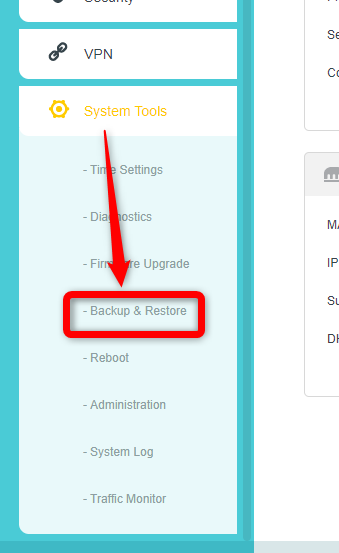
- On the Backup/Restore page, click the Browse button, locate the V3 config file you downloaded on your computer, and select it. Once selected, click the Restore button.
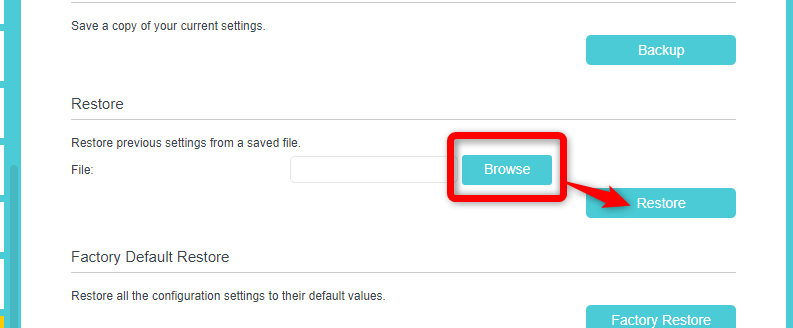
- The router will reboot.
When the Reboot process finishes, your TP-Link should ready to use.
In most cases, when you plug in your USB modem, the TP-Link should automatically update with the correct Country and Carrier information. If you are having trouble connecting, you should log back into the router and verify that the Country and Carrier were correctly set by the modem. This can be done under the 'Network' menu.
To test configuration, insert a USB modem into the router, plug the router into a controller using the USB cable, and then connect the router to the controller with the Ethernet cable. Wait for both the router’s and the modem’s boot sequences to complete. This can take a couple minutes, depending on the modem you are using.
Finally, attempt to establish a connection on your controller, first ensuring that the Server address is set to 50.17.233.218.
If you need to log into the Router at a later time, the login Username and Password can be found on the Router Password Cheat Sheet in the Downloads section of the Timer Portal under Networking Accessories.
The SSID name and password are also found on the Cheat Sheet.
In order for the Router to receive enough power from the controller, both plugs of the USB cable must be inserted into the USB ports on the controller.
