Introduction
This guide will walk you through the process of configuring your TP-Link TL-WR802N router as a WiFi bridge to supply internet to a MiniTrack or Pro Controller through a connection to another Host TP-Link that is using a USB cellular modem OR a hotspot device such as a Verizon Jetpack. This type of configuration is useful for Gator-less splits where there are two FlashPoints and two MiniTracks on either side of a road or path.
Configure the WiFi Hotspot
Before you can configure your 802N router to connect a Mini through a WiFi hotspot, you need to configure the hotspot device correctly. If you're not sure how to configure these settings on your WiFi device, please refer to your owner's manual for help.
- Set the Hotspot device's IP address to 172.20.23.1
- Set the Hotspot's DHCP range to 172.20.23.2 - 172.20.23.30
- (optional) Set the Hotspot's Lease Time as high as possible. Lease times are typically set in seconds, but not always, so refer to your user manual for help. Not all hotspot devices allow you to configure Lease Times.
Connect to the Host
- Power on the WiFi hotspot or router you'll be connecting your 802N to.
- Supply power to the Router and connect your PC to the TP Link's WiFi network. Make sure that your computer's WiFi adapter is not set with a static IP address. You can find the network SSID and WiFi password for the router on a card that came with your router packaging.
- Open a web browser and type tplinkwifi.net into the address bar and press Enter. If you get an error message on the first attempt, wait 30 seconds, then try again. If you still get an error, try a few more times, then make sure your computer's WiFi adapter is set to DHCP.
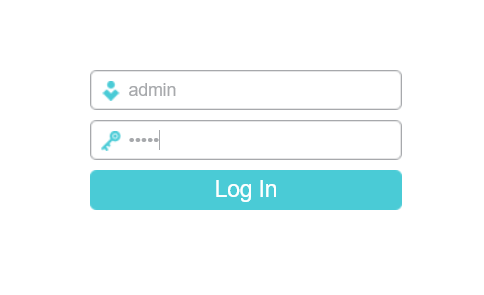
- You should see a login form similar to what is shown below. The login information is admin for both the User and Password fields.
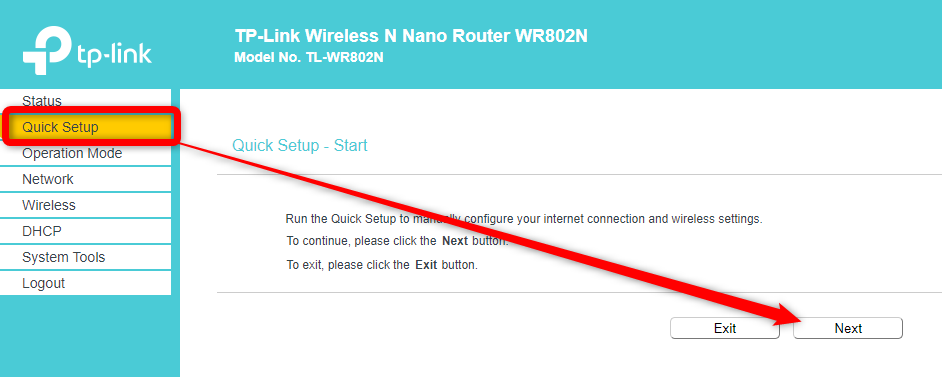
- Once logged into the router, click the Quick Setup option, then click Next.
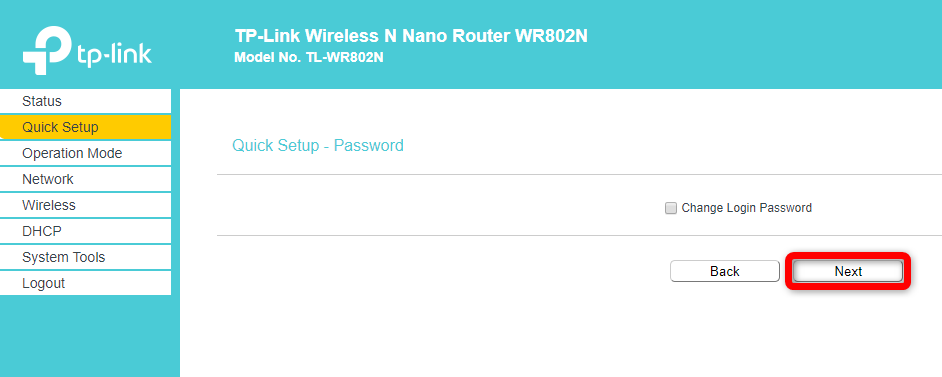
- On the next screen click Next again.
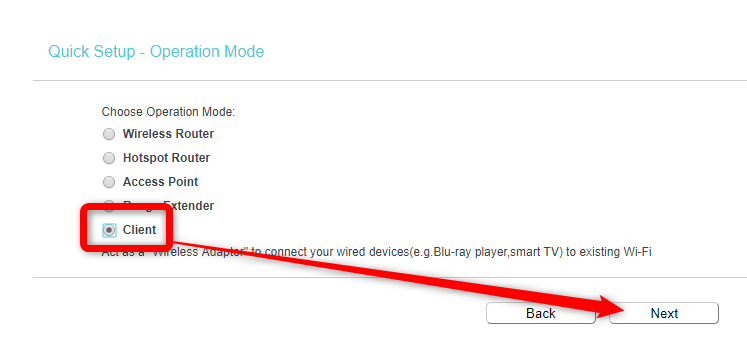
- On the next screen, select the Client option from the list, then click Next.
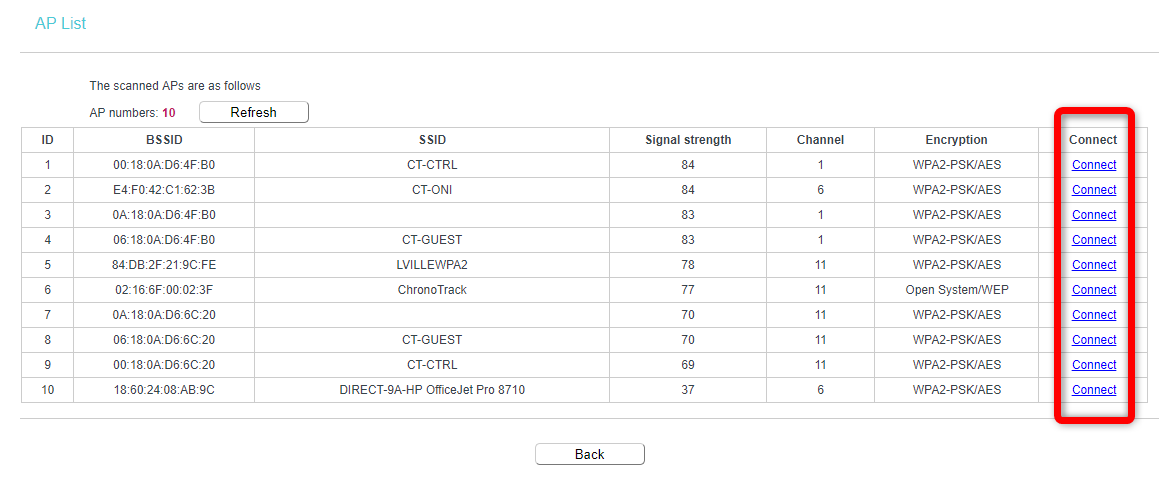
- On the next screen, you'll see a list of available WiFi networks appear after a few seconds. Locate the network from your hotspot device and click the blue Connect link next to its entry in the list.
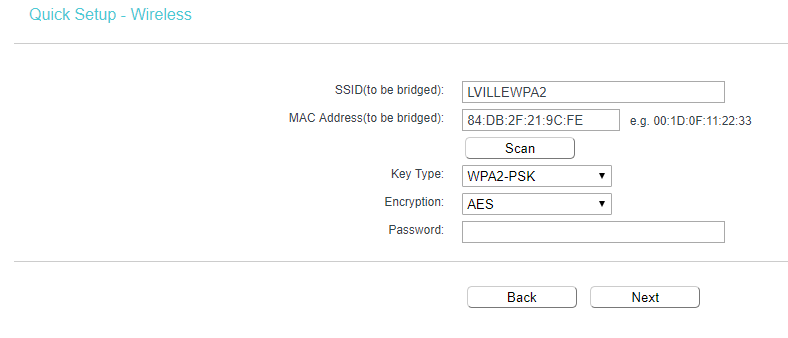
- The next screen will prompt you to select a security type and enter the WiFi password for the network. The security type is typically auto-detected by the router, so all you'll need to do is type in the WiFi password. Click Next when you've entered the password.
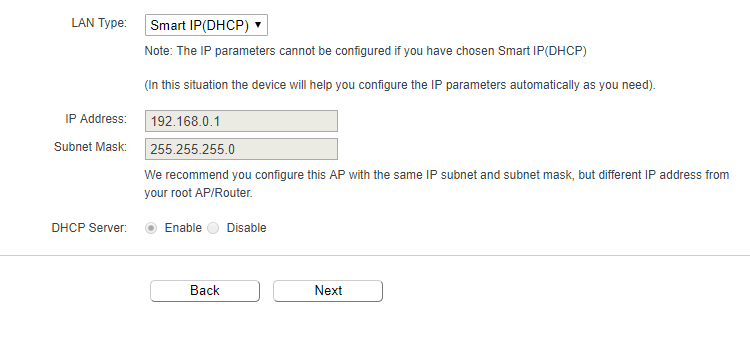
- The next page will ask about the DHCP settings for the 802N. Make sure it's set to Smart IP(DHCP), then click Next.
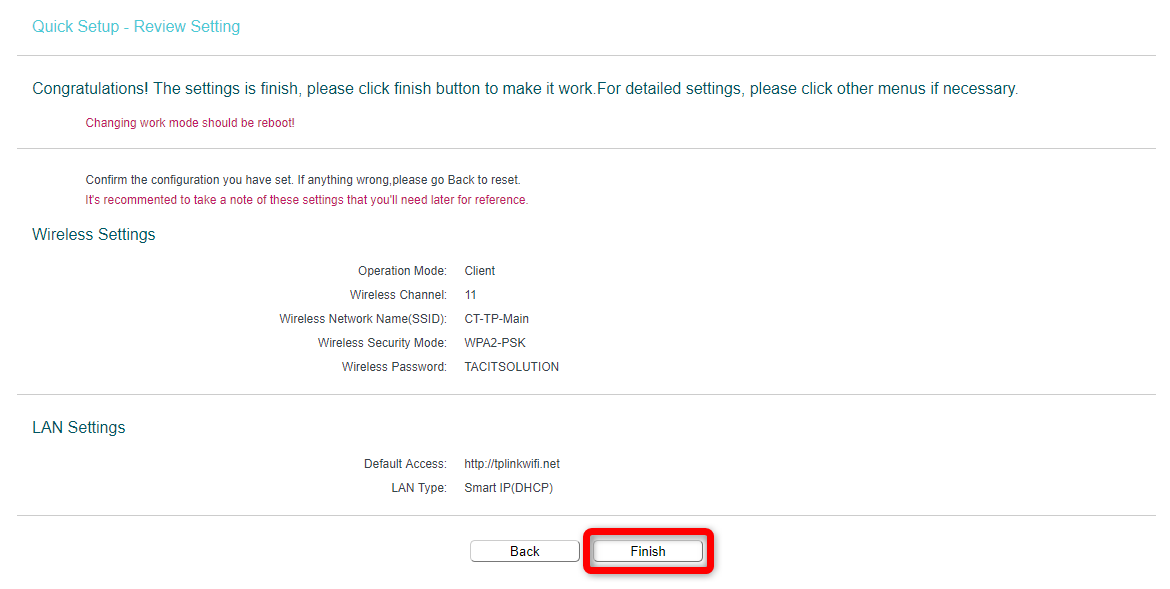
- The final configuration screen will ask you to confirm the settings you've selected. Click Finish, and the router will reboot.

- Once the progress bar reaches full, the page will refresh. Your router is now ready to connect a Mini to the internet via the WiFi hotspot it's connected to.
Test the Connection
Now that the router is configured, test the connection with a MiniTrack.
Ensure that your WiFi device is powered on, then plug the 802N's USB and ethernet cables into the MiniTrack as pictured here, then wait for the green light on the router to stay solid.
Once the light is staying lit, press Menu > 2 > 1 to connect the Mini to the Server. Make sure the Mini's Server IP address is set to the ChronoTrack server IP (50.17.233.218). The Connected light on the Mini should go solid green, indicating that the connection was successful.
If the Mini isn't able to connect to the Server, make sure your Hotspot device is powered on and connected to its cell network.