Introduction
If you're using a Host/Client pair of TP-Links, you will need to reference the Router Password Cheat Sheet found in the Downloads section of the Timer Portal under Networking Accessories. Please download it and have it ready.
This guide will walk you through the process of configuring your TP-Link MR3020 router as a WiFi bridge to supply internet to a MiniTrack or Pro Controller through a connection to another Host TP-Link that is using a USB cellular modem OR a hotspot device such as a Verizon Jetpack. This type of configuration is useful for Gator-less splits where there are two FlashPoints and two MiniTracks on either side of a road or path.
When you get your router, it may be one of two versions - V1 or V3. The V3 model is slightly newer, and its interface is different. This guide contains instructions for both the V1 and V3 models. The V3 router will say "V3" next to the model number on the bottom and will have TP-Link's updated logo on the front.
If you're connecting your MR3020 to a WiFi hotspot device, the hotspot MUST have its LAN IP address set to 172.20.23.1. Please refer to your hotspot device's owner's manual to learn how to set the IP address.
Connect to the Host (V1)
This procedure does NOT require a config file.
- Set the switch on the side of the MR3020 to AP
- Supply power to your MR3020 AND the Host TP-Link or your WiFi Hotspot. The HOST router/hotspot must be powered on for the Client router to connect.
- Connect the MR3020 to your computer with the included Ethernet cable.
- Open a web browser and enter 192.168.0.254 in the address bar.
Please note that you may need to set your Ethernet adapter's IP address to the router's IP scheme in order to access the admin interface. Example: 192.168.0.7 - You should see the TP Link configuration page. If not, ensure the Ethernet cable is firmly inserted into both the router and the computer. Also, ensure that your computer’s Ethernet adapter does not have a static IP that's outside the range of the Router (see above).
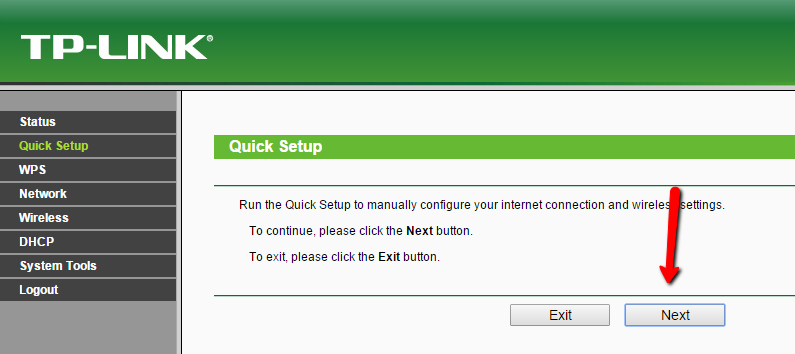
- Click Quick Setup and then Next.
- On the next step, select Bridge with AP as the Operation Mode.

- On the next page, skip to the Security Setting section and click the Survey button. The following screen will appear.
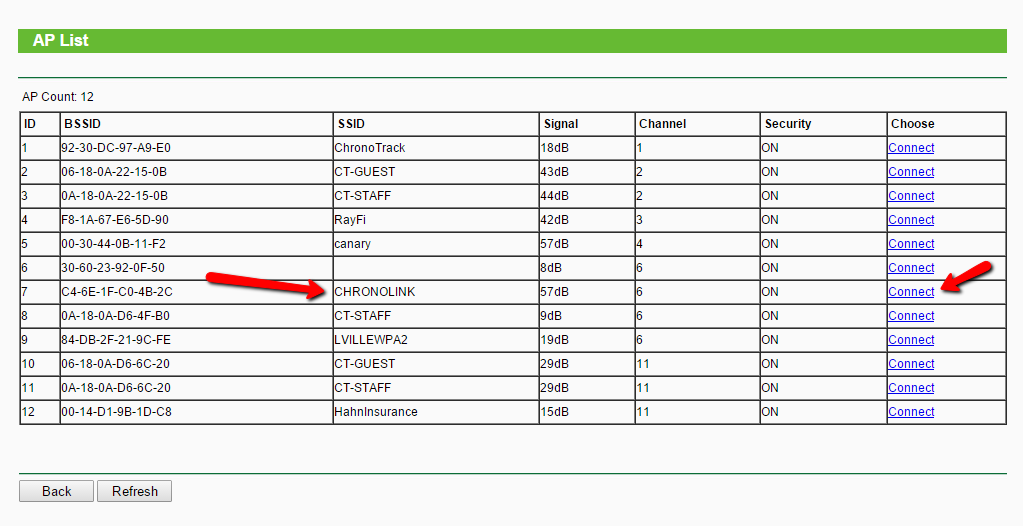
- Locate the CHRONOLINK network SSID or the SSID of your hotspot and click the Connect link on that row. You will be returned to the previous page.
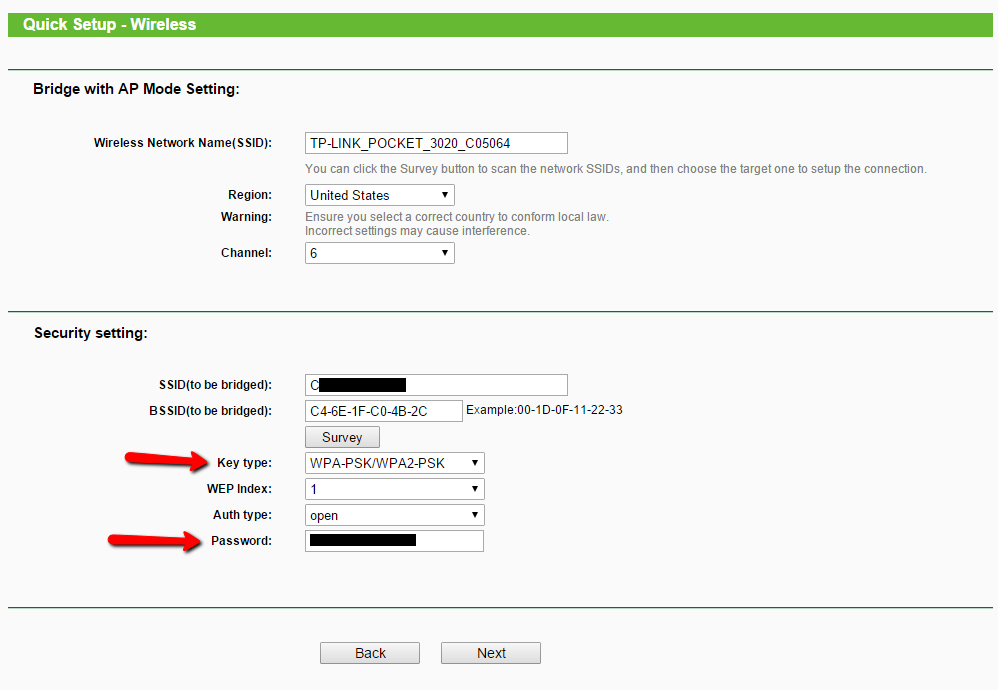
- Select WPA-PSK/WPA2-PSK as the Key Type, then enter the password for the TP-Link MR3020 (Host) entry on the Router Password Cheat Sheet. For a Hotspot, verify the security type and password, then enter the correct values here.
- Click Next.
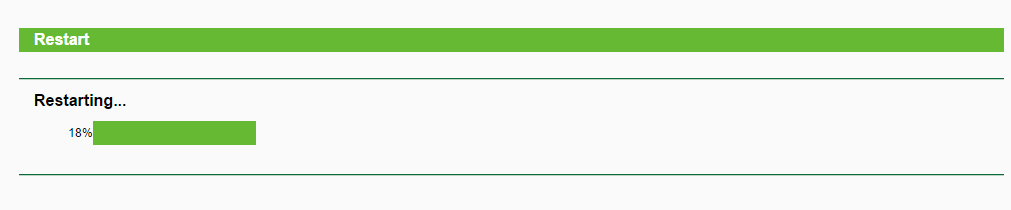
- You will see the message below displayed. Click Reboot to finalize the settings.
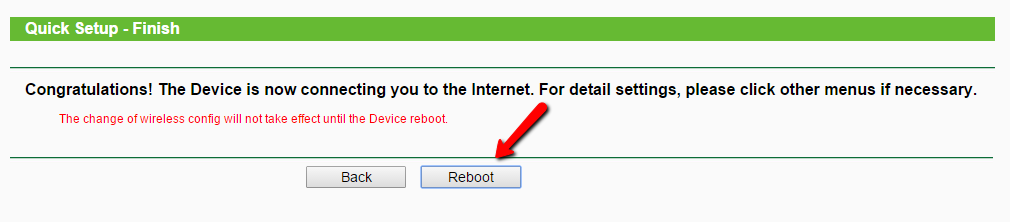
- A progress bar will display the reboot progress. This will take about a minute. When the reboot has finished, your Router is configured and ready to go.
You are now ready to use your TP-Link Client Router to connect a MiniTrack to the internet.
To test configuration, insert a USB modem into the Host Router and power it on or ensure that your Hotspot is powered on. Plug the Client router into a MiniTrack using the USB cable, and then connect the Client router to the controller with the Ethernet cable. Wait for both the devices' boot sequences to complete. This can take a couple minutes, depending on the modem or hotspot you are using.
Finally, attempt to establish a connection on your MiniTrack, first ensuring that the Server address is set to 50.17.233.218.
In order for the Router to receive enough power from the controller, both plugs of the USB cable must be inserted into the USB ports on the controller.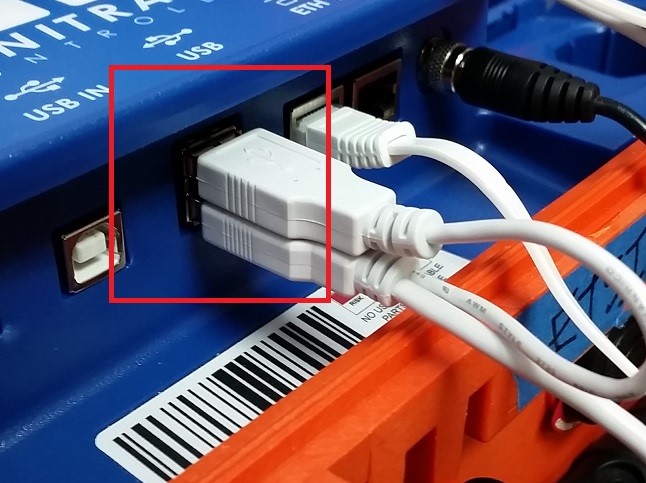
Connect to the Host (V3)
This procedure does NOT require a config file.
- Set the switch on the side of the MR3020 to AP
- Supply power to your MR3020 AND the Host TP-Link or your WiFi Hotspot. The HOST router/hotspot must be powered on for the Client router to connect.
- Connect the MR3020 to your computer with the included Ethernet cable.
- Open a web browser and enter 192.168.0.254 in the address bar.
Please note that you may need to set your Ethernet adapter's IP address to the router's IP scheme in order to access the admin interface. Example: 192.168.0.7 - You should a login page for the TP-Link that may ask you set a new password. Set the password to something you'll remember, then continue.
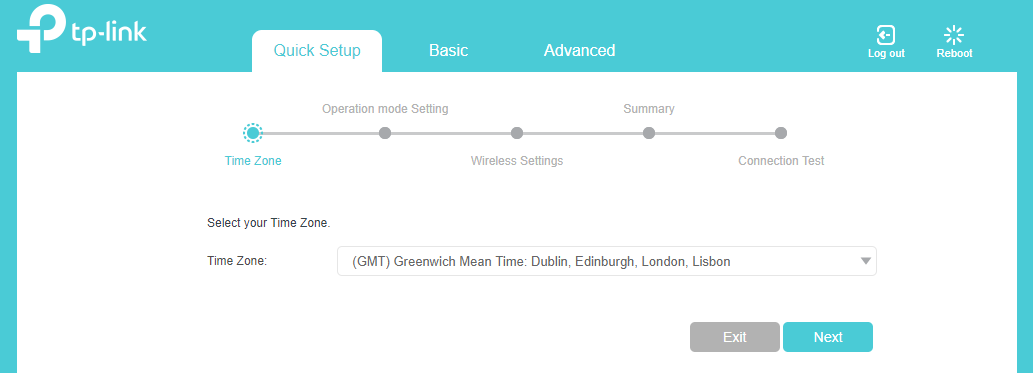
- You should not be on the Quick Setup page. Choose your correct Time Zone, then click Next.
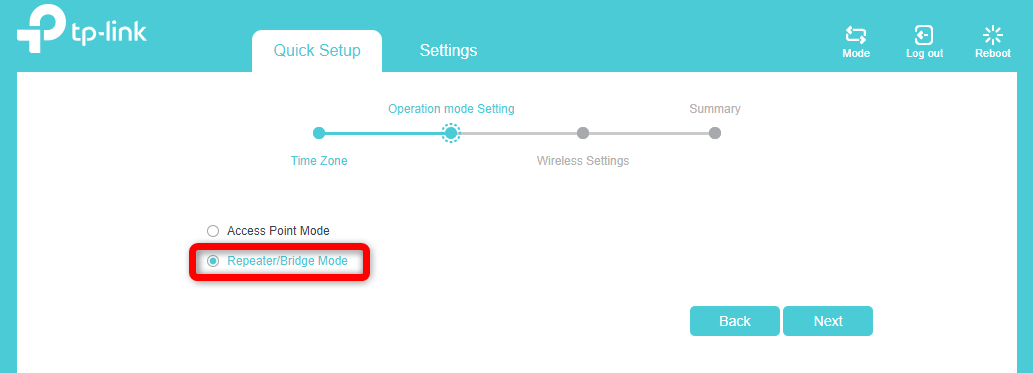
- On the next step, select Repeater/Bridge Mode, then click Next.
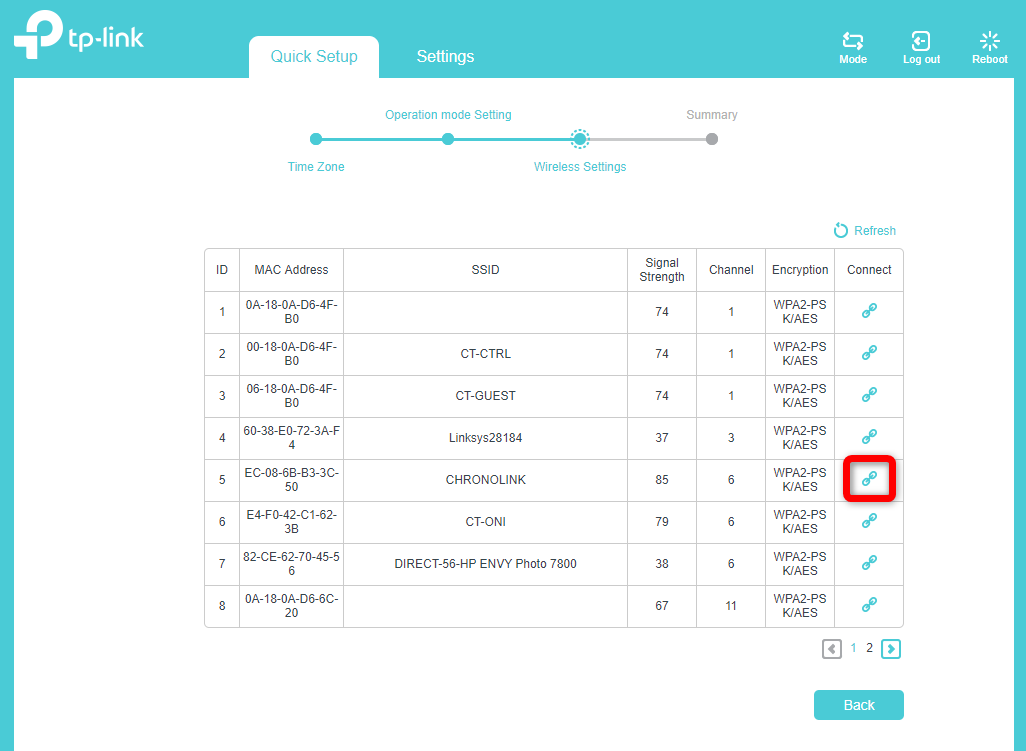
- On the next page, check the Connect to 2.4GHz Network box, then click Scan. The following screen will appear. Locate the SSID name of the network you're trying to connect the router to, and click the link icon next to it. You will be returned to the previous page.
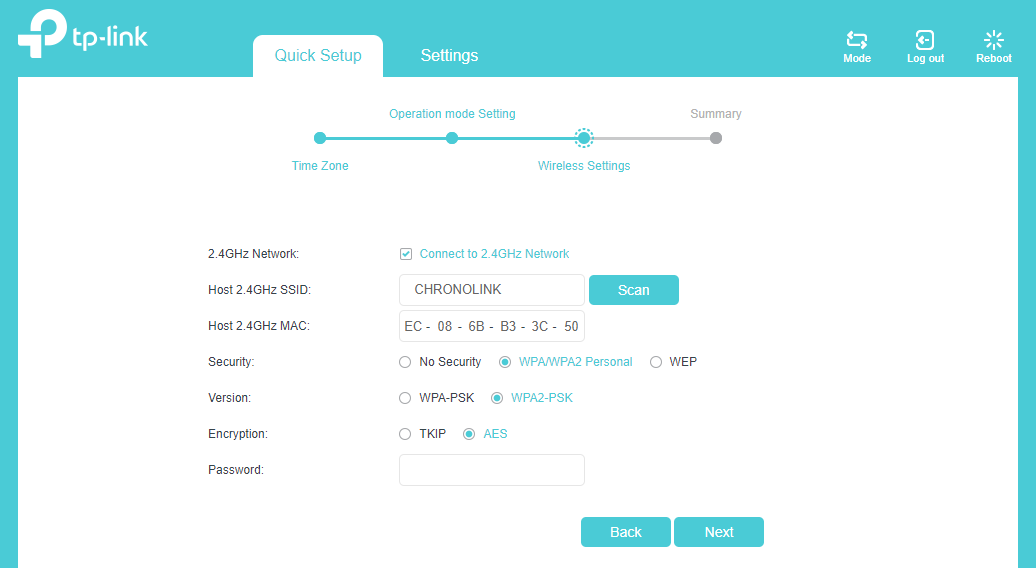
- Select WPA-PSK/WPA2-PSK as the Key Type, then enter the password for the TP-Link MR3020 (Host) entry on the Router Password Cheat Sheet. For a Hotspot, verify the security type and password, then enter the correct values here. Click Next when you're done entering the security information.
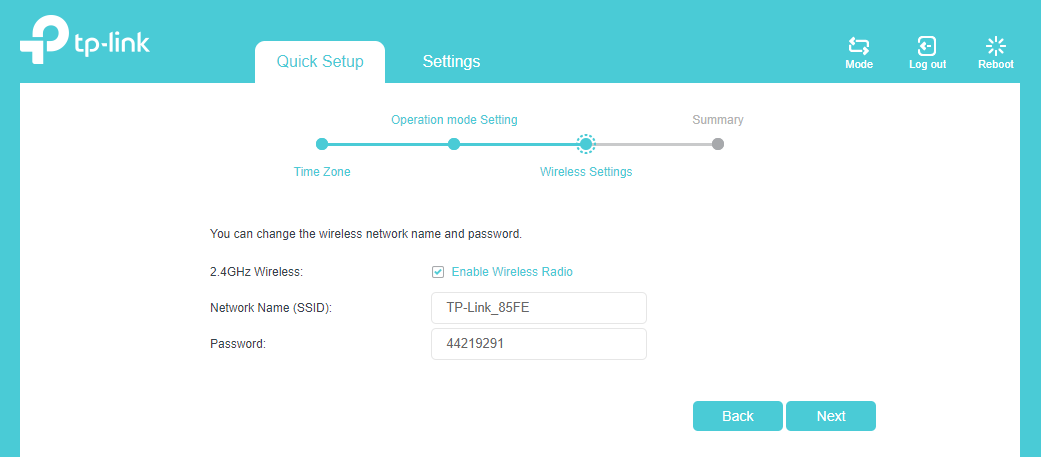
- The next step will offer the ability to configure this router's WiFi network or turn its wireless radio off. We recommend turning it off to conserve power unless you intend to use the network. Click Next when you're done on this page.
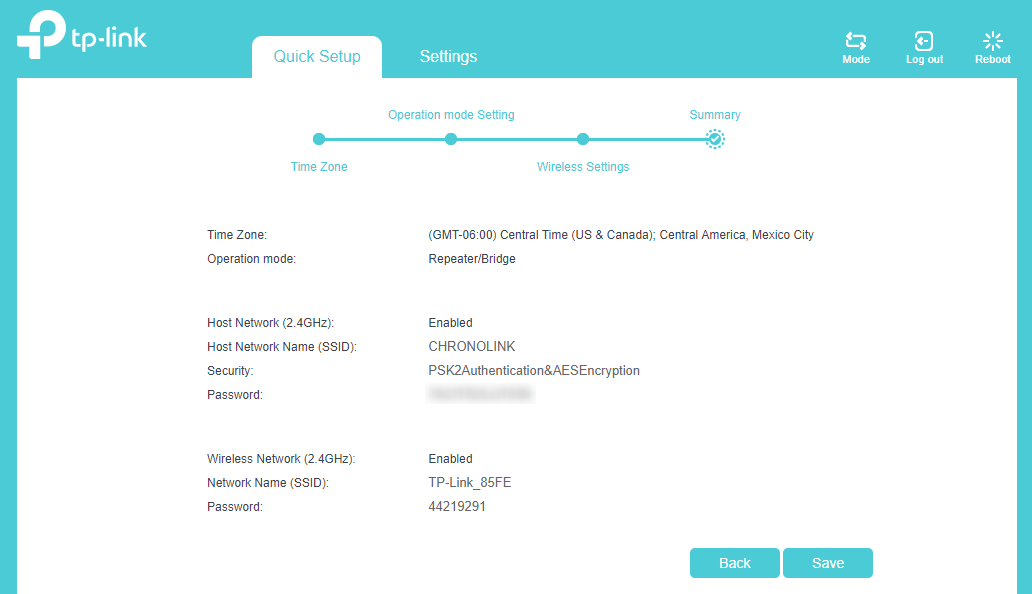
- You will see a summary of the settings you've selected displayed. Click Reboot to finalize the settings.
- A progress bar will display the reboot progress. This will take about a minute.
- When the reboot has finished, your Router is configured and ready to go.
You are now ready to use your TP-Link Client Router to connect a MiniTrack to the internet.
To test configuration, insert a USB modem into the Host Router and power it on or ensure that your Hotspot is powered on. Plug the Client router into a MiniTrack using the USB cable, and then connect the Client router to the controller with the Ethernet cable. Wait for both the devices' boot sequences to complete. This can take a couple minutes, depending on the modem or hotspot you are using.
Finally, attempt to establish a connection on your MiniTrack, first ensuring that the Server address is set to 50.17.233.218.
In order for the Router to receive enough power from the controller, both plugs of the USB cable must be inserted into the USB ports on the controller.