Introduction
This process only works on controllers with TPC-31 running BoxScore 3.0.9 or later.
It can be useful to have the ability to connect multiple controllers to the internet using only one SIM and one device. A WiFi hotspot allows you to do that using Pro controllers' built-in WiFi modem. Often, a hotspot will have limited range, and testing should be done before you commit to using one on race day. Awareness of battery life is also necessary. In most cases, a Hotspot can be charged while operating, so plugging it into one of your controller's USB ports will enable the hotspot to last as long as the controller does.
Since a Pro controller has a built in cellular modem, this method for connecting a Pro to the server should be used as a fall-back in case your built-in modem goes bad or you are attempting to use a non-GSM carrier such as Verizon or Sprint.
This guide will walk you through the steps necessary to configure your WiFi hotspot and pro controller and establish the connection to the server.
Configure the Hotspot
It's a good idea to customize certain settings on your WiFi hotspot so that it is not operating with defaults. Default configuration might easily allow a third party to connect to your hotspot and monopolize your bandwidth. Use the documentation included with your Hotspot to access its admin interface and change the following:
- WiFi SSID (WiFi network name)
- WiFi Password
- Admin interface password
- (Optional) If you're using the Hotspot with both Pro controllers and MiniTrack controllers, you should set the hotspot's LAN IP to 172.20.23.1. This will ensure that either controller can connect.
Configure the Controller
There is some configuration necessary on the controller's WiFi adapter before you can use connect the controller to the server through the hotspot. Make sure that your Hotspot and controller's WiFi modem are powered on before completing the process below. (Configure > Power)
- Press Configure > Network
- Change the WiFi Server IP to 50.17.233.218 (the ChronoTrack Server IP) and ensure it's selected.
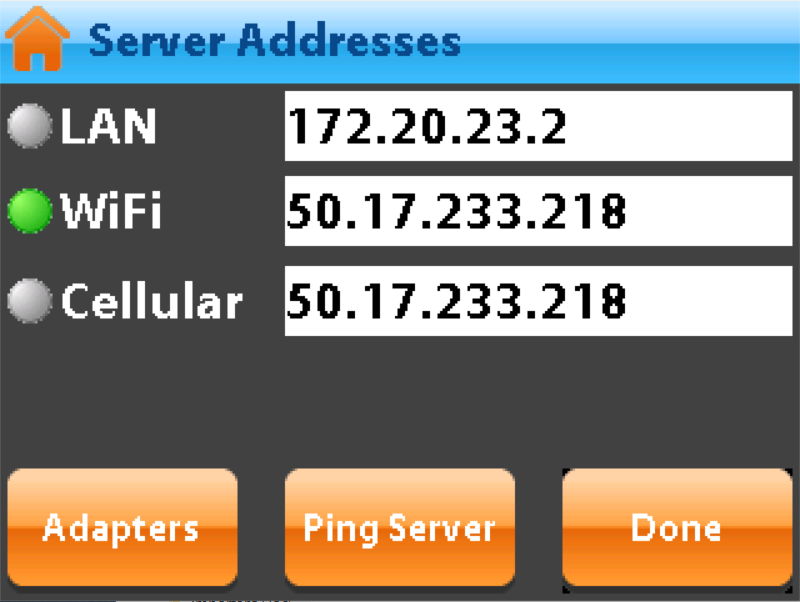
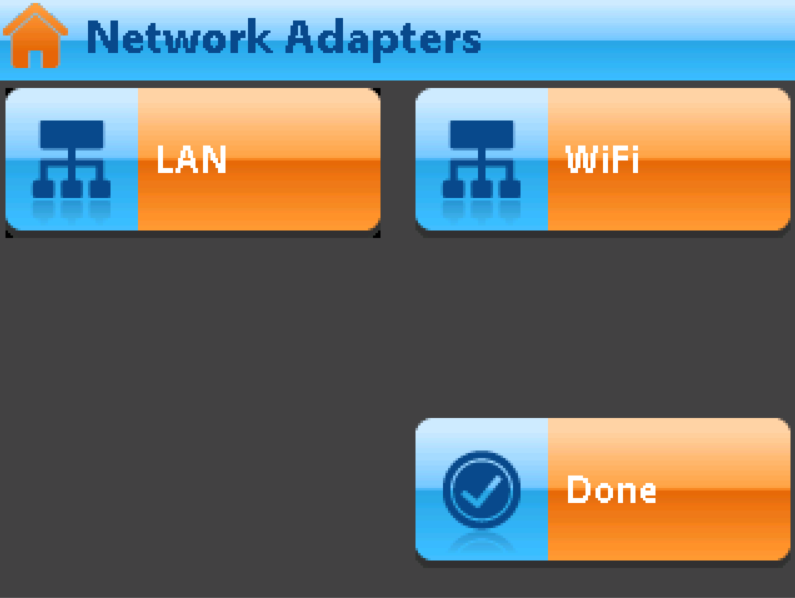
- Press the Adapters button and select Yes on the warning dialogue.
- Press the WiFi adapter button.
- Near the top of the screen is an item that says 'DHCP Disabled'. Press this text once. It should change to 'DHCP Enabled', and the IP, Netmask, and Gateway fields should go gray and become unselectable.
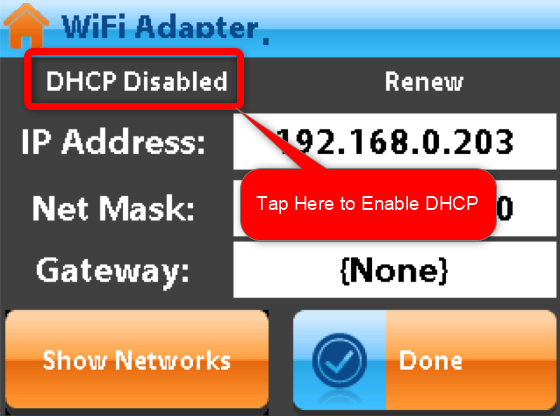
- Now press the Show Networks button.
- Locate the WiFi SSID for your hotspot, highlight it, and press Connect.
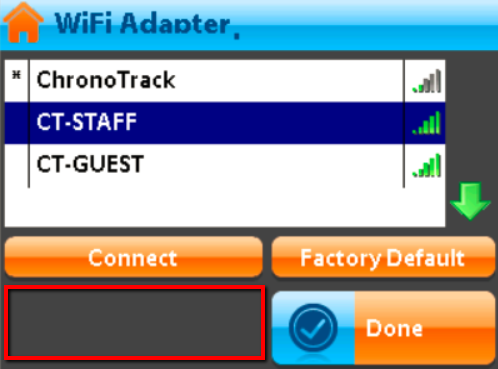
- If you set a password for the network, you will be prompted to enter it. Once you've entered the password, press Done.
- After a moment, you should see the status in the portion highlighted in the picture above change to "Connected to (your network name)"
Connect the Controller
- From the main screen of BoxScore, press the Data Stack icon in the upper right corner of the screen.
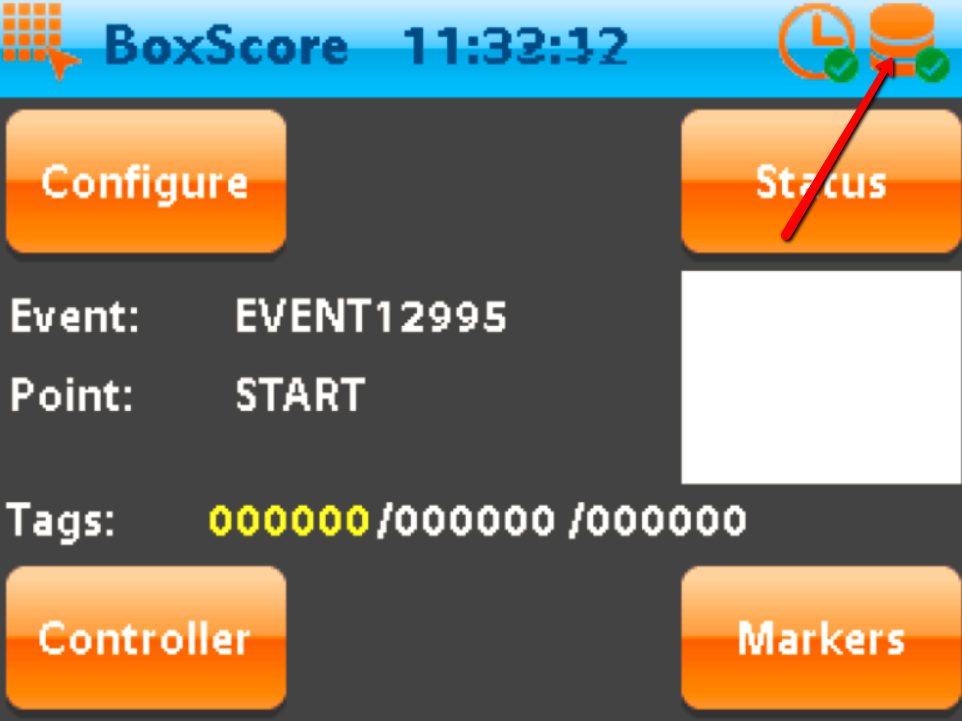
- Press Connect. After a moment, the status should change to "Connected"
Now that you've configured your Controller to connect using the hotspot, the controller should store your hotspot's network data and automatically connect to the hotspot when powered on.
Now, you can stream data to your CT Live Event using Fusion, SimpleClient, or StreamManager