Introduction
Panels are ChronoTrack's scrolling results display solution. A ChronoTrack Live event can have any number of Panels, and Panels can show results by Race and Category. Panels can be edited at any time including during a race, and open Panels will not need to be refreshed for edits to be reflected. This guide will walk you through the process to adding, and using Panels.
Only users with Timer roles can create and manage Panels.
Adding a New Panel for an Event
To Add a panel to your event:
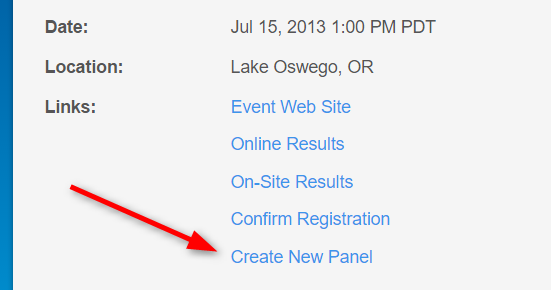
- Click the Create New Panel link on the Event tab of your event.
You can also click the My Orgs button at the top of any page within CT Live, click the Panels tab, and use the + Add New Panel button to create a panel from scratch.

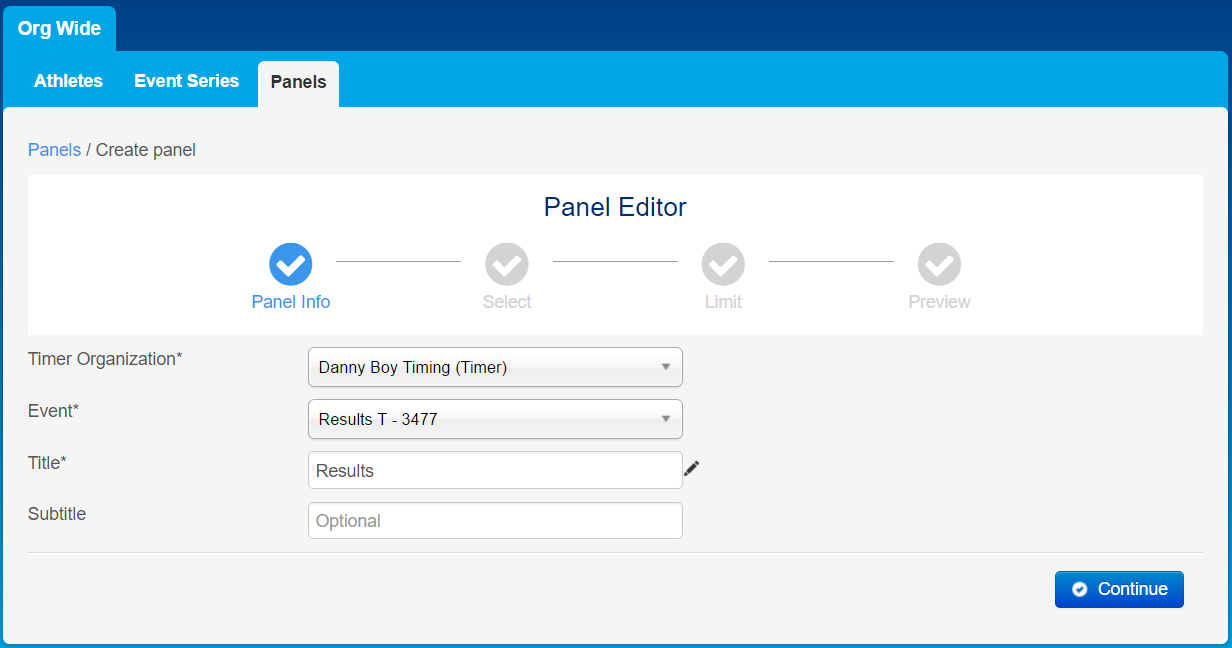
- A new tab/window will open in your browser, displaying the first step of Panel creation.

- The Timer Organization and Event fields will automatically be filled in based on the event page from which you clicked the link. Supply a Title for the Panel and a Subtitle, if necessary. You can click the pencil icon on the right side of the Title field to auto-fill the field with the name of the Event. Click Continue when finished with Step 1
- On the next step, select either Race or Report in the "Choose Type" heading. The Report type will allow you to display either the XC Aggeregate Teams report or the Awards report.
For a complete look at using the XC Aggregate Teams report in a Panel, click HERE.
If you select one of the report types, the configuration of the report will be reflected in the Panel including ranking and double-dipping policy. - Next, select which Race will be displayed in the Panel. Only one Race may be displayed on a panel at once, so you will need to create multiple panels if you want to display scrolling results for multiple panels. Click Continue when finished selecting the Race.

- Next, set the Race Name to be displayed in the Panel. This field will automatically be filled with your Race's name, but you can modify the name that will be displayed in the panel.
Modify Finisher Limit lets you limit the number of athletes being displayed in the panel. You can choose to show the first x number of athletes, the last x number of athletes or leave the box unchecked to display All Results.
Display Rows lets you set the number of lines visible on the Panel at the same time. We recommend testing with an existing event to ensure your number of athletes to display at once will fit well on the screen you will be using. It's generally better to display too many than too few.
Filter by Bracket lets you display only athletes that belong to a specific Bracket. For example, if you wanted to have a separate display for Wheel Chair finishers, you could select your Wheel Chair bracket here.
Secondary Bracket Column lets you choose to display the Primary bracket for each Athlete or the Bracket selected in the Filter By Bracket field.
Lastly, you can choose to Show Gender, Show Bracket Rank, Show Pace, or Show Milliseconds
If you choose to Show Milliseconds, all times displayed in the Panel will be Gun Times, not Net (Chip) times.

Click Continue when you're done. - On the next step, you can customize the Display Method between Scroll or Slide Show, scroll speed, and Font, text, Line Height, and background display options. Always test the panel in multiple lighting conditions to verify that the selected colors will be easily visible to athletes.

- Finally, you can choose to hide the Title and Icon to help conserve space in the Panel. You can also choose to Center Columns.
- Click Save & Publish to complete the process. Panels can be edited later if necessary.
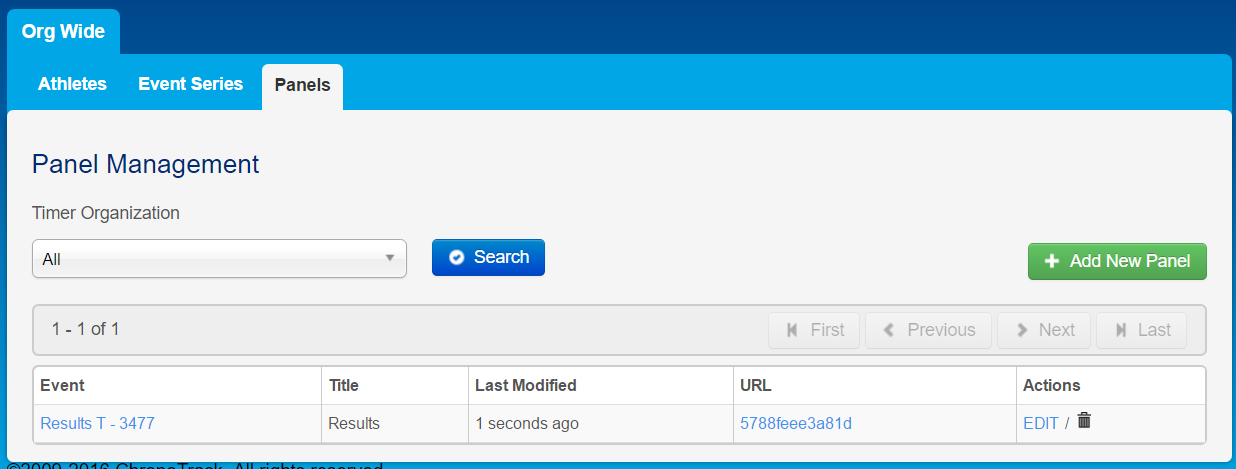
- You will be directed to the Panels tab of the My Orgs page and your new Panel will be displayed at the top of the Panels list. You can view its title, the last time it was modified, and the URL for the panel. You can click the EDIT link to change any of the Panel's settings or click the trash can icon to delete the Panel. Click the URL to open the Panel.

To display a Panel, you will need to open the Panel's URL in Chrome or FireFox. For the best experience, put the browser window in Full Screen Mode (F11 for Chrome or FireFox). If you're using multiple displays with multiple Panels, you can use two different computers or a single computer with multiple display ports. You can also use multiple ChromeCast devices and cast wirelessly from separate browser windows from the same PC.
Be aware that ChromeCasts use WiFi to communicate. Make sure that the network you are using to cast the Panels uses a device that is ensured a strong, steady connection.
To make the best use of space, we recommend turning the TV/Monitor you will be using to display the Panel sideways into "portrait" mode. In Windows, you can press Ctrl + Alt + Left Arrow/Right Arrow to orient the screen either left or right to take advantage of a portrait orientation.

As your race progresses, the Panel will start to show times once athletes have completed an interval. This means that if your race has 3 splits, the Panel will show times for split 1 once athletes have crossed the split line, then it will switch to split 2 results once they cross that line, and so on.
Remember that you can edit a Panel at any time during a race, so if you have different races happening at different times, you can set up the panel to display results from the first race, then edit the Panel to display the next race once finishers come in for the first. Edits to the panel will not change the URL and you will not have to refresh the page for any active panels for the edit to go into effect. If you have a display for each race in your event, you can set up a Panel for each race and display the Panels on different displays at the same time since each Panel has its own unique URL. A Panel will display only the event's log and the Panel Title until valid results are generated for an interval.