Introduction
Once you've Claimed events to your Company in Athlinks, you'll be able to take advantage of the Athlinks Results Widget. This widget will show some or all of your Claimed events and can be embedded into your website using an Athlinks-supplied code snippet. This guide will show you how to access and configure your Results Widget.
Please note that in order to use the Widget on your website, you need to have some basic HTML/CSS know-how.
Access and Edit the Widget
- Log into start.athlinks.com
- Click your Company name in the top bar, then select Results Widget

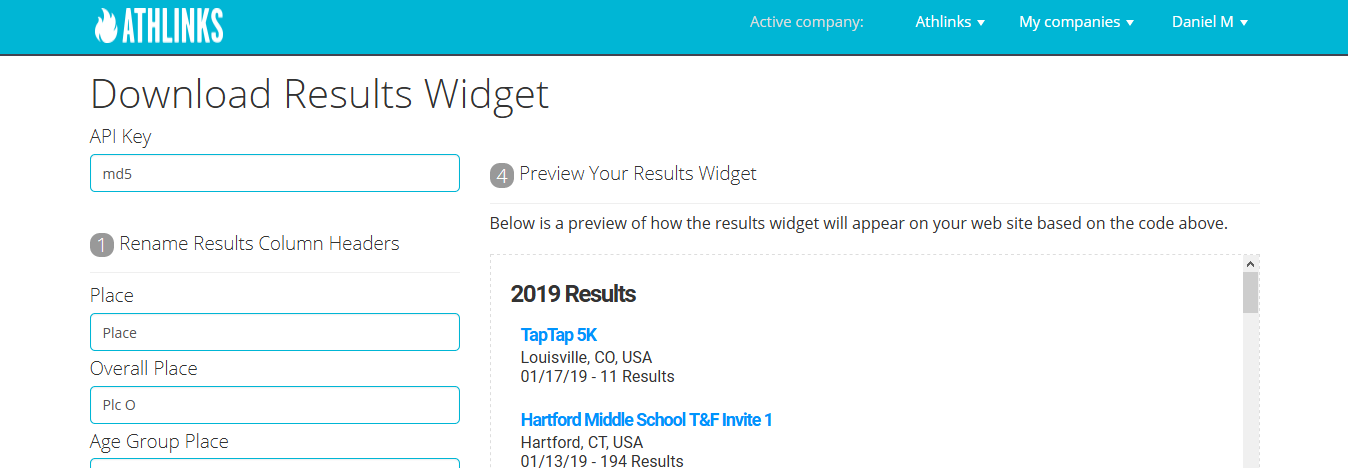
- On the next screen, you'll see a Preview of the Widget and some configuration settings for it.

- First, you can Rename Results Column Headers (1). These are the labels that display over each column in an event's results. Make any desired changes and use the Preview panel on the right to click through and see how your changes appear.
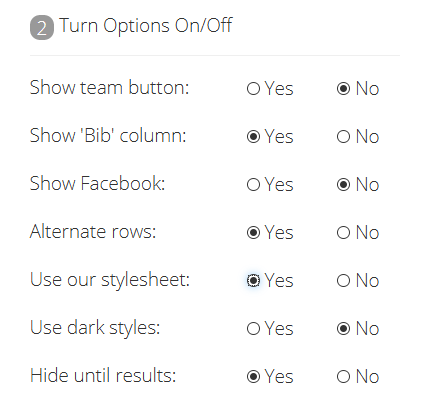
- Next, you can Turn Options On/Off (2). These options mostly affect how the results list for any given event appear.
Show Team Button displays a button athletes can click to view Team standings. This button will display even if there are no Team results in an event.
Show Bib Column can be used to either hide or show Bib numbers in the Event results view.
Show Facebook doesn't currently affect anything.
Alternate Rows shows results in alternating colors - white, gray, white, gray, etc.
Use Our Style Sheet is an advanced option that allows you to set the styling of the widget yourself. Only mark 'No' on this option if you know what you're doing.
Use Dark Styles applies a darker skin to the Widget at large.
Hide Until Results keeps events from showing up in the widget until results have been generated for the event.
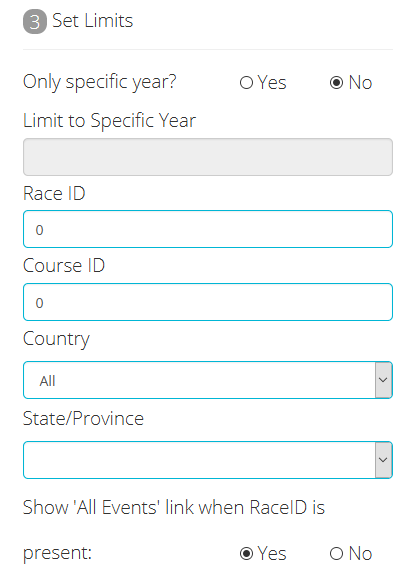
- Now, you can Set Limits (3) on which Events display in the Widget by Year, Race ID, Course ID, Country, and State/Province. You can also choose to display or hide an All Events Link when events contain RaceIDs.

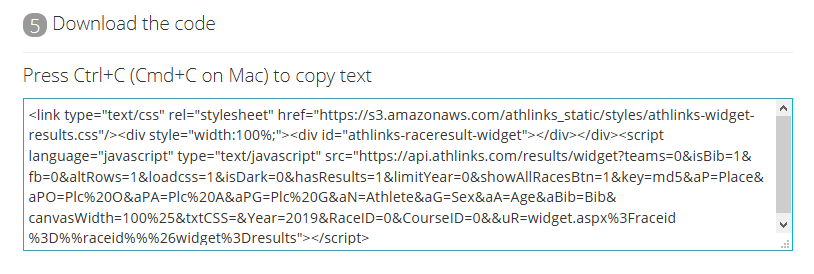
- Once you're done configuring the Widget, you can Download the code (5). Simply highlight all the text in the code snippet and copy it, then paste it into the code for your website in the desired location to embed the Widget.

Any changes made to the configuration of the Widget after embedding it into your website will require you to re-copy the snippet and update it on your website.