Introduction
With the introduction of ChronOS version 1.2.7.0/MiniTrack version 7.7.2.0 AND Fusion version 3.6.25, Fusion remote control features are officially out of Beta, and you can download these latest versions from the Timer Portal.
Fusion now lets you remotely view and control Pro2 and MiniTrack controllers' batteries, ports, readers, and more in Fusion. This article will show you how to authorize your controllers on ChronoTrack's remote server and give an overview of all the things you can see and do.
Log Into the ChronoTrack Hub in Fusion
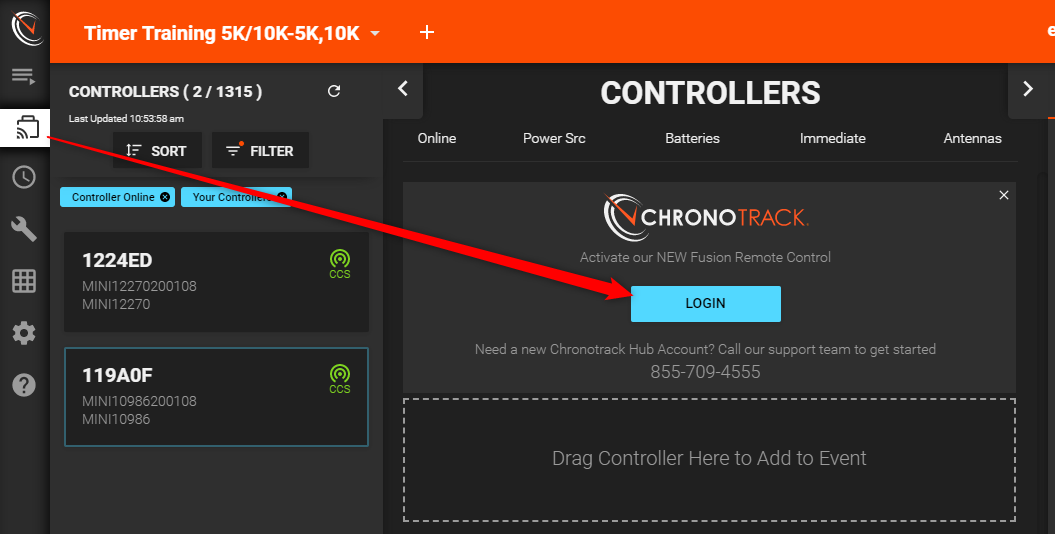
- Open Fusion, and click the Controllers tab, then click the LOGIN button.
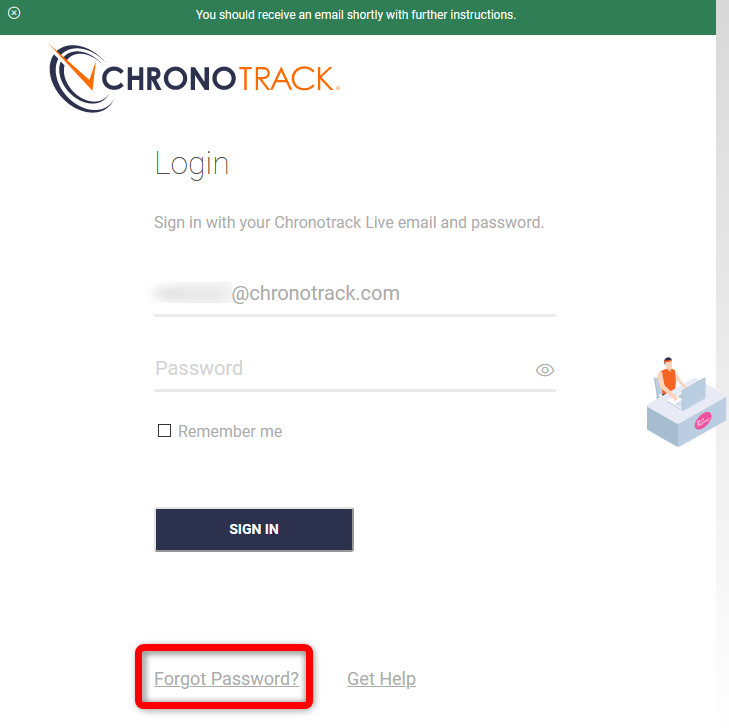
- If this is your first time logging into the Hub, use the Forgot Password link at the bottom of the page and enter the email address you use to log into the Timer Portal (secure.chronotrack.com). Once you get the reset email and complete the reset, you'll be logged in.
The reset process will NOT change your Timer Portal password. It simply sets your password for the Hub.
Authorizing Controllers on the Hub
Adding Controllers to the ChronoTrack Hub will allow you to view those controllers in the Remote display in Fusion. Controllers can only be associated to one user account at a time, so if you have multiple staff who need to use Remote View, it's a good idea to share a login. Controllers can be de-authorized and re-authorized on a different user account if necessary.
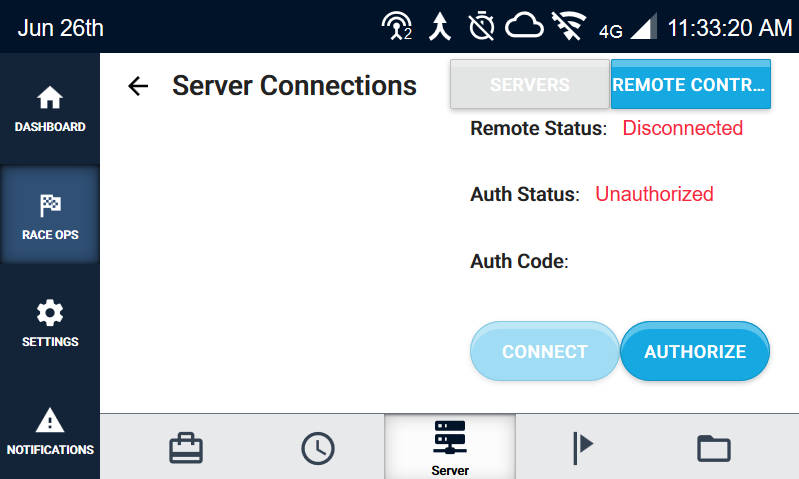
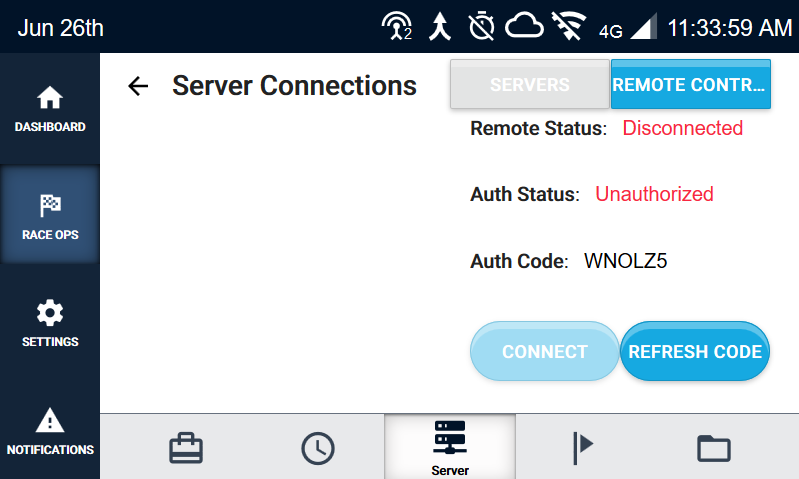
Get an Authorization Code (Pro2)
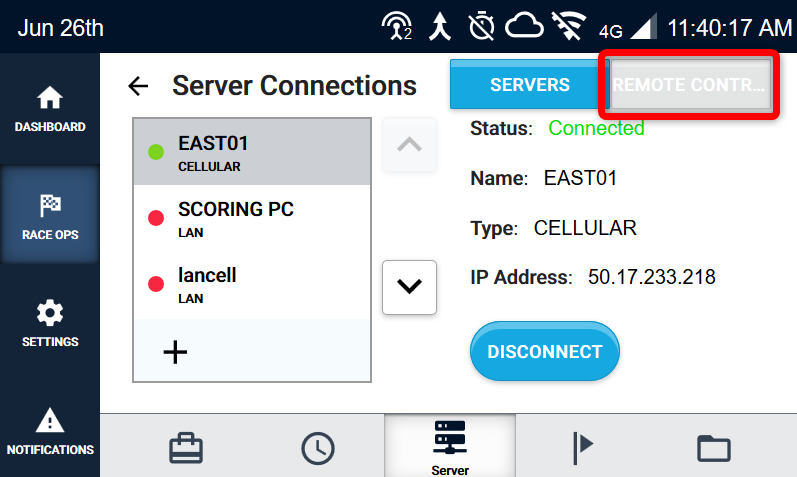
- Power on the controller(s) you want to add to Hub and connect them to the ChronoTrack Server (50.17.233.218). Once they're connected, tap the Remote Control button.
- Tap the Authorize button and wait for the the Auth Code to appear.
Get an Authorization Code (MiniTrack)
- Power on the controller(s) you want to add to Hub and connect them to the ChronoTrack Server (50.17.233.218). Once they're connected, go to Menu > 2 > 3 > 2 (Authorize)
- The screen should cycle from "Authorizing..." to "Connected" and then display a 6-character code after a few seconds.

Enter the Authorization Code on the Hub
- Once you've got your Authorization Code, go to https://hub.chronotrack.com/remotecontrol
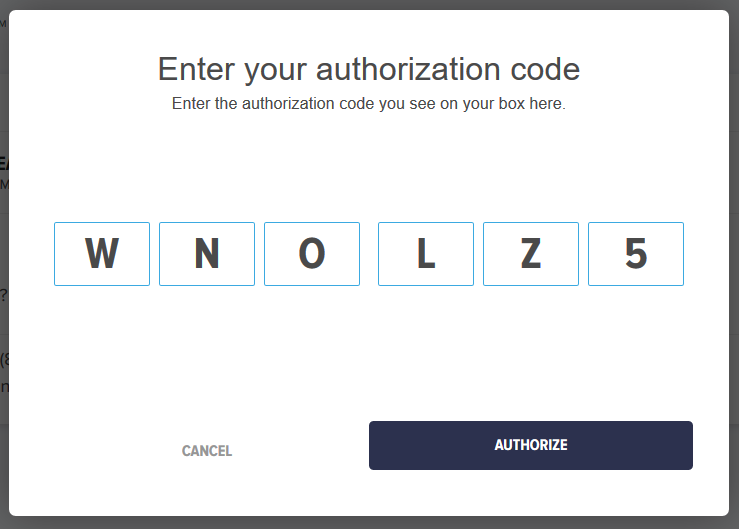
- Click the ADD CONTROLLER button, then enter the code from the Controller in the window that appears, and click AUTHORIZE.
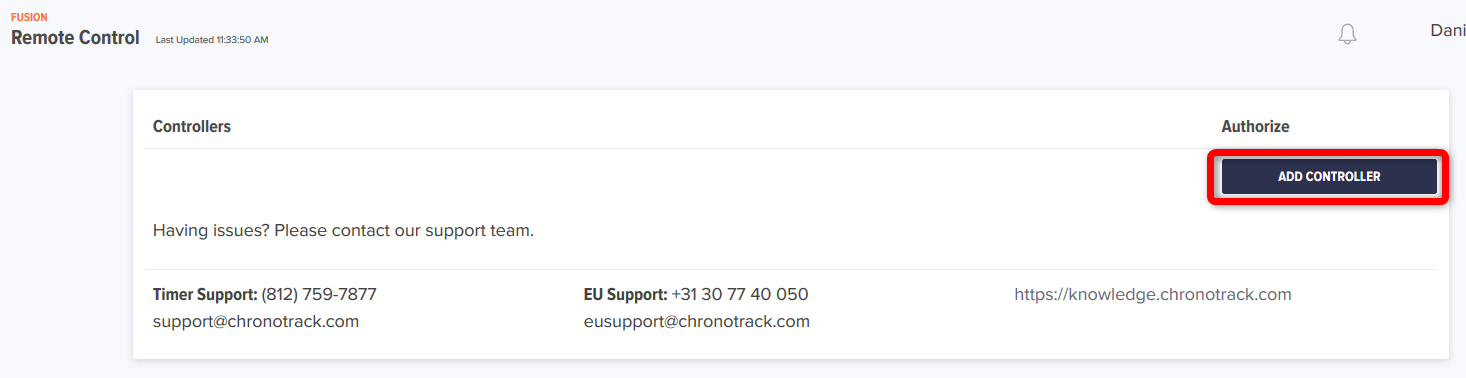
- Once the controller is authorized, it will appear on the Remote Control page of the Hub as shown here:

Your controller is now authorized on the ChronoTrack Remote server. Repeat the steps in the Authorizing Controllers on the Hub section for each controller you'd like to add to Remote View.
Using Remote Control
Back in Fusion, you can click and drag Controllers from the right panel into the center panel to begin using Remote Control. In the central panel, you can see the Power Source, Batteries, Immediate Mode status, and Reader/Port Status and Temperature. If an icon is green, that typically means the feature is on/active.
Please note that the Battery indicator shows the presence of batteries and which battery is currently in use, but not their charge level.

The right side panel's Properties tab shows the Event and Point names, reader power status, MAC address(es), power level(s), and Auxiliary status.
Any changes to features shown in Remote Control should be reflected in Fusion within no more than 5 seconds of the real-world change on the controller.

You can change the Event and Point names by clicking inside those fields, entering the new names, and clicking Apply at the bottom of the panel.

Clicking the circle next to the "Reader 1" or "Reader 2" labels allows you to turn the Readers off/on. You'll see a warning message alerting you that readers can take several minutes to start up. Click Apply to send the final command to the controller to turn the readers on/off. For international readers, you can adjust the Channel in the Reader panel as well.
You can also click on the "POWER" field to adjust the power level for each reader.
NEVER reduce the power on the passive RFID reader unless you know what you're doing. If you've never adjusted reader power before, please contact support for guidance.

The Auxiliary button under each Reader allows you to set parameters for A-Transactions on the controller. If you're not familiar with this feature, check out the articles linked below:
After clicking the Auxiliary button, a warning message will appear with some basic information about A-Transactions. Confirm the message and you'll be able to set the Count and RSSI values. Click Apply at the bottom of the panel to finalize the changes on the controller.

The Immediate button at the bottom of the Properties panel will toggle Immediate Mode on/off on the controller. Simply click the button, then click Apply.
Immediate Mode is normally used for Announcer functionality. Check out our articles on the various Announcer options we provide HERE.
If you've got an Active Extension connected to your controller, you can control the Loop and Channel numbers and the power level of the Extension.

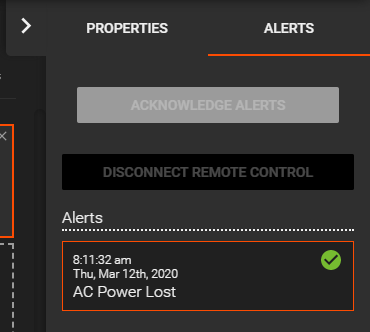
The Alerts tab in the panel on the right allows you to view and acknowledge any errors or alerts that happen on the controller. Acknowledging the alerts in Fusion remote control will silence the controller itself. All Acknowledged alerts will remain int he Alerts panel until you disconnect Remote Control.