The next generation Fusion middleware has been fully-released and is available for download from the Timer Portal. Fusion is the successor to Classic Data Suite, so we recommend using it instead.
Introduction
Setting accepted Tag Ranges is a useful tool for limiting the Tags that may be validated when processing data through SimpleClient. Tag Ranges can be set using Timer Code, Event Code, and Bib Ranges. This guide will give you a basic walkthrough of setting Tag Ranges for your event through SimpleClient.
Enable Tag Range Filtering
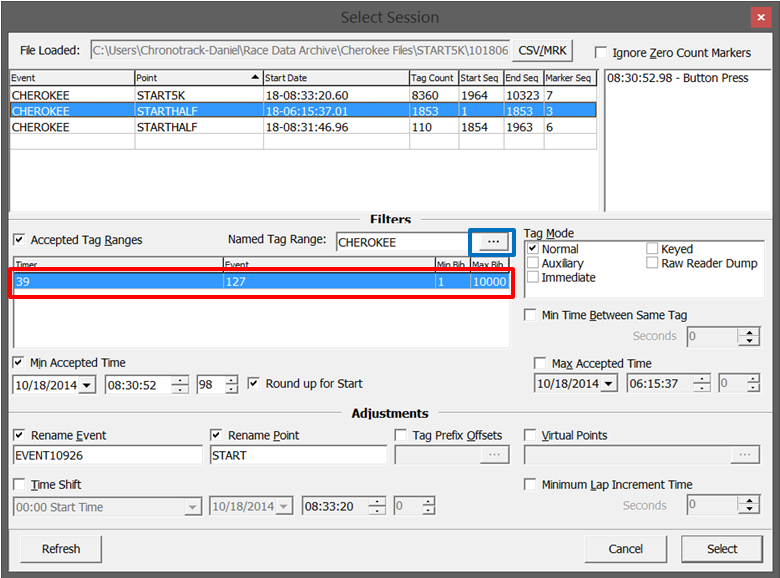
- In the Select Session window or SimpleClient, select the appropriate session and apply any Filters and Adjustments necessary.
- Check the Accepted Tag Ranges box found just below the Session pane. This will open the Select Tag Range window.

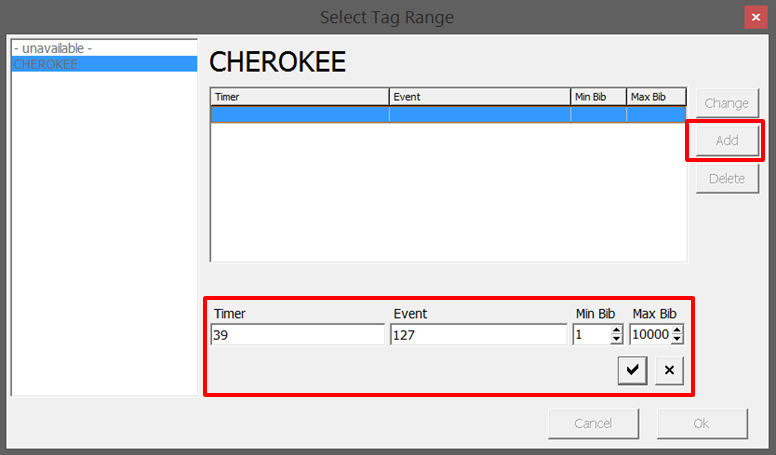
- Click Add.
- Timer, Event, Min Bib, and Max Bib fields will appear at the bottom of the window.

- Supply the Timer and Event codes to be used and enter numerical values into the Min and Max fields.
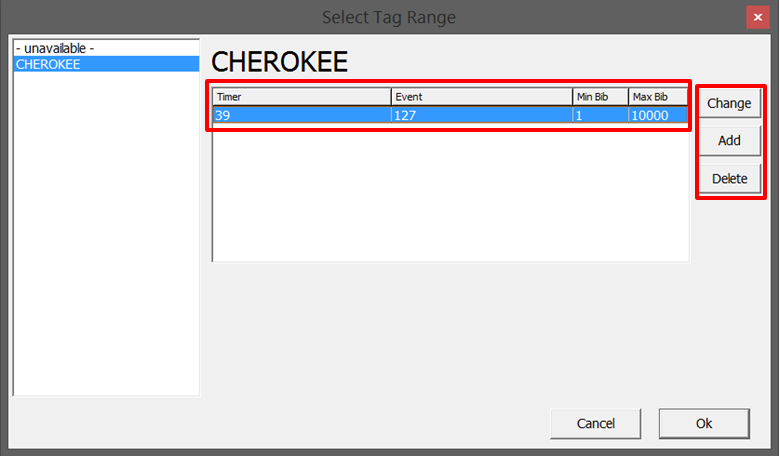
- Click the check mark. The range will appear in the pane above.

- You can Change, Add, or Delete a tag range at any time prior to clicking OK.
You can also add multiple accepted Tag Ranges to the same session. - Click Ok when you are finished. The Tag Range(s) will now appear in the pane under the Tag Ranges filter. You can re-enter the Select Tag Ranges window at any time before clicking Select by clicking the button next to the Named Tag Range field.

- You may now stream your data as usual.