Introduction
ChronoTrack equipment and software use time of day for tag reads, so you have to set and sync the time on your controllers before your event begins in order to collect accurate reads with your Controller.
To avoid disparity between individual controllers, we recommend you "daisy-chain" controllers together with ethernet cables before syncing times. When you sync the time on one controller, the time sync will automatically be passed to all networked controllers. This not only speeds up the process of syncing, but ensures that all controllers are on exactly the same time. Below is an example of "daisy-chained" controllers.
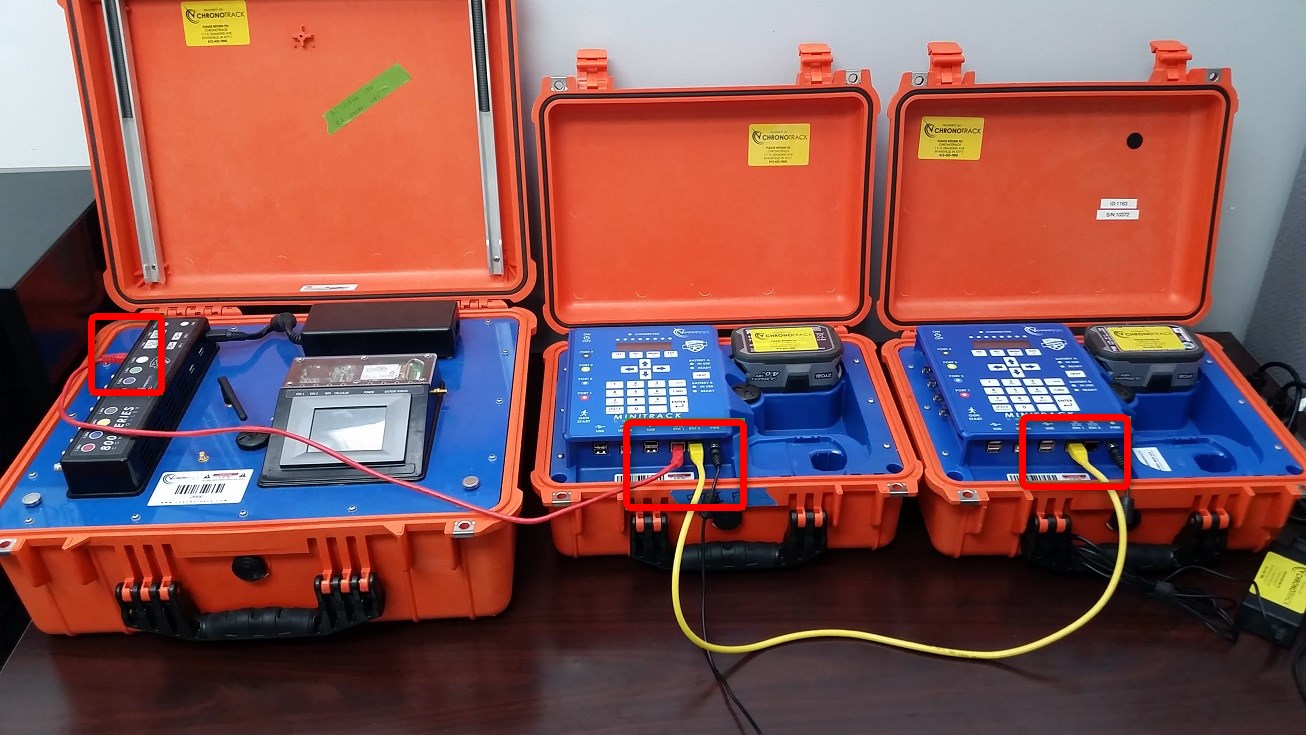
When controllers are powered off, their internal time is kept by what's called a CMOS battery. The CMOS clock is not hyper accurate, and controllers may experience 'drift' when powered off, even for only a few minutes. Because of this, we recommend that Controllers be synced on race day immediately prior to being distributed to their respective points on the course without turning them off.
There are several ways to sync the time on your Pro2 Controller.
Most laptops set their time automatically from the internet using NTP (Network Time Protocol). Because time pulled from the internet is very accurate, syncing your Controllers from your computer is the best way to ensure the time is set correctly.
To Sync Your Controller from your Computer with Fusion:
- Connect the controller to the computer with an ethernet cable.
- Open Fusion and click the clock icon to access the Time menu.

- Click SYNC ALL. The Controller's Marquee display and the top bar on the screen should both be flashing to indicate that the time was accepted. If you have multiple controllers linked together with cables, they should also indicate that their time was set.
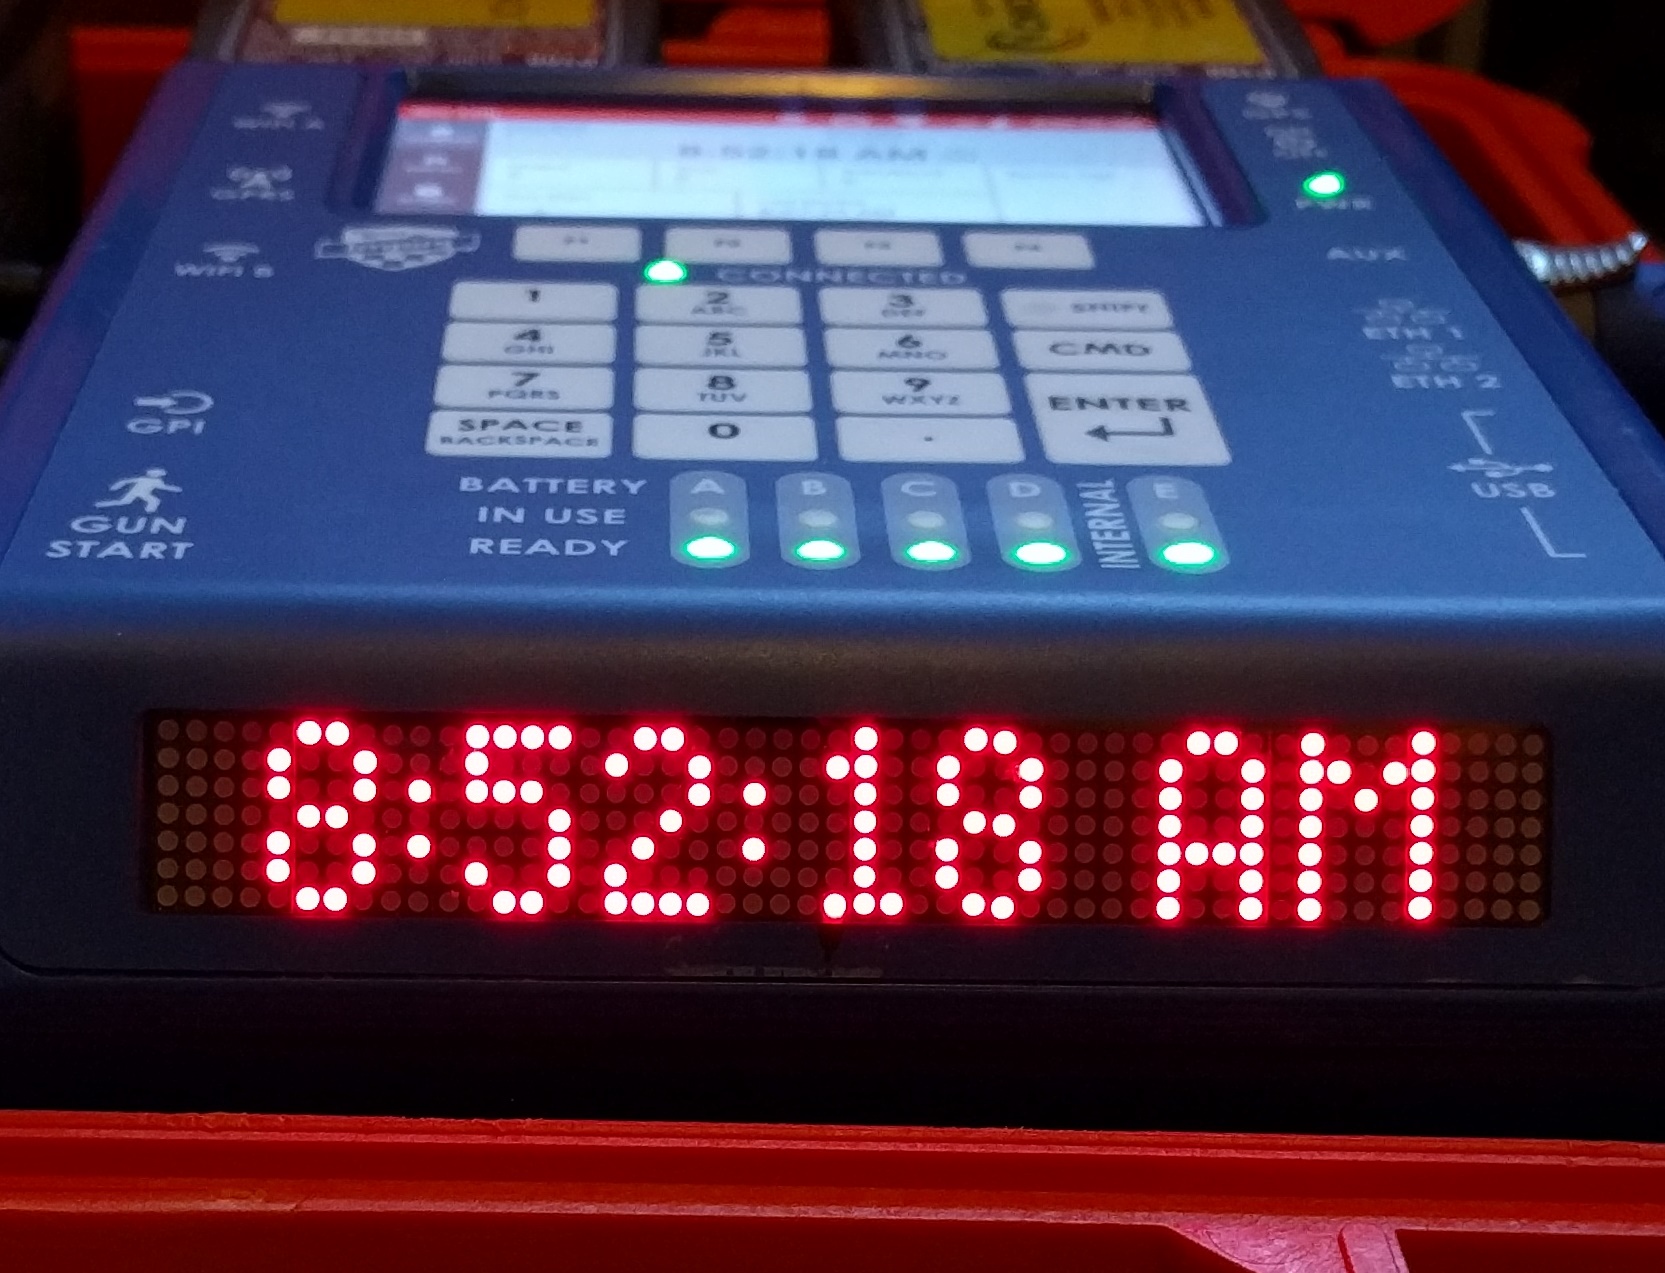
Visually verify that all controller times are completely in sync, then distribute them to their timing locations.
ChronoTrack has created a device with an ultra-accurate internal clock that keeps time to a tenth of a second for 3 days after syncing. Before using a ChronoSync, make sure you've synced it from ChronoSync Time Manager.

Please note that a ChronoSync is only compatible with ChronOS, BoxScore 3, and MiniTracks running firmware version 5.3.8 or higher.
- First, ensure that your ChronoSync has been synced through ChronoSync Time Manager.
- On the main screen of ChronOS, tap the clock display in the middle of the screen. This will take you to the Race Ops > Time menu.
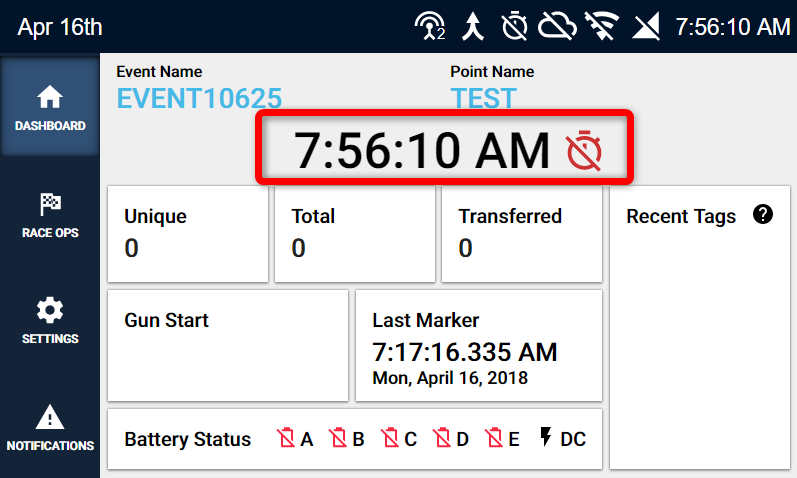
- Select ChronoSync.

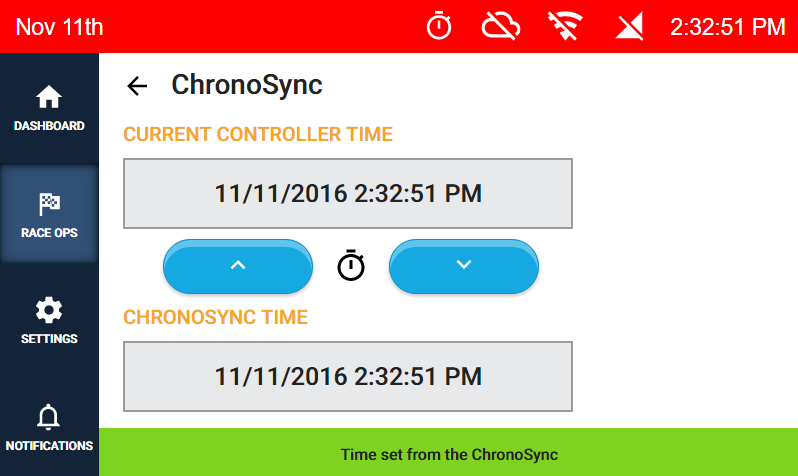
- Insert the ChronoSync into one of the controller's USB ports. After a few seconds, the ChronoSync Time should appear below the Current Controller Time, as shown here. If the ChronoSync hangs on "Initializing", remove the ChronoSync and re-insert it into a different USB port.
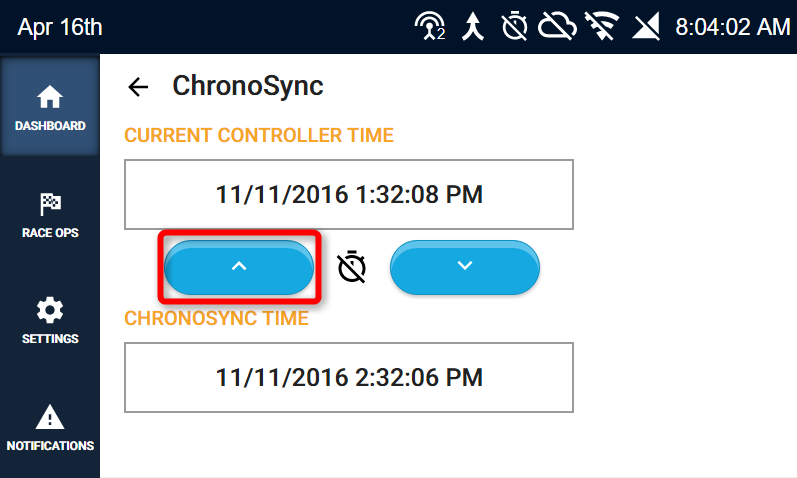
- Click the up arrow on the left to pass the time from the ChronoSync to the controller. A green message will confirm the time set, the status bar along the top of the screen will flash, the LED marquee will flash between red and green to indicate a successful sync. Verify that the ChronoSync Time and the Controller Time match, then remove the ChronoSync.
Visually verify that all controller times are completely in sync, then distribute them to their timing locations.
This feature currently only works via an ethernet or WiFi connection to an internet connected router.
NTP stands for Network Time Protocol. Syncing your controller via NTP allows the controller to use the internet as its source of truth for time. To use NTP sync, first connect the controller to the internet and establish a Server Connection. Now go to Race Ops > Time > NTP Time
To Sync from NTP:
Tap on the blue Offset text to set the offset for your time zone. Offsets are based on UTC. For example, CST has an offset of -05:00.
Now, tap the Auto Sync Time toggle. If your controller is connected to the internet, the time will immediately sync from the network. If the controller isn't connected, it will sync when a connection is acquired.

GPS Time Sync was added in ChronOS version 1.0.1.1. If your controller is running a version earlier than this, please update the controller. For instructions on updating ChronOS, click HERE. You must also have a GPS antenna. If you did not receive a GPS antenna with your Pro2, please contact esupport@chronotrack.com
Syncing your Pro2 from GPS is a convenient and accurate way to do a time sync, but it isn't always reliable depending on environment and location. For example, heavy cloud cover, tall buildings, or being under a roof or inside a building may prevent the controller from communicating with enough satellites to be accurate. Due to these possible restrictions, we recommend that you test GPS signal at each location where it will be used prior to race day.
To set the time on your controller with GPS:
- On the main screen of ChronOS, tap the time display. This will take you to the Race Ops > Time screen.

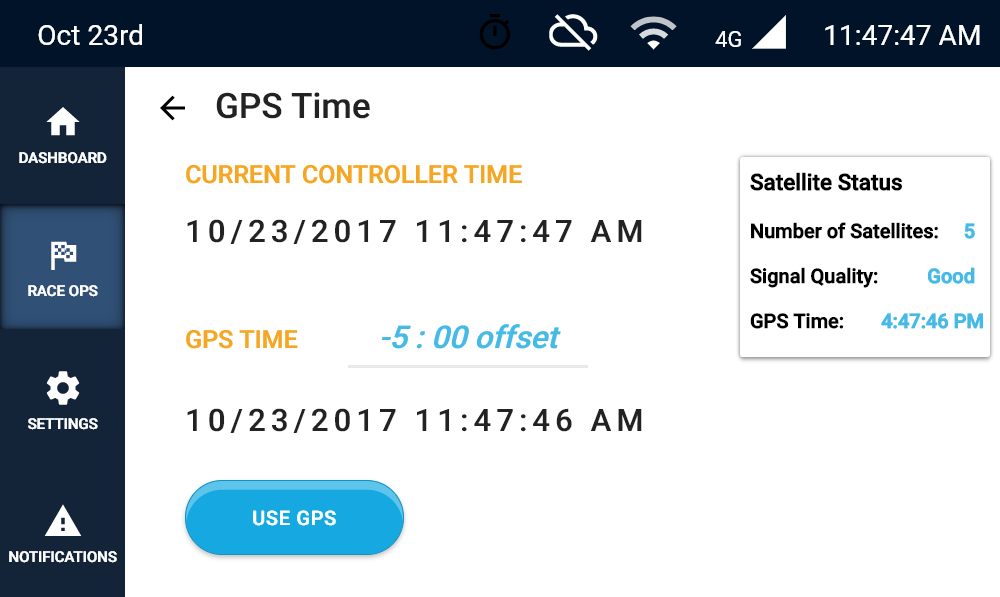
- Tap the Time Sync option, then select GPS. On the next screen, the controller should already be scanning for satellites. The controller requires at least 5 satellites to ensure accuracy, so depending on environmental conditions, locating the satellites may take anywhere from a few seconds to a few minutes, so please be patient. You can see the number of Satellites the controller has detected, the Signal Quality, and the current GPS time being sent from connected Satellites in the panel on the right side of the screen.
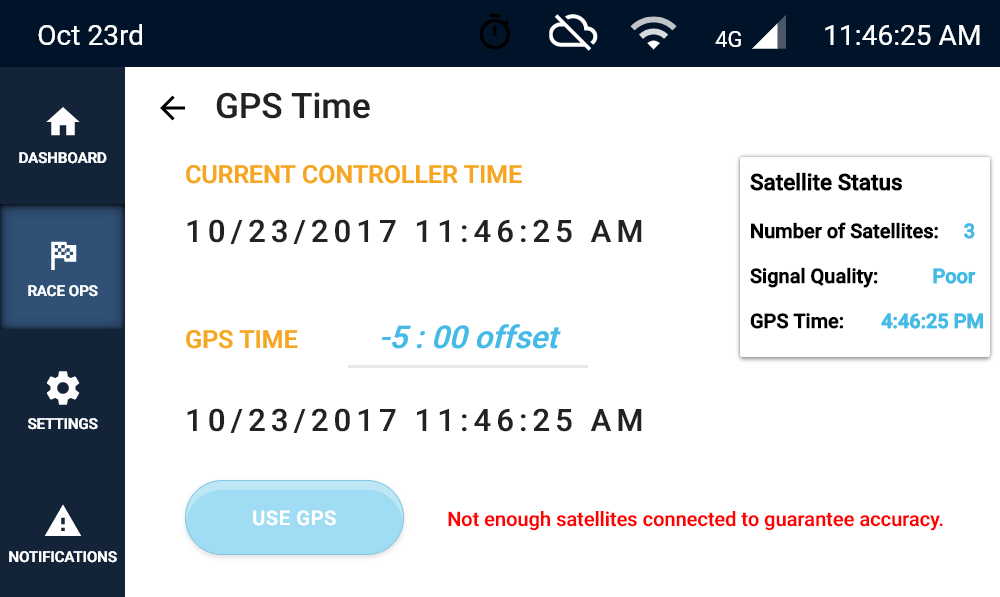
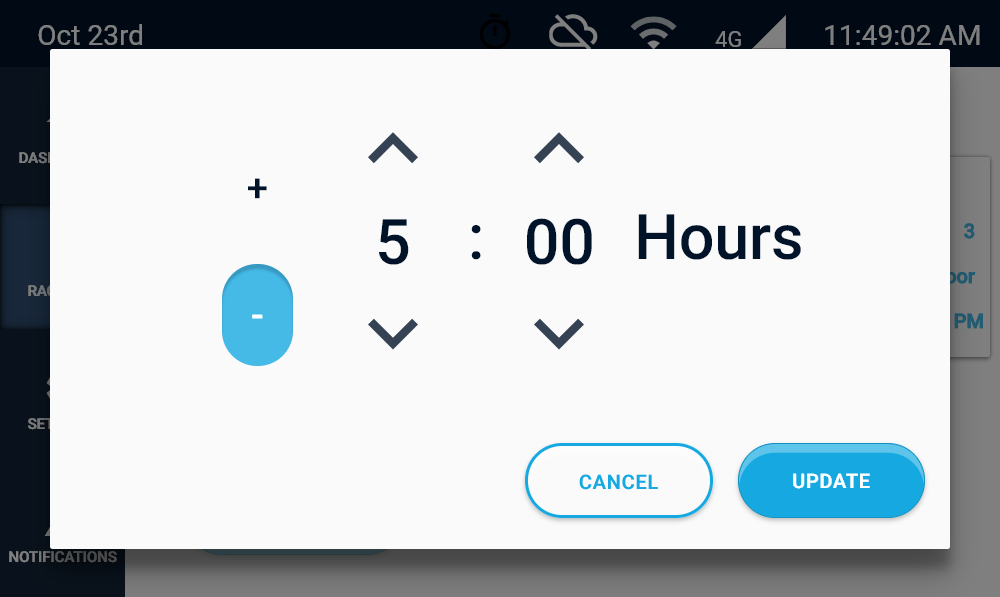
- While the controller is scanning for Satellites, you can set your GPS Time offset. Satellites provide time based on GMT (Greenwich Mean Time), so unless you are in a time zone that coincides with GMT, you will need to apply either a positive or negative offset. To do this, tap the text field next to the GPS TIME heading and use the + or - icons and the arrows above the hour and minute fields to adjust the offset to your time zone. Once you've selected the correct offset, tap Update.
The offset will be saved for future use, so if you are timing a race in a different time zone, be sure to adjust the offset accordingly.

- Once the controller has detected 5 or more satellites, the USE GPS button will turn a darker blue. When you press the button, the time on the controller will be synced to GPS time +/- the offset.
Visually verify that all controller times are completely in sync, then distribute them to their timing locations.
In the absence of a laptop, ChronoSync, or GPS signal from which to sync, you can perform a manual time sync on the controller. Manually syncing a controller isn't as accurate to the time of day, but the most important thing is that all controller times agree across all timing lines.
To Perform a Manual Time Sync
- On the main screen of ChronOS, tap the time display. This will take you to the Race Ops > Time screen.

- Tap the Manual Time option, then tap Config Time on the next screen.

- Use the arrows to adjust the Day, Month, and Year values to the correct date, then click Next.

- On the next screen, use the arrows to set the hour, minute, and second values. Select AM or PM as well, then click Update.

- Now, to finalize the manual time sync, press the Set Time button. The LED marquee should flash between red and green and the status bar along the top of the screen should flash red to indicate a successful sync.

Visually verify that all controller times are completely in sync, then distribute them to their timing locations.