When switching between D-Tags and B-Tags, the RZ600 can be a little finicky. This document provides a process for switching between the two tag types.
Please follow this process very carefully.
Procedure
- Power on the Printer.
- From the ChronoPrint program, click File > Settings, then click the Printer Setup tab. On the window that appears, verify that the printer IP address is properly set, READY should display to right of Ping Printer.

- Select the tag type you're switching TO as the tag type.
- Click the Reset Printer button, then click OK on the message that appears after a few seconds.

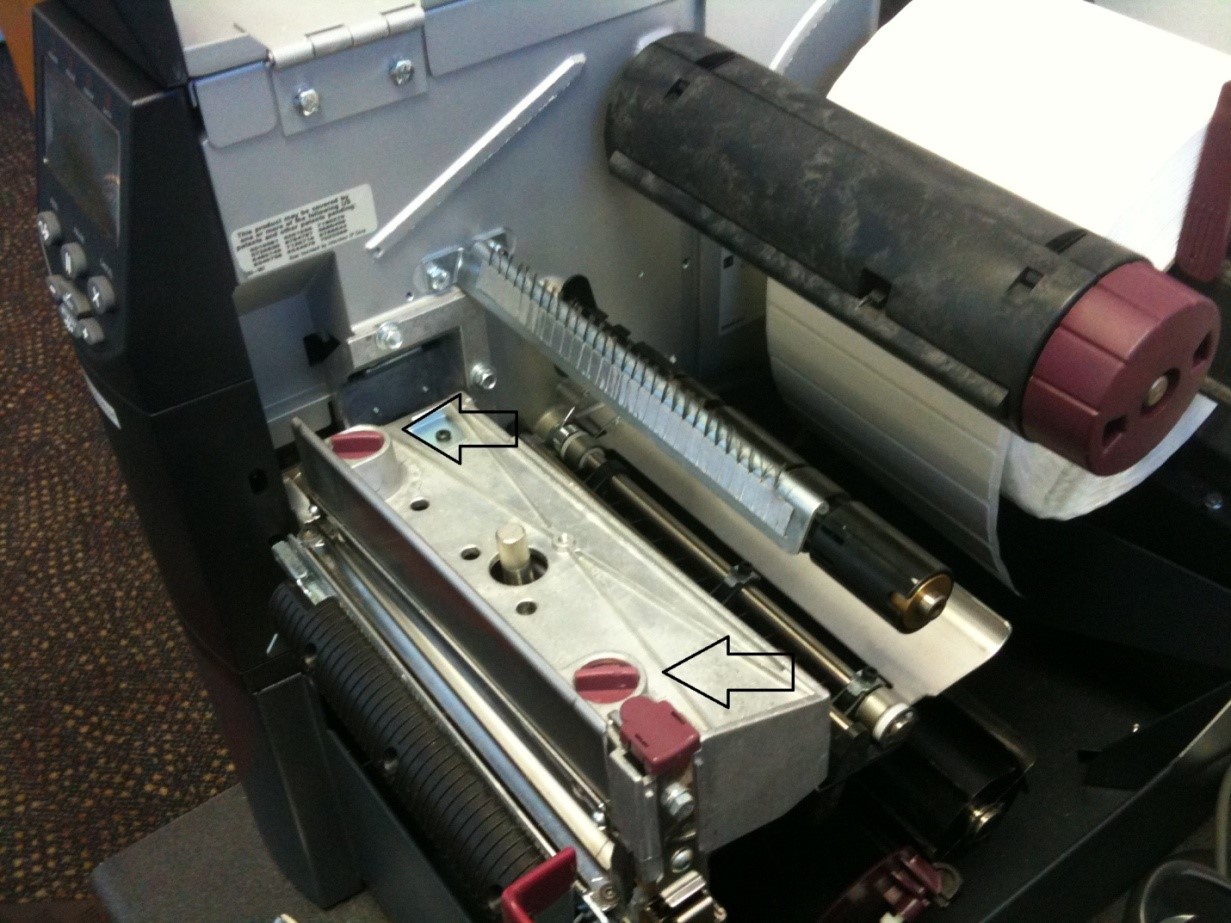
- Now power off the printer. B-Tags are thicker than D-Tags, so the print head may need to be loosened if you're switching to B-tags, or tightened if you're switching to D-tags. This is done using the printhead screws or "clickers" shown below (arrows point to clickers). WITH THE PRINT HEAD CLOSED, loosen each clicker one click counter-clockwise when switching to B-Tags or one click clockwise when switching to D-Tags. This may need to be adjusted once tags are actually printed.

- Load the new tag type onto the printer.
- Power on the printer and check the printer screen for any error messages. If you see any ERROR messages, you must perform a manual calibration. Click HERE to find out how. Please remember that you may need to do more than one manual calibration.
- Once there are no errors on the printer, go back to the File > Settings window and select the Printer Setup tab, and click the Send Setup button. The DATA light on the printer should flash and tags should advance. Click OK on any messages that appear in ChronoPrint.
- If there are still no errors on the printer screen, click the Save and Quit button and then print a SINGLE tag and verify no errors or voids.
Verify that each tag is encoded correctly by using an RFID block or a controller with an antenna connected. - If the test tag printed/encoded correctly, the setup should be correct and you can continue printing with the new tag type.