This document describes printer setup for the Monza 5 single B-Tag. The document also features screenshots from ChronoPrint 1.0.6. Below is an image comparing the dual B-Tag (Viper), with the Monza 5 single B-Tag. There are two differences between the tags: There is no blank spacer on the single B-Tag and there is a rectangular cut-out on the paper backing of the single B-Tag.
The only change required to the printer is the alignment of the lighted sensor with the cut-out on the single B-Tag roll. Once the sensor is properly aligned, the normal tag calibration process is used to complete the printer setup.
Setup Procedure
- From ChronoPrint, select File > Settings, click the Printer Setup tab, and select Single B-Tag as the Tag Type and click the Save button. Keep this window open, and click Reset Printer, then click OK at dialog box. DO NOT turn off the printer.
- On the printer console, press SETUP/EXIT twice, press the + key until LOAD DEFAULTS is displayed, and then press SETUP/EXIT.
- Open the printer cover and remove the ribbon (can be torn at the take-up spool then wound back onto the ribbon spool).
- Remove previous tags (dual B-Tags or D-Tags).
- Locate the lighted sensor shown below.
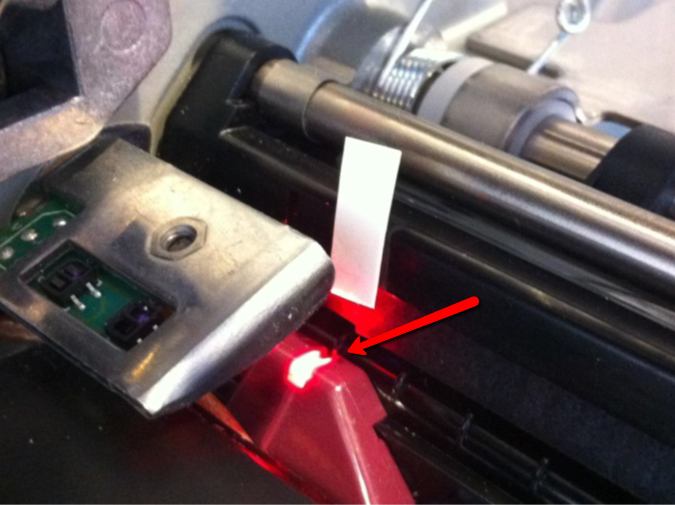
From below, the arrow points to the lighted sensor which can be moved along the black plastic track.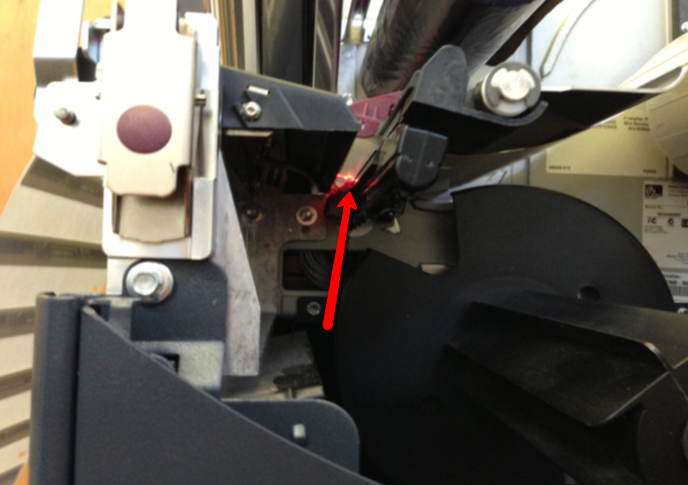
- Notice marks or stripes on the black plastic track. As a starting point, align the center mark on the sensor with or slightly to the right of the 2nd mark from the left (see below). The first mark is obscured by the ribbon sensor.
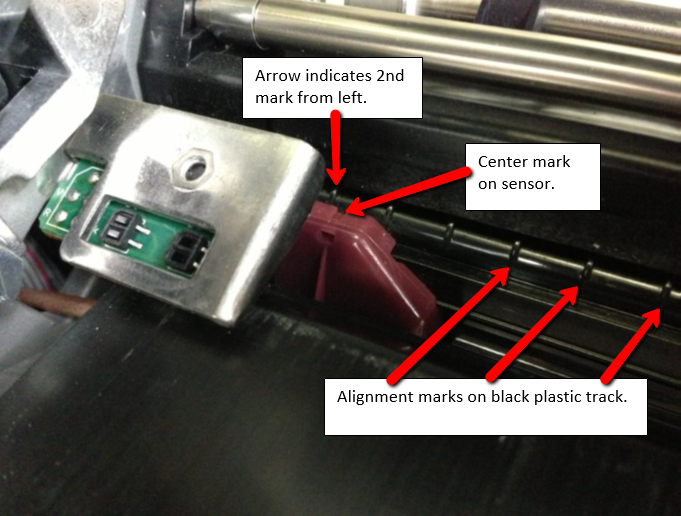
- Install roll of single B-Tags (same way as the dual B-Tags). Make sure to align the left edge of the tag roll with the right edge of the V mark, just as you would when installing dual B-Tags or D-Tags.
- Move the lighted sensor directly beneath one of the cut-outs in the tag backing. To determine if the sensor is in the correct position, stand directly over the sensor looking down.
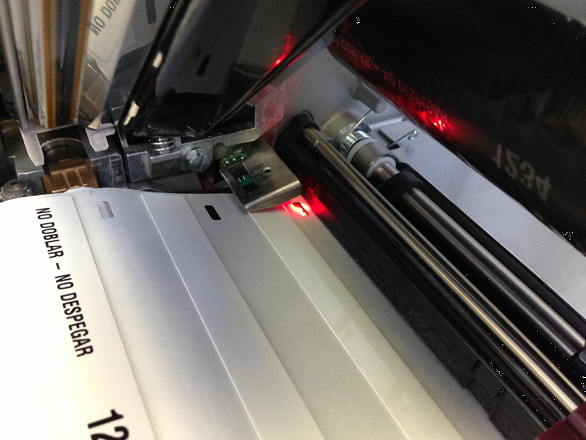
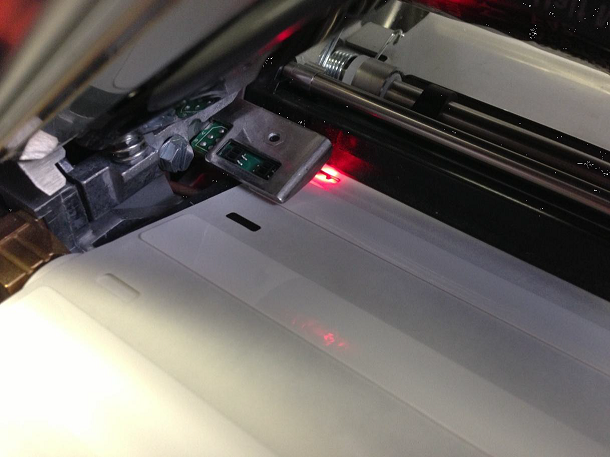
- Once the lighted sensor is correctly positioned, check the left edge of the tag roll (paper backing), and verify it is aligned with the right edge of the V mark.
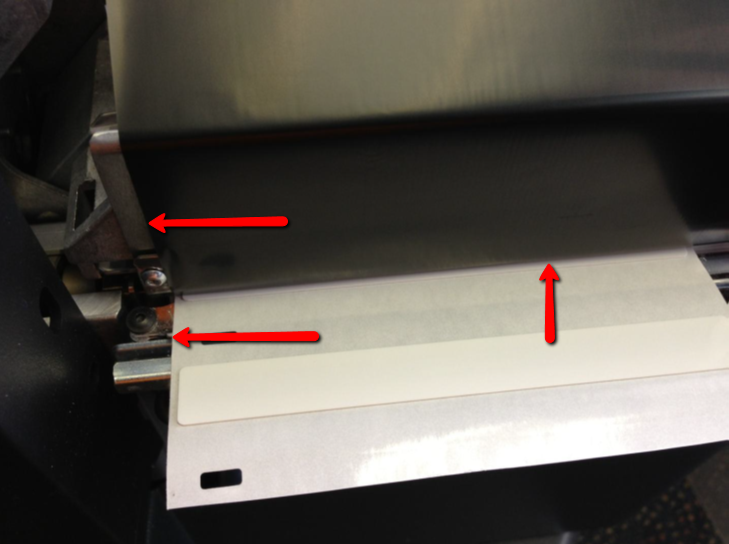
- Wind the ribbon onto its take-up spool as normal. Align the ribbon with the vertical bar stamped into the metal plate above the printhead.
- Line up a tag with the edge of printhead as shown below. Top arrow shows position of vertical bar used to align ribbon. Bottom arrow shows V-mark used to align left-edge of tags. Vertical arrow on right shows leading edge of tag aligned with printhead.
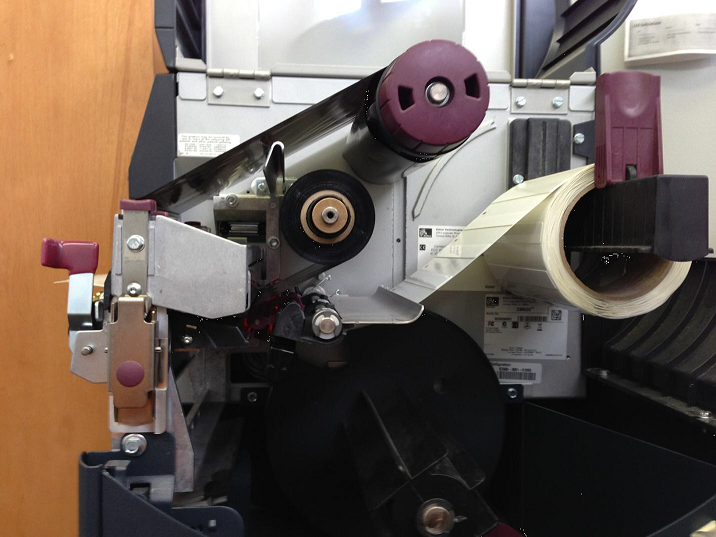
- The image below shows how tags and ribbon should be aligned.
- Power the printer off, wait 10 seconds, then power the printer back on. When boot up completes, check the printer console for one of the conditions below:
- If the printer displays PRINTER READY on console, skip to Step 14.
- If the printer displays ERROR CONDITION - PAPER OUT, you must perform a Manual Calibration.
- If the printer displays ERROR CONDITION - RIBBON OUT, check the alignment of the ribbon with the vertical bar (move the ribbon to the left). If the ribbon is aligned correctly, open the printhead and clear the ribbon path using canned air. Also check there are no tag parts stuck along the path of the ribbon. Turn the printer off and repeat if necessary until the error is cleared. - On your PC in ChronoPrint, select File > Settings and click the Printer Setup tab. Click the Send Setup button and more tags will feed out. Click OK if a message box appears.
Make sure Single B-Tag is selected as Tag Type. - Notice the alignment of the tag roll and printhead. For example, the top of a cut-out may line up with the printhead. Power off the printer and back-feed tags to save all the tags that were fed out. Line up the last tag or cut-out with the printhead. Power the printer back on.
- Once the printer powers on, PRINTER READY should be displayed on the console. If not, return to step #13 and repeat as needed.
- Print a single B-Tag and verify printing and RFID encoding are correct. If tags are VOIDED, power off the printer, wait 10 seconds, power the printer on, and repeat the process from step #14.
If more than 10 tags are VOIDED, please stop and contact ChronoTrack (Eric Lovins). - If a single tag prints/encodes correctly, put the printer into REWIND mode by clicking File > Settings, selecting the Printer Setup tab, and clicking Rewind as the Print Mode Setting. Then click Save Mode Setting and print a single tag again to confirm the setting.
Always put printer back into TEAR-OFF mode before powering off or changing tags/ribbon.