Introduction
This feature allows you to save time and effort on race day by automatically adding streams from controllers with a specified Event Name as soon as they come online while simultaneously applying tag range filters and Point name changes. If configured correctly, StreamManager can effectively be on auto-pilot once you connect controllers to the server.
Creating an Event
In order to take advantage of Autoconfig, you need to set up an Event in the Timer Portal. To do this:
- Log into the Portal and click the Events tab, then select Add/Edit My Events.

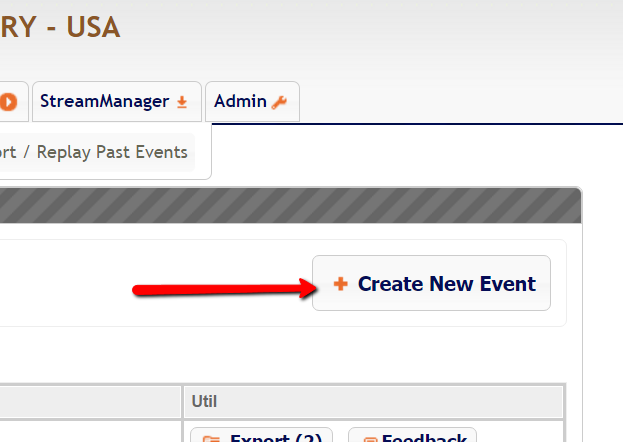
- In the next screen, click the + Create New Event button.
- A pane will appear similar to what's pictured below.
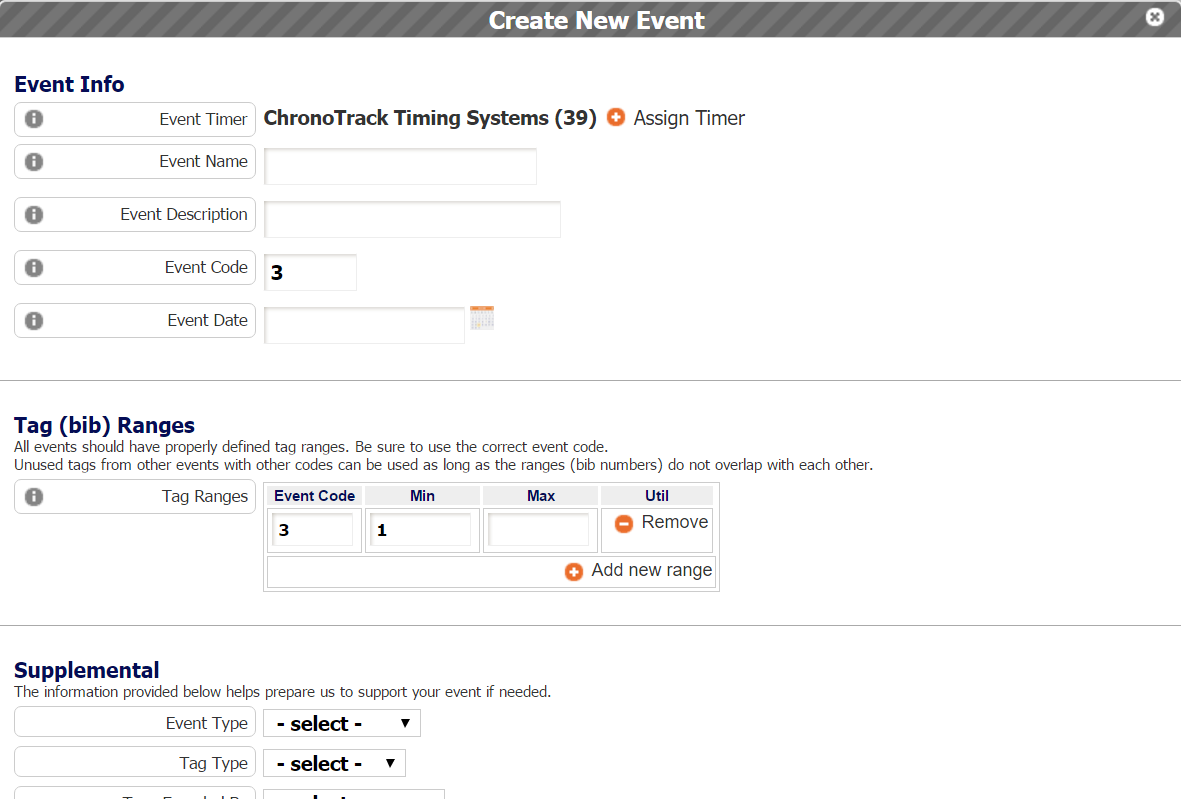
- The Event Timer will fill automatically. Supply a UNIQUE Event Name that's relevant to your event. This will be the Event Name you should set on your controllers.
It is VERY important that the Event Name be as unique as possible. If you're streaming to CT Live, this should be EVENTXXXXX where the Xs are your Event ID number. - Enter an Event Code that matches the event code being used in your Event.
- Enter the Event Date on which the Event will take place.
- Next, specify the Tag Range(s) to be used in the Event. When tag ranges are applied to Streams, all tag reads whose Event code doesn't match the ones specified will be filtered out of the timing data.
- If you'd like, you can supply the information under the Supplemental section, but it is not necessary.
- Likewise, you can fill in the information for each individual Point, but this is also not necessary for using Autoconfig.
Set Up Autoconfig
- Now that you've created an Event in the Portal, navigate to the StreamManager tab of the Timer Portal.

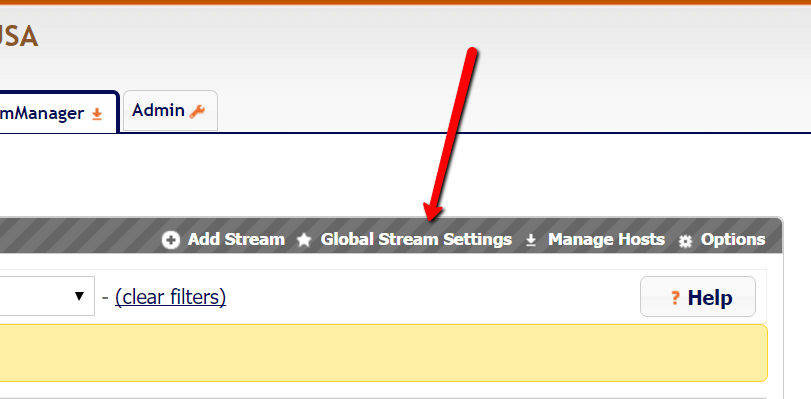
- Click the Global Stream Settings button near the upper right side of the StreamManager view.
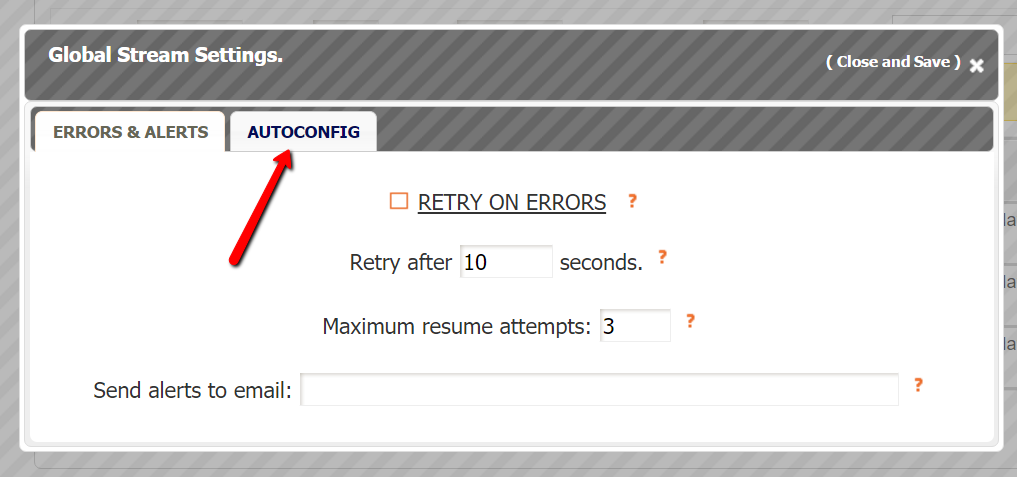
- Click the Autoconfig tab.
- The Autoconfig menu will allow you to automatically add Streams for each read type (Normal, Auxiliary, Immediate, or Keyed) and add a prefix to the Point name of each type (except Normal).
Example: I'm using a Pro with 4 Gators and a FlashPoint at my finish line, but I'm also typing in tag numbers using a USB keyboard as athletes cross the line. Since I want my Keyed reads to be 'backup' reads, I've made two Timing Devices in ChronoTrack Live - FIN for normal reads (priority 1) and AUXFIN (priority 2) for keyed reads. I can't assign two different Point names to my controller at once, so I'll set the Pro's Point name to FIN. In the Autoconfig window, I'll enter 'AUX' as the prefix for Keyed type reads. This way, Keyed reads will automatically stream to the AUXFIN device.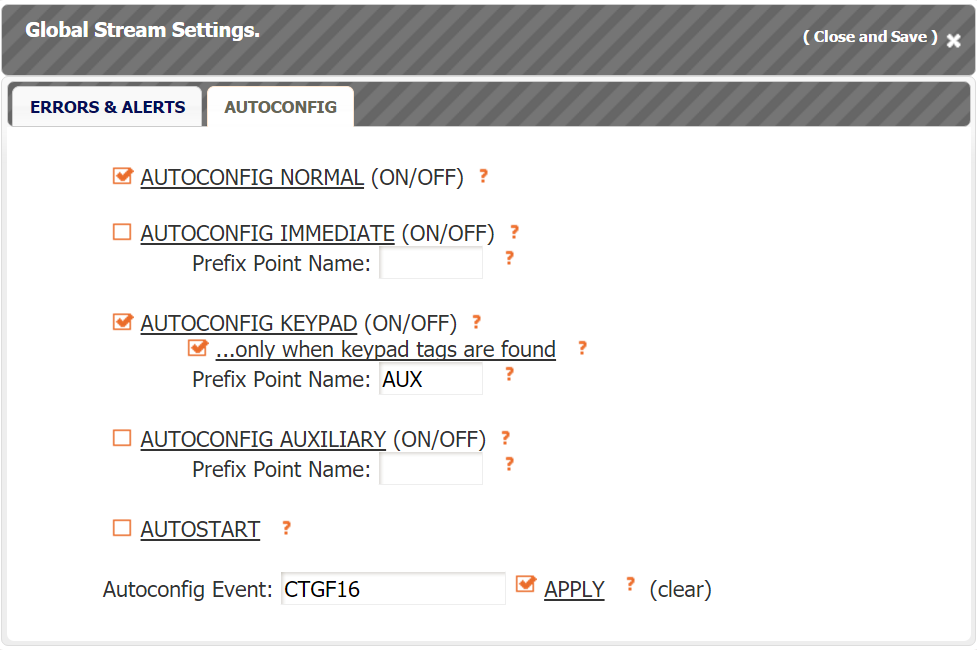
- Check any read types for which you would like to add Streams and enter any necessary Prefixes. You can also choose to only add Streams for a specified read type when reads of that type are streamed to the Server. If you do not check this option, each controller will automatically have a Stream for any selected read types (up to 4 streams per controller).
- If you would like Streams to Autostart check the autostart box.
- Finally, enter the Name of the Timer Portal event you created into the Autoconfig Event field.
- When you're finished with the settings, click the X at the top of the frame to save your changes.
Now, whenever you connect a Controller to the server with the specified Event Name, Streams for any selected read types will automatically be added, modified with prefixes, and streamed (if Autostart was selected)
Autoconfig Streams will be noted as AUTOCONFIG until you make changes to them.